Showing posts with label dessert - candy. Show all posts

Friday, December 16, 2011

Saltine Toffee Bark aka Christmas Crack


It's that time of year when baking is underway, and I want to bake all sorts of goodies to share. This weekend, my sister and I are actually doing our annual bake-a-thon. I will be preparing goodies to share, as well as baking for another cookie exchange.

I signed up for another recipe swap, and the theme this time was holiday goodies. What a better way to start the baking season by making this! These past few weeks have been extremely crazy, so I was scared that I wasn't going to finish this in time, but luckily, it takes almost no time to make!

I received this recipe from Nicole from Prevention RD. I saw "Christmas Crack" and loved the very idea of this recipe! I've never heard of using saltines as a crust or a base, and this intrigued me. Nicole got this recipe from her hair dresser, who I'm not sure is the original source. But, of course, like all "crack" recipes that have been floating around the interwebs forever, and who knows who originated this.

After googling, I saw a few variations. I was originally planning on making a swirl with half white chocolate, half semi-sweet, but I glad I stuck with just the semi-sweet. I would have had a hell of a time spreading both! I topped this with holiday colored sprinkles, but I would definitely try nuts, crushed peppermints, or whatever comes to mind!

I ended up bringing these to the office to share, and it was definitely like crack for them. Some couldn't stop at just one piece! Many people couldn't figure out what the crust was. They thought they were pretzels or graham crackers. It's hard to explain the taste, but if I had to I think it would be like the Take 5 candy bar, where all these different salty and sweet flavors meld and come together as one.

Remember to check out Sarah's blog to see all the other delicious treats from the swap!


Saltine Toffee Bark aka Christmas Crack
adapted from Prevention RD

ingredients:
1 sleeve of saltine crackers (4 oz)
3/4 cup unsalted butter (1 1/2 sticks)
1/2 cup packed brown sugar
1 tsp vanilla extract
1/2 tsp baking soda
12 oz. bag of semi-sweet chocolate chips (2 cups)
1 oz sprinkles
(optional toppings: crushed peppermint, nuts, toffee bits, caramels, whatever floats your boat!)

directions:
Preheat oven to 375° F.

Line a 15x10 jelly roll pan with foil and spray with nonstick spray.

Line the saltines in a single layer in the pan,with sides touching.

Meanwhile, cut up the butter into pieces. In a saucepan on medium heat, bring the butter and sugar to a boil, without mixing. Once boiling, remove from heat. Add vanilla extract and whisk in the baking soda. The mixture will become frothy. Pour the mixture over the saltines, covering as evenly as possible. Bake in oven for 8 minutes.

Remove from oven, and wait until the pan has stopped bubbling. Sprinkle the chocolate chips on top and bake in oven for another 2 minutes.

Remove pan from oven. Using a spatula, spread the melted chocolate chips evenly over the entire surface of the saltines. Add sprinkles or desired toppings.

Allow to cool and harden in fridge. Since it was a bit tough to cut directly from the fridge, I broke them into pieces by hand. I personally like the jagged look! :)

Makes a whole lot!


Pin It

Friday, December 24, 2010

Peanut Brittle

peanut_brittle

After making the peanut butter chip brittle last month, my family suggested making a regular peanut brittle. I found Martha Stewart’s recipe and decided to use this because it looked so easy.

I’ve always been a fan of sweet and salty things, so this was right up my alley. My sister didn’t like how the original recipe called for whole peanuts. She didn’t want to bite into whole pieces as the original recipe showed, so she chopped them up. I think it actually made it taste better that way if that’s even possible.

While I was working with the sugar in the pan, the liquid didn’t really turn golden to me. It was bubbling a lot, but pretty much remained clearish throughout the whole time, until the last minute. First it was bubbly and boiling. Then after about 7 or 8 minutes, it looked like all the water evaporated and it became dry, grainy sugar again. I thought it was weird, but I kept on whisking away, and it eventually melted again and became amber colored.

The brittle didn’t fill the entire pan as it did last time, but after it was broken up, it was still a good amount of brittle.

In the end, I also had a little bit of dried sugar stuck to my pot. If running it under hot water doesn’t get it off, I recommend boiling a pot of water to loosen it up. It came right off for me that way!

Peanut Brittle
adapted from: Martha Stewart

 printable recipe


ingredients:
Unsalted butter, softened, for baking sheet (use margarine or spray for dairy free)
2 cups sugar
1/2 cup water
Pinch of salt
1 1/2 cups salted peanuts, chopped (7 ounces)
Vegetable oil, for spatula

directions:
Butter a rimmed baking sheet; set aside. Measure out  1 1/2 cups peanuts and coarsely chop, set aside.

Stir together sugar, 1/2 cup water, and the salt in a medium saucepan. Cook over high heat, without stirring, until sugar begins to melt and turn golden, about 3 minutes. Continue to cook, stirring occasionally, until sugar has melted and mixture turns golden amber, about 10 minutes. Keep stirring, and it will continue to melt the sugar. It will turn into sugar lumps before it liquefies into an amber color.

Remove pan from heat. Stir in peanuts. Immediately pour peanut mixture onto buttered baking sheet. Quickly spread mixture to 1/2 inch thick using an oiled metal spatula. Let cool completely, about 15 minutes. Break brittle into pieces. Brittle can be stored in an airtight container, up to 2 weeks.

Makes about a half sheet pan of brittle.

Monday, December 6, 2010

Peanut Butter Chip Brittle

peanut butter chip brittle2

It’s that time of year again when I’m searching for treats to make and bring to work to share. Although I made this peanut butter chip brittle for Thanksgiving, I think it’s a great addition to your cookie or candy gifts this year.

I came upon this recipe because I had purchased 2 bags of peanut butter chips on a whim. I needed to use them up, so this was one of the recipes that caught my eye. It was fairly simple to make, although I may have gotten a little whisk burn on my hand from standing over the stove so long.

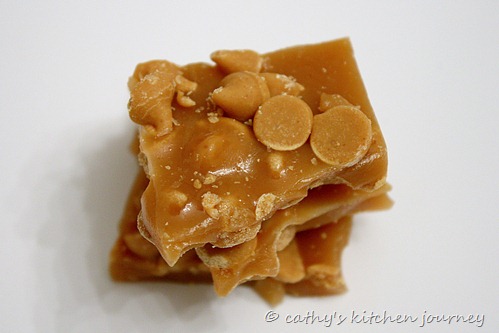
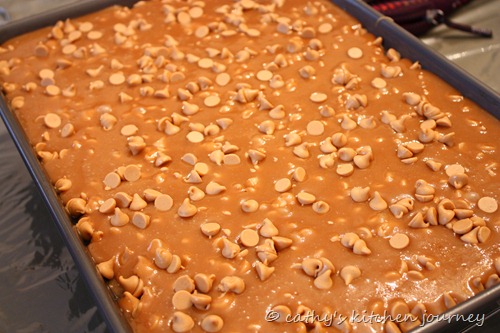
This came out beautifully, and it didn’t call for a lot of ingredients. Although some thought this was a bit sweet, well candy is sweet! It reminded my family of the filling in Almond Rocas, one of our favorite candies growing up. I brought a tin to work once, but I was surprised many people didn’t know what it was.

IMG_2115IMG_2121IMG_2124

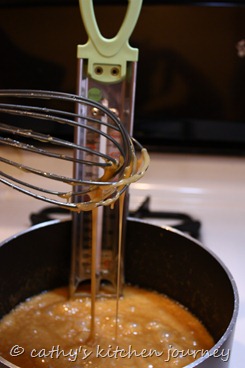
The recipe indicated that I would be stirring for about 30-35 minutes. The gauge on the thermometer seemed to rise pretty fast…until it hit 220°. After that, the temperature seemed to slow to a crawl, but it eventually got there. At 260° the mixture started to look like sweetened condensed milk. At about 280°, it started to look like dulce de leche. It was a nice and brown, and bubbly when it finally hit 300°!

Since my family liked it so much, I’m planning on making a batch of peanut brittle over the holidays.

IMG_2126

Peanut Butter Chip Brittle
source: Hershey’s

 printable recipe


ingredients:
1 2/3 cups (10-oz. package) REESE'S Peanut Butter Chips, divided
1 1/2 cups (3 sticks) butter or margarine
1 3/4 cups sugar
3 tablespoons light corn syrup
3 tablespoons water

directions:
Butter 15-1/2x10-1/2x1-inch (preferably nonstick) jelly roll pan. Sprinkle 1 cup peanut butter chips evenly onto bottom of prepared pan; set aside.

Melt butter in heavy 2-1/2-quart saucepan; stir in sugar, corn syrup and water. Cook over medium heat, stirring constantly until mixture reaches 300°F. on candy thermometer until thick, brown and bubbly, can range from 30-50 minutes. (Bulb of thermometer should not rest on bottom of saucepan.)

Remove from heat. Immediately pour mixture evenly into prepared pan; sprinkle with remaining 2/3 cup peanut butter chips. Cool completely. Remove from pan. Break into pieces. Store in tightly covered container in cool, dry place.

Makes about 2 pounds brittle.

Wednesday, September 22, 2010

Chocolate Covered Cornflakes

chocolate covered cornflakes
Cornflakes, they’re not just for breakfast anymore!

Steps from where I work, there’s a store called Jacques Torres. They sell all kinds of confectionaries and chocolates. Their kitchen faces the street, and you can stand there and marvel at what they’re making. When you walk in, all things chocolate exists…(although I went in once with Erin, and they didn’t know what dutch process cocoa was. They tried to sell me hot cocoa mix instead).

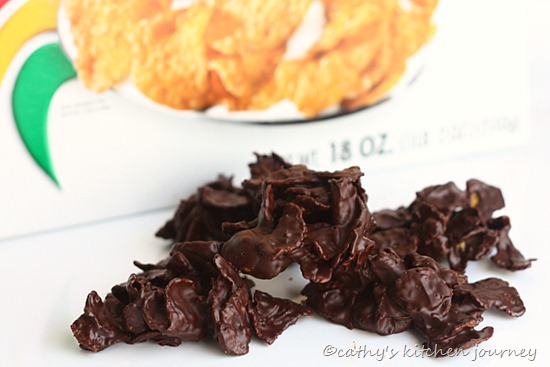
One of the delectable treats they make and sell are these chocolate covered cornflakes. These little crunchy flakes are amongst one of the favorite picks from the folks in the office.

I don’t recall how the conversation started, but my coworker or I said something about it. I told her I could make that…whenever I get around to it…! I then searched for the recipe, although I could have easily winged it. Surprisingly, Jacques actually had how to videos and recipes online in various locations. The video made it seem so simple, so I told everybody I was making it that weekend.

Before I looked at the recipe, I had the idea to use the dark chocolate I had on hand, our favorite baking and eating dark chocolate from Trader Joes: the pound plus. Although the recipe used bittersweet, I went with my gut and used the dark chocolate. When I poured out the corn flakes, they seemed really large. I almost went ahead with crushing the flakes slightly, but stopped myself. I’m glad I went with my gut in both instances, because people thought I could give Jacques a run for his money! The dark chocolate went well with the larger crunchy flakes.

chocolate covered cornflakes 2

Chocolate Covered Cornflakes
inspired by: Jacques Torres

 printable recipe

ingredients:
1 lb  dark chocolate
4 cups corn flakes

directions:
Chop up chocolate into small even pieces. Place in a large dry glass or metal bowl.

In a medium pot, bring about an inch of water to a boil. Reduce heat to low to simmer. Place bowl over the simmering water. Make sure the bottom of the bowl does not touch the water.

Continue to stir the chocolate until melted. Remove from heat. Set aside to allow to cool slightly.

Line 2 cookies sheets with parchment paper, or silicone mats.

Pour corn flakes into the bowl of melted chocolate. Using a spatula, fold in the cornflakes and mix well to evenly coat. It’s ok if the flakes break slightly.

Using a tablespoon, scoop about half a spoon (or more if you want them bigger). Using another tablespoon, transfer the mound from the spoon to the parchment.

Transfer baking sheet to refrigerator and let set for 10-15 minutes.

Store at room temperature ok, but if your house is on the warm side, I suggest storing in a covered container in the fridge.

Makes a few dozen, depending on how big you make them.

Wednesday, September 23, 2009

Pumpkin Pie Pecan Candy

I guess it’s inevitable that pumpkin season and fall foods eventually appear even though I’m not ready to give up summer foods yet. Don’t get me wrong, I love the fall! It’s my favorite time of year. I just feel like I was gypped of a summer this year because it felt so short!

One of my favorite fall foods is pumpkin. I’ve only really made pumpkin pie, but my mom makes this awesome pumpkin dish that is made with black bean garlic sauce and cane sugar. I don’t think I’ve ever attempted to recreate it yet, but if I did, it still wouldn’t taste like hers.

I’ve heard talk about a pumpkin shortage this year. I saw plenty of pumpkins at my supermarket, but I’ve never seen canned pumpkin there. I guess I’ve never looked. I did find canned pumpkin at Target last year (although after pumpkin season), so I had a can in the pantry available to use.

I saw this recipe for pumpkin pecan candies that looked pretty interesting. The recipe called for 2 cups sugar, it did seem like a lot to me, but I left it as is. As I suspected, it was pretty sweet. It also called for 3 cups chopped pecans, but pecans are expensive! I first started out with 1 1/2 cup chopped pecans and would add more as needed, but it was the perfect amount. I’ve also never seen unsweetened coconut in my supermarket. I bought mine at the Chinese supermarket. I originally bought it 2 weeks ago without a recipe in mind, so I’m glad I came across this recipe.

I also think this looks like a truffle and has the truffle consistency. However it can’t really be called a truffle because it doesn’t contain any chocolate. Now, if I coated it in chocolate, then that would be a different story.

pumpkin pecan candy

Pumpkin Pie Pecan Candy
adapted from: The Ultimate Candy Book
printable recipe

ingredients:
1 (15oz) can pure pumpkin
2 cups white sugar
2 cups unsweetened coconut
1 tsp ground cinnamon
1/4 tsp ground nutmeg
1/8 tsp ground cloves
1/2 tsp vanilla extract
1 1/2 cups chopped pecans

directions:
In a medium saucepan, combine the pumpkin, sugar, coconut, cinnamon, nutmeg, and cloves. On medium heat, cook and mix together and allow sugar to dissolve. Continue cooking and stirring until mixture forms into a ball, about 15-20 minutes. Have patience, it will eventually turn into a ball once the liquid evaporates.

Remove mixture from heat and add in vanilla. Transfer to a heat safe bowl and cover mixture with plastic wrap so a skin does not form. Chill in refrigerator until cool.

Using a cookie scoop that is about a TBSP size, scoop up balls and roll in the palm of your hands. Roll balls  in the chopped pecan, coating all sides. Put back in fridge to let set.

Store in airtight container up to a week.

Makes about 30 candies.

pumpkin pecan candy