Showing posts with label dessert - frosting. Show all posts

Tuesday, November 1, 2011

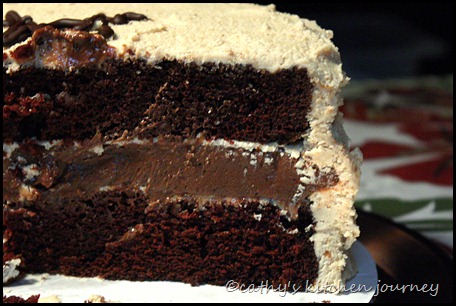
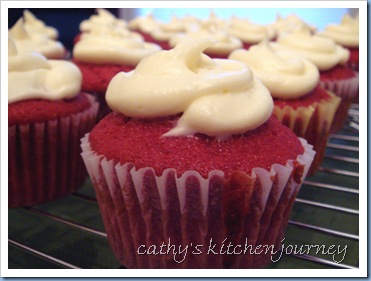
Vegan Chocolate Mocha Cupcakes


Did you know today is World Vegan Day? I didn't but it's just a happy coincidence that I'm posting this today! Today marks the start of a month long vegan celebration. I guess I celebrated early, since this past month has been primarily vegan recipes!

As I mentioned, I made 2 different cupcakes for our birthday get together. The other one I made was this chocolate mocha cupcake also from Vegan Cupcakes Take Over the World. I was set to make a chocolate cupcake, but the notes in the book also had instructions on turning the chocolate cupcake into a mocha one.

I think these turned out pretty good, as a chocolate cupcake. I didn't taste too much coffee in the cupcake, and only slightly in the frosting, even though there was coffee in both the cupcake batter and the frosting. I missed the part where it said to dust with cinnamon or nutmeg, so I think that would have made a difference as well. I also made the mistake of putting too much vanilla in the frosting while halving rest of the ingredients. It didn't taste off, but the extra liquid made the frosting a bit too thin while piping.


Vegan Chocolate Mocha Cupcakes
adapted from Vegan Cupcakes Take Over the World

ingredients:
cake
1 cup unsweetened soy milk
1 tsp apple cider vinegar
1 cup all-purpose flour
1/3 cup cocoa powder
3/4 tsp baking soda
1/2 tsp baking powder
1/4 tsp kosher salt
3/4 cup granulated sugar
1/3 cup canola oil
1 1/2 tsp vanilla extract
2 TBSP cold strong brewed coffee

frosting (half the original recipe)
1/4 cup non hydrogenated shortening
1/4 cup vegan butter (rec: Earth Balance)
1 3/4 cup powdered sugar
1 tsp vanilla extract
2 TBSP cold strong brewed coffee
cinnamon or nutmeg for dusting

directions:
make the cake:
Preheat oven to 350° F. Line a muffin pan with cupcake liners.

Whisk the milk and vinegar in a measuring cup and set aside for a few minutes to curdle.

Sift the flour, cocoa powder, baking powder, baking soda, and salt into a large bowl and mix to combine.

Beat together the milk mixture, oil, sugar, vanilla extract and coffee in a large bowl. Sift in the dry ingredients and mix until no large lumps remain. (batter will be thin)

Fill cupcake liners two-thirds of the way and bake for 18 to 20 minutes. Transfer to a cooling rack to cool.

prepare the frosting:
In a stand mixer, beat together the shortening and butter until light. Add sugar a little at a time and beat for 3 minutes until no lumps remain, scraping down the sides as necessary.

Add vanilla and coffee and beat for another 5-7 minutes until light and fluffy.

Scoop frosting into a piping bag or heavy duty zip top bag and pipe from the outside in. Dust tops lightly with ground cinnamon or nutmeg.

Makes 12 cupcakes


Pin It

Wednesday, August 24, 2011

Chocolate Zucchini Cake with Chocolate Buttercream

You would never have known that this innocent looking chocolate cake would be chock full of vegetables!


For my mom's birthday, I decided to make this chocolate zucchini cake. I purchased some zucchini because I had plans on making chocolate chip cookies with them. I didn't make them yet, but since I was going to need to use them up, I made this cake. I figured if carrot cake is one of my faves, why not zucchini!

This cake came out beautifully and nobody knew there were hidden vegetables inside! My little cousins ate up big slices and gobbled it up just like any old chocolate cake! However, I'm not saying this is a healthy cake, since it does have a lot of oil in it! I originally intended to use some applesauce in place of some oil, but I noticed it was already expired, (whoops). I also don't know what the nutritional value of the zucchini ends up being after it's baked into a cake.

Even after I mixed in the eggs and oil, I thought the batter looked a little stiff, almost cookie batter-like. However after I folded in the zucchini, it was fine and easily pour-able. I used my food processor to grate the zucchini, and I did not squeeze out any liquid.

I did change this from a bundt cake recipe to a layer cake one. I omitted the nuts since I didn't have any on hand. For the frosting, I reduced the amount of sugar by 1/4 cup from the original recipe.


*note: this is tagged as dairy free, as the cake itself is dairy free. For a dairy free/vegan chocolate frosting option, see this cupcake recipe.


Chocolate Zucchini Cake
cake adapted from allrecipes.com
frosting adapted from More from Magnolia

ingredients:
2 cups all-purpose flour
2 cups white sugar
3/4 cup unsweetened cocoa powder
2 teaspoons baking soda
1 teaspoon baking powder
1/2 teaspoon kosher salt
1 teaspoon ground cinnamon
4 large eggs
1 1/2 cups vegetable oil (or replace some with applesauce)
3 cups grated zucchini (about 2 medium)

9 oz semisweet chocolate, melted and cooled to lukewarm
3 sticks (1.5 cups) unsalted butter, softened
2 TBSP milk
1 tsp vanilla extract
2 cups powdered sugar, sifted

directions: 
bake the cake: 
Preheat oven to 350° F (175° C). Grease and flour two 8 or 9 inch round cake pans.

In a medium bowl, stir together the flour, sugar, cocoa, baking soda, baking powder, salt and cinnamon. Add the eggs and oil, mix well. Fold in zucchini until it is evenly distributed. Pour into the prepared pans.

Bake for 30 minutes in the preheated oven, until a toothpick inserted into the center comes out clean. Transfer to wire racks and cool cake completely before frosting.

prepare frosting: 
In a medium saucepan bring an inch of water to a boil. Reduce heat to low to simmer. Place chocolate in a glass or heat proof bowl over the simmering water and mix to melt the chocolate. Once all the chocolate is melted, remove from heat, set aside and let cool to room temperature, 5-15 minutes.

Meanwhile, on medium speed beat butter in an electric mixer for 3 minutes until smooth and creamy.

Slowly pour in milk and continue to beat for 2 minutes. Add vanilla and beat for 3 more minutes. Add in powdered sugar in small increments and beat at low speed until it reaches the desired consistency.

Frost cake as desired.

Monday, May 16, 2011

Vanilla Bean Cake with Lemon Lime Curd & Swiss Meringue

cake

This cake was a slight adaptation of one that I previously made. My sister requested a lemon and vanilla cake like the one I’ve made previously for her daughter’s birthday. I decided to use the same recipe but adapted it slightly.

From what I recall, the first one I made had thick layers of cake. I wanted to fill the layers in between with some more curd, so I made a lemon layer and a lime layer. You can’t really tell, but they are two different flavors. I also took into consideration my family’s tastes since they don’t like sweets. I decided to make a Swiss meringue buttercream to use up the extra egg whites from the extra layer of curd. It was a perfect complement to the cake!

Although the curds tasted different when I was making them, they sort of meshed together in the end and tasted the same. None-the-less, the cake was a nice an refreshing spring cake.

Vanilla Bean Cake with Lemon and Lime Curd Filling and Swiss Meringue Frosting
cake and frosting adapted from: Martha Stewart’s Cupcakes
curd fillings from: Williams Sonoma

ingredients:

cake: lemon curd: frosting
3 1/4 cups sifted cake flour 5 egg yolks 5 egg whites
1 1/2 TBSP baking powder 1/2 cup sugar 1 cup plus 2 TBSP granulated sugar
1/4 tsp. salt 1/4 cup fresh lemon juice pinch of salt
1 TBSP vanilla extract or 1 vanilla bean Grated zest of 2 lemons 1 pound butter (4 sticks)
1 cup plus 2 TBSP milk 6 TBSP (3/4 stick) unsalted butter 1 1/2 tsp. vanilla extract
1 3/4 sticks unsalted butter, room temp    
1 3/4 cups sugar lime curd:  
5 large egg whites at room temp repeat above, replacing lemon w/lime (about 3 limes)  

directions:
prepare curds:
In a heavy saucepan before turning on the heat, combine the egg yolks and sugar and whisk vigorously for 1 minute.

Add the lemon juice and zest and whisk for 1 minute more. Set the pan over low heat and cook gently, stirring constantly, until slightly thickened, 10 to 15 minutes.

Remove the pan from the heat and stir in the butter. Let cool, stirring occasionally. Cover tightly and refrigerate before using. Makes about 1 cup.

repeat with lime curd

*make sure the remaining 5 egg whites are in separate bowls. 5 will be for the cake, 5 for the frosting.

bake the cake:
Preheat oven to 350°. Butter and flour or spray two 9-inch round cake pans. Set aside.

Sift together cake flour, baking powder, and salt. In a separate bowl, stir vanilla seeds into milk.

Cream butter in your mixer with the paddle attachment on medium-high speed. Gradually add sugar, beating until pale and fluffy. Reduce speed to low. Add flour mixture to batter, alternating with the milk, and betting until just combined after each addition.

In a separate bowl, whisk the egg whites until stiff peaks form. Fold 1/3 of the egg whites into the batter to lighten. Gently fold in remaining whites in 2 batches.

Divide batter evenly into prepared pans. Bake for 30-35 minutes or until a cake tester comes out cleanly when inserted in the center. Allow to cool completely on wire racks before frosting.

make the frosting:
Place egg whites, sugar, and salt in the heatproof bowl of your stand mixer. Place over over a small pot of simmering water. Whisk vigorously until the mixture is warm to the touch and no longer grainy. (test this by rubbing it with your fingertips.)

Transfer the bowl to the mixer. Using the whisk attachment, starting at low speed, and gradually increasing to medium-high. Whisk until stiff peaks form and continue to whisk until fluffy and glossy, about 10 minutes. At the end, the bottom of the bowl should be cool.

Reduce the speed to low. Cut the butter into tablespoon sizes, and gradually into the bowl. After adding all the butter, whisk in the vanilla.

Switch over to the paddle attachment, and continue to beat on low to get rid of all the air bubbles. Scrape the bowl, then continue to beat until completely smooth.

assemble the cake:
Cut each cake in half. You should have 4 layers now.

Place one layer on a cake board. Place some frosting in a piping bag or freezer bag. Pipe a line of frosting along the edge of the cake layer.

Pour lemon curd in the center and spread into an even layer. Place other cake layer on top. Spread a layer of frosting. Add the third cake layer, then top with the lime curd. Add the final cake layer, frost cake with remaining frosting and decorate as desired.

Store in fridge until serving.

Wednesday, January 5, 2011

Pumpkin Cupcakes with Cream Cheese Frosting

pumpkin cupcakes with cream cheese
After making the pumpkin bars, I still had 3/4 cup pumpkin left. I was going to try to attempt scones again, but then I came across this recipe for cupcakes. This was perfect, since I was in a cake mood anyway and I had cream cheese to use up.

The original recipe yielded 32 cupcakes, but I halved the recipe and ended up with 18.  I did use buttermilk powder and water instead of actual buttermilk. I found that the batter was nice and fluffy from the use of the cake flour and buttermilk powder. Also, since I didn’t have any more unsalted butter left, I used salted butter, but forgot to reduce the amount of the salt. It didn’t make a big difference at all. To top it off, I used my favorite cream cheese recipe. It’s not too sweet to my family’s tastes, and it’s a good ratio of butter and cream cheese.

I didn’t quit have enough frosting to frost all 18 cupcakes based on the amount of frosting from the picture. I was able to frost 14. Next time, each cupcake will get slight less frosting on them so all of them will have some!

Pumpkin Cupcakes with Cream Cheese Frosting
adapted from: Martha Stewart’s Cupcakes

printable recipe

ingredients:2 cups cake flour, sifted
1/2 tsp baking soda
2 tsp baking powder
1/2 tsp kosher salt
1 tsp ground cinnamon
1/2 TBSP ground ginger
1/2 tsp ground nutmeg
1/8 tsp ground cloves
1/2 cup unsalted butter, softened
1 1/4 cups packed light brown sugar
2 large eggs
1/2 cup buttermilk
3/4 cup pumpkin puree

for the frosting:
1/4 cup butter, softened
4 oz cream cheese, softened
1/2 tsp vanilla extract
1 cup confectioner’s sugar

directions:Preheat oven to 350° F. Line 2 muffin trays with 18 paper liners. In a medium bowl sift together dry ingredients: flour, baking soda, baking powder, salt and spices. Set aside.

In an electric mixer on medium-high speed, cream butter and brown sugar until pale and fluffy. Beat in eggs one at a time until each one is fully incorporated. Reduce speed to low and add the flour mixture in three batches, alternating with the buttermilk. Beat until just combined, then add pumpkin and beat until just combined.

Using a 1/4 cup ice cream scoop, scoop and fill the lined cups. Bake in preheated oven for 15-18 minutes, rotating halfway through. Cupcakes are done when a toothpick inserted in the center comes out with little or no crumbs. Allow to cool in the pan on wire racks for 10 minutes before transferring to wire racks to cool completely.

for the frosting:
Beat butter and cream cheese until light and fluffy, then beat in vanilla. Gradually add powdered sugar and beat for 5 minutes or until fluffy.
Attach your favorite tip into a piping bag, or cut the corner of a ziploc bag and pipe onto cupcakes from the outside in. Alternatively, you can scoop and spread the frosting with an offset spatula.
Makes 18 cupcakes.

Wednesday, December 15, 2010

Red Velvet Cheesecake

Happy Birthday, Sis! redvelvetcheesescake2

A few months ago, I asked my sister what birthday cake she wanted. She told me mango cheesecake. One, I hate mangoes; two, are mangoes even in season in the middle of December? Well, she said didn’t really have a preference, as long as it was cheesecake. I bookmarked this recipe a while ago, but I never got around to making it (like the other recipes I have flagged and bookmarked). It wasn’t until Annie had a recap post of holiday treats that I decided to make this once and for all.

I went to the supermarket the day before to pick up the remaining ingredients for baking. While I was about to open the door to the house, I realized I forgot the chocolate graham crackers! I didn’t want to go back to the store, so I thought about using the honey grahams I had in the pantry. In the end, I ended up running an errand near the supermarket so I went to pick up some crackers. They were not on sale…and it was too expensive at regular price…especially since I was only using 1/3 of a box. I bought a package of chocolate sandwich cookies since they were on sale. I remember Annie used chocolate sandwich cookies for the crust, and I also did that for the chocolate marble cheesecake I made a while, back so I knew it would work.

After mixing everything, I noticed that the batter for this cheesecake was a little bit runny. It could have been because I was not paying attention to the amount of buttermilk that was supposed to be added. I ended up adding 1 full cup of buttermilk so I tried to add 2 tablespoons of flour to try to thicken it up. There seemed to be a lot of batter, and when it was done baking, the cake rose up past the rim (but didn’t spill). Once it cooled down, it sunk back down.

After baking, I had to run, so I left it in the oven for a few hours to cool down, with a wooden spoon propping the oven door open. It still cracked (as in Grand Canyon crack!), as did my last cheesecake. Good thing there was frosting going over it!! I’m wondering if it was because I used my 10-inch pan for this again, since the 9-inch one I ordered didn’t arrive in time. Nonetheless, this still came out great, even though I made some mistakes. If I make this again, I’m definitely going to pay attention!

Red Velvet Cheesecake
adapted from: Southern Living, via Culinary Concoctions by Peabody

 printable recipe


ingredients:
18 chocolate sandwich cookies, crumbled
3 TBSP  butter, melted

cake:
3 (8-ounce) packages cream cheese, softened
1 1/2  cups  granulated sugar
4  large eggs, lightly beaten
3  tablespoons  unsweetened cocoa
1  cup  sour cream
1/2  cup  whole buttermilk
2  teaspoons  vanilla extract
1  teaspoon  distilled white vinegar
2  (1-ounce) bottles red food coloring

frosting:
4 oz cream cheese, softened
1/4  cup  butter, softened
1  cup  powdered sugar
1  teaspoon  vanilla extract

Garnish: fresh mint sprigs (optional)

directions:
Stir together cookie crumbs and melted butter, press mixture into bottom of a 9-inch spring form pan.

Beat 3 (8-ounce) packages cream cheese and 1 1/2 cups granulated sugar at medium-low speed with an electric mixer 1 minute. Add eggs and next 6 ingredients, mixing on low speed just until fully combined. Pour batter into prepared crust.

Bake at 325° for 10 minutes; reduce heat to 300°, and bake for 1 hour and 15 minutes or until center is firm. Run knife along outer edge of cheesecake. Turn oven off. Let cheesecake stand in oven 30 minutes. Remove cheesecake from oven; cool in pan on a wire rack 30 minutes. Cover and chill 8 hours.

Beat remaining 4 oz cream cheese and 1/4 cup butter at medium speed with an electric mixer until smooth; gradually add powdered sugar and vanilla, beating until smooth. Spread evenly over top of cheesecake. Remove sides of spring form pan. Garnish, if desired.

Tuesday, September 7, 2010

Japanese Strawberry Shortcake

Happy birthday mom!

japanese strawberry shortcake

Over the weekend, we went over to my parents’ place for my mom’s birthday. I provided the cake. My family isn’t too fond of sweets. They love the cakes from the Chinese bakeries. Basically they’re sponge cakes with a mixed fruit filling. I haven’t tried making those types of cakes before, but when I saw this recipe, it looked like it would be something similar.

This recipe doesn’t call for too much sugar in the cake or frosting, which my family prefers. My mom requested a fruit filling cake, so I decided on this Japanese strawberry shortcake.

I love the way this turned out. The technique is a little different from what I’m used to (i.e. super easy). The cake was light and airy, and had a distinct egg taste. I followed the original directions almost exactly, but omitted brushing the simple syrup on the cake, since I though it would be a bit much for my family. I think it tasted great without it. I also made 2 layers of filling, but that was only because I had extra strawberries. I didn’t have quite enough frosting for the top and sides after doing that, so next time I will make a double batch of frosting if making 2 layers of filling. I baked it for less time than the recipe called for, 22 minutes, so I’ve adjusted the cook time accordingly.

IMG_1727

Japanese Strawberry Shortcake
adapted from: La Fuji Mama

 printable recipe


ingredients:
cake:
4 large eggs, white and yolks separated
4.2 ounces (120 grams, 9.5 tablespoons) granulated sugar, sifted once
3 tablespoons milk, at room temperature
1/2 teaspoon vanilla extract
4.2 ounces (120 grams, 14 tablespoons) cake flour, sifted 3 times
1.2 ounces (22 grams, 2.3 tablespoons) butter, melted

frosting:
1 teaspoon unflavored gelatin
4 teaspoons cold water
1 cup cold heavy whipping cream
1/4 cup confectioners’ sugar
1/2 teaspoon vanilla extract

1 container strawberries (1 lb)

directions:
Allow eggs and milk to come to room temperature. Melt butter and set aside to cool to room temperature.

Preheat the oven to 350° F (170° to 180° C).  Grease and flour an 8-inch circular cake pan, set aside.

Using the wire whisk attachment to your mixer, gradually add the sugar to the egg whites, and beat the egg whites until they are stiff and glossy.

Add the egg yolks to the egg white mixture, and gently whisk until the yolks are incorporated.

Add the milk, vanilla extract, and gradually add flour (in that order) to the batter and gently fold them into the batter with a spatula.  Fold in the melted butter until it is well combined.

Pour the cake batter into the prepared cake pan, and get rid of any air bubbles in the batter by dropping the pan on a counter once or twice.  Bake the cake for 20-25 minutes (originally 25-30 mins, mine was done at 22).  The cake is done when it is golden brown and springs back when pressed lightly.  Let the cake cool completely on a wire rack. Run a blade around the inside of the pan to loosen the cake, and remove.

To make the Stabilized Whipped Cream Frosting:

Place mixing bowl in the fridge to cool down.

Put the cold water in a small saucepan.  Sprinkle the gelatin over the surface of the water and let stand for 5 minutes (do not stir).  Place the saucepan over low heat and stir constantly with a wooden spoon just until the gelatin dissolves.  Remove the saucepan from the heat and cool to room temperature.

In a cold mixing bowl and using a the wire whisk attachment, combine the whipping cream, sugar, and vanilla and beat until slightly thickened.  Reduce speed of mixer and gradually pour the gelatin into the whipped cream mixture.  Then whip the mixture at high speed until stiff.

To assemble the cake:

Reserve 7 to 1o  similar sized strawberries for decorating the cake.  Slice the remaining strawberries into thin slices.

Slice the sponge cake horizontally into 2 layers.

Place one sponge layer cut-side up on a cake board or serving plate.

Spread a thin layer of whipped cream over the cake layer and arrange the strawberry slices over the surface. Spread an additional layer of whipped cream over the strawberries.

Place the other cake layer over the frosting.  Frost the sides and top of the cake with the remaining whipped cream.  Decorate as desired and garnish with the reserved strawberries. I cut 7 strawberries in half and arranged them on the edge of the cake. Sliced the remaining 3 and fanned them out in the center of the cake.

IMG_1735

Wednesday, July 7, 2010

Red Velvet Firework Cupcakes with Vanilla Icing

One of my coworkers recently let me borrow her cupcake book, and she really wanted me to try the red velvet cake recipe. This cupcake book was the More from Magnolia dessert cookbook. I had her book for months, and didn’t get a chance to try it at all.

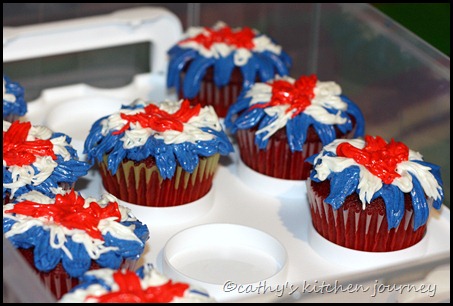
Then came July 4th and I asked for suggestions for dessert ideas. A few people asked for red velvet cupcakes. For our annual July 4th bbq, I made these red velvet cupcakes, topped with a firecracker design inspired by the Wilton site. I told my sister in law I would try making the design. However I think the icing that was paired with this cupcake recipe was too thin to use for piping. It was supposed to be used to mound on top of the cake.

firecrackercupcakes2

Now, I’m not too fond of the commercial cupcake places. Usually their cakes are too dense and the frosting too sweet. My theories were confirmed when I bit into the cake and found it a bit dry. Granted, I did make several adaptations, but I did the same for the other red velvet cake recipe, and that came out fine.

My sister in law also made a red velvet cake using my previous recipe. Personally, I like the Cake Man Raven recipe better, adaptations and all. I also like the cream cheese frosting pairing better.

cmr red velvet

I couldn’t believe the Magnolia recipe called for 6 TBSP of red food coloring. I halved that and only used 3. I thought using basically two 1 ounce bottles of red dye would be overkill. I thought the batter was plenty red after only 3 (although you can’t really see it in the pic above, you can sorta tell in this one.)

fireworkcupcakes2

Also, although this isn’t the greatest substitutions, again, I did this with the other recipe with no problems. I subbed buttermilk powder and water for the buttermilk, and a blend of flour/cornstarch for the cake flour.  I’m not sure if it was because I made the substitutions, but I was able to get 34 cupcakes out of this instead of 24. I saw some of the reviewers mentioning that the icing was too gritty, but I had the opposite problem, I thought it was too thin. I guess I overbeat the frosting a bit too much, but it also could have been the 100° weather we were having that caused it to melt too much.

Magnolia’s Red Velvet Cupcakes with Creamy Vanilla Icing
adapted from: More from Magnolia, also found on Epicurious

printable recipe

ingredients:
3 1/2 cups cake flour (not self-rising)
3/4 cup (1 1/2 sticks) unsalted butter, softened
2 cups sugar
3 large eggs, at room temperature
3 tablespoons red food coloring
3 tablespoons unsweetened cocoa
1 1/2 teaspoons vanilla extract
1 1/2 teaspoons salt
1 1/2 cups buttermilk
1 1/2 teaspoons cider vinegar
1 1/2 teaspoons baking soda

Creamy Vanilla Frosting (I halved this)
6 tablespoons all-purpose flour
2 cups milk (I used low fat)
2 cups (4 sticks) unsalted butter, softened
2 cups sugar
2 teaspoons vanilla extract

directions:
Preheat oven to 350°F. Line 2 muffin tins with paper liners (or line one tin and allow to cool before lining again).

To make the cake:
In a small bowl, sift the cake flour and set aside. In a large bowl, on the medium speed of an electric mixer, cream the butter and sugar until very light and fluffy, about 5 minutes. Add the eggs, one at a time, beating well after each addition. In a small bowl, whisk together the red food coloring, cocoa, and vanilla. Add to the batter and beat well.

In a measuring cup, stir the salt into the buttermilk. Add to the batter in three parts alternating with the flour. With each addition, beat until the ingredients are incorporated, but do not overbeat. In a small bowl, stir together the cider vinegar and baking soda. Add to the batter and mix well. Using a rubber spatula, scrape down the batter in the bowl, making sure the ingredients are well blended and the batter is smooth.

Divide the batter among the prepared pans. Bake for 30-40 minutes, or until a cake tester inserted in the center of the cake comes out clean. Let the layers cool in the pans for 1 hour. Remove from the pans and cool completely on a wire rack.

to make the frosting:
In a medium-size saucepan, whisk the flour into the milk until smooth. Place over medium heat and, stirring constantly, cook until the mixture becomes very thick and begins to bubble, 10-15 minutes. Cover with waxed paper placed directly on the surface and cool to room temperature, about 30 minutes.

In a large bowl, on the medium high speed of an electric mixer, beat the butter for 3 minutes, until smooth and creamy. Gradually add the sugar, beating continuously for 3 minutes until fluffy. Add the vanilla and beat well.

Add the cooled milk mixture, and continue to beat on the medium high speed for 5 minutes, until very smooth and noticeably whiter in color.

To create the red, white and blue frosting, divide the batter in thirds, (adding more to the blue one). Dye 1/3 using a royal blue color and dye 1/3 with a red color, leave 1/3 white. I used about half a (1 oz) tub  of gel color for each of the ones that were dyed and mixed it in with a fork.

Cover and refrigerate for 15 minutes. Use immediately.

To create the fireworks, pipe with the grass tip, pulling away from the cake each time.

Makes 24 cupcakes.

Monday, May 10, 2010

Walnut Mocha Torte

My brother’s birthday was last week. He’s just turned a quarter century! It was also my baby cousin’s birthday. He just turned one.

I volunteered to make 2 cakes for them. One of the cakes I made was this walnut mocha torte. One of the requests was a chocolate cake, but I was at a lost of what to make. A few things crossed my mind. The original request was for a black forest cake, but most of the recipes I came across used canned cherry pie filling and/or Kirschwasser. I didn’t want to buy the alcohol  just of one use, so I did some more brainstorming. I though of German Chocolate cake, but my sister told me she wasn’t too fond of it. I would have had a hell of a time finding German chocolate as well.

I decided to look through the cookbooks I had at home for ideas. For some reason, I always forget that I have a supply of cookbooks at home to reference too. I’ve been relying on food blogs and online recipes a lot lately. I guess I like to read reviews on the recipes before I try them blind.

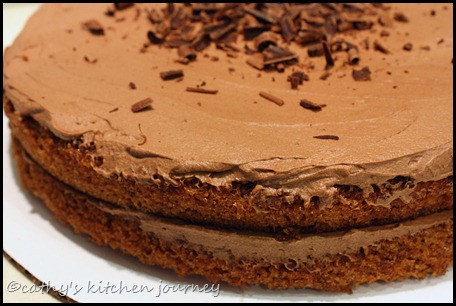
walnutmochatorte1

I saw this walnut mocha torte in my Better Homes and Garden cookbook. I was surprised that it only called for a few ingredients and was so simple. Since I was making 2 cakes, one of which was an ice cream cake that had to be assembled, I thought this easy peasy torte was a great idea. I was surprised that it didn’t call for any oil and a minimal amount of flour. I was concerned of how it would taste in the end. I’m glad I made it though, because it ended up tasting really good.

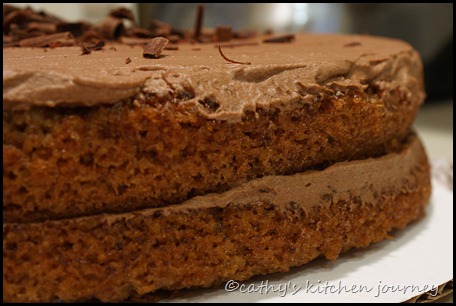
Since I used 9 inch pans instead of the 8 inch the recipe calls for, my cake was a little bit thinner than pictured in the cookbook. The batter looked really thin before it was baked, but the baking powder I added allowed for adequate rising, so don’t worry if it looks like there’s nothing in the pan when you pour it in.

walnut mocha torte

Walnut Mocha Torte
adapted from: Better Homes and Garden New cookbook, also found online here

printable recipe

ingredients:
for the cake:
2  cups walnuts or pecans, toasted
2  tablespoons all-purpose flour
2-1/2  teaspoons baking powder
4 eggs
3/4 cup sugar
chocolate curls or shavings (for decoration, optional)

for the frosting:
1 tsp instant coffee
1 cup heavy whipping cream
1/3 cup sugar
1/4 cup unsweetened cocoa powder
1/2 tsp vanilla extract

directions:
Preheat oven to 350 degrees F. Grease and lightly flour two 8x1-1/2-inch round cake pans (I used 9 inch pans). Set pans aside. In a medium bowl combine nuts, flour, and baking powder; set aside.

In a blender or food processor combine eggs and sugar; cover and blend or process until smooth. Add nut mixture. Cover and blend or process until smooth. Spread batter evenly in the prepared pans.

Bake for 20 to 25 minutes or until cakes spring back when lightly touched (centers may dip slightly). (Since I used 9 inch pans I baked for 15 mins.) Cool cake layers on wire racks for 10 minutes. Remove cake layers from pans. Cool thoroughly on wire racks.

to make the frosting:
In a chilled small mixing bowl dissolve instant coffee in 1 cup whipping cream; add sugar, unsweetened cocoa powder, and vanilla. Beat with an electric mixer on medium speed just until stiff peaks form (tips stand straight).

Spread Mocha Frosting on each layer; stack layers. Loosely cover and chill frosted cake for 2 to 24 hours. If desired, top with chocolate curls.

walnutmochatorte

Friday, February 5, 2010

Vegan Chocolate Peanut Butter Ice Cream Cake

Now, that title is a mouthful!

This past weekend was Gary’s 30th birthday! I told him I would make a cake for him that would be dairy free. Who knows what store bought cake has in them, unless you specifically ask for something that is allergen free.

I thought up an ice cream cake with a chocolate peanut butter swirl ice cream sandwiched between two layers of chocolate cake, then topped off with a peanut butter frosting. I wasn’t sure if I would be able to pull it off, but it came out pretty good. It tasted amazing and you would not know it’s vegan unless I told you.

I’ve used the chocolate cake recipe previously when I made chocolate cupcakes for a coworker. Since it tasted great the first time, I decided to use it again for this cake. Since what I wanted to make didn’t come from one particular cookbook, I found recipes for each component of the cake from different sources. Each component tasted good on it’s own already, it was just a matter of everything tasting good together, and of course it did! This photo does not do justice to how amazing it tastes.

chocolatepbicecreamcake

The cake was served after leaving it in the fridge for about an hour or so, so the ice cream was a little bit melty to a pudding like consistency. I suggest leaving it in the freezer until serving if you have space, because the leftovers tasted great straight from the freezer.


Vegan Chocolate Peanut Butter Ice Cream Cake
Chocolate Peanut Butter Swirl ice cream adapted from: The Vegan Scoop
Chocolate cake adapted from:
Go Dairy Free
Peanut Buttercream frosting adapted from:
Vegan Cupcakes Take Over the World
printable recipe

ingredients:

ice cream cake frosting
1 cup coconut milk, divided 3 cups all purpose flour 1/2 cup Earth Balance butter
2 TBSP arrowroot powder 2 cups sugar 4 TBSP shortening
1 cup dairy free cream 1/2 cup cocoa powder 2/3 cup creamy peanut butter
3/4 cup sugar 2 tsp baking soda 3 tsp vanilla extract
1/4 cup cocoa powder 1 tsp salt 2 - 2 1/2 cups powdered sugar, sifted
1/2 cup chocolate chips scant 2/3 cup canola oil 2-4 TBSP dairy free milk or cream
1 TBSP vanilla extract 2 TBSP white vinegar  
3/4 cup creamy peanut butter 2 tsp vanilla extract  
  2 cups cold water  


directions:
at least a day before, make ice cream:
In a small bowl, combine 1/4 cup coconut milk with arrowroot and set aside. (I only had 3/4 cup coconut milk total, so I used the cream for this).

Mix cream, remaining coconut milk, sugar, cocoa powder, and chocolate chips in a saucepan and cook over low heat. Bring mixture to a boil, stirring frequently. Remove from heat and mix in arrowroot cream. Add in vanilla extract.

Refrigerate mixture until chilled, at least 2-3 hours (I left it in the fridge for about 24 hours).

Freeze according to your ice cream maker’s instructions. In the last few minutes of freezing, add in peanut butter.

Line a cake pan the same size as one you’ll be baking the cake in with plastic wrap. Pour ice cream into pan, smooth out and cover with more plastic wrap. Freeze in freezer until solid. If you don’t have enough pans, you can remove the ice cream from the pan after it’s solid and leave it in the freezer until you’re ready to use it.


at least 6 hours prior, bake the cake:
Preheat oven to 350° F. Grease and flour two 8 or 9” cake pan (I used pam baking spray on my 9” pans). Set aside.

In a large mixing bowl, sift together dry ingredients: flour through salt.

Make 3 small wells in the flour mixture. Place oil in the first well, vinegar in the second, and vanilla extract in third.

Pour water all over and stir well to combine.

Divide batter evenly between the 2 pans. Bake in preheated oven for 25-30 minutes or until a toothpick inserted in the center comes out clean. (Original recipe called for 30-35 minutes in an 8” square pan. I put both pans in the oven at the same time, and at 30 minutes the edges were a little overdone.)

Allow the cakes to cool for 10 minutes in the pans before inverting them onto wire racks to cool.

After it’s cooled, you can cut off the top domed part to make a flat cake.


while cake is almost cooled, prepare the frosting:
In a large bowl, cream together butter and shortening at medium speed until smooth.

Add peanut butter and vanilla and beat until very smooth, about 2-3 minutes. Beat in sifted sugar (make sure it’s sifted, or you’ll have lumps).

Set mixer to low speed and slowly pour in milk or cream until frosting is pale tan and very fluffy.

This makes just enough frosting to frost this entire cake.


assemble:
On a 9 or 10” cake circle, line parchment paper along the edges and let hang off, leaving room in the center to place a little frosting. This is to keep the cake circle neat while frosting, so it will be removed later. Spread a dollop of frosting on the center of the circle. Place one layer of cake on the center of the circle.

Add a thin layer of frosting on top of the cake.

Remove ice cream from freezer. Place on top of the frosted cake layer. Remove plastic wrap.

Frost with another thin layer of frosting. At this point, you must work quick, or the ice cream will melt.

Place the last layer of cake on top. If you feel you need to place the cake back in the freezer, do so at this point.

Frost the cake on top and sides with the remaining frosting.

Place in freezer until ready to serve.

Store leftovers in a freezer tight container.

Wednesday, July 8, 2009

Apple Turnovers

I first made these last year or the year before for a fourth of July also. It turned out very well, although I didn’t use the glaze with it. This year, I decided to make it again, since I my dad requested it. I told him I was making a strawberry pie, but he said he didn’t like strawberries, and he wanted apple pie. Of course. That’s the same thing Gary asks for all the time too!

I tried to access allrecipes.com, but unfortunately their site was down for a few days. Luckily, I printed this recipe a long time ago before I had a laptop, when I was still printing and keeping recipes in a binder.

I didn’t have a chance to get puff pastry from the supermarket, so I used the phyllo dough I had on hand. It was the first time using phyllo dough, and it seemed pretty easy. Maybe I will finally make the baklava I’ve been meaning to make.

phyllo apple turnover

Apple Turnovers
adapted from: allrecipes.com

Ingredients:
2 tablespoons lemon juice
4 cups water
4 Granny Smith apples - peeled, cored and sliced
2 tablespoons butter (I used margarine)
1 cup brown sugar
1 teaspoon ground cinnamon
1 tablespoon cornstarch
1 tablespoon water
1 (17.25 ounce) package frozen puff pastry sheets, thawed (I used phyllo dough)

1 cup confectioners' sugar
1 tablespoon milk
1 teaspoon vanilla extract

Directions:
Combine the lemon and 4 cups water in a large bowl. Place the sliced apples in the water to keep them from browning. (I didn’t do this. I used an apple peeler/corer/slicer while the butter was melting and quickly placed the apples in the pan once I was done.)

Melt butter in a large skillet over medium heat. Drain water from apples, and place them into the hot skillet. Cook and stir for about 2 minutes. Add brown sugar, and cinnamon, and cook, stirring, for 2 more minutes. Stir together cornstarch and 1 tablespoon water. Pour into the skillet, and mix well. Cook for another minute, or until sauce has thickened. Remove from heat to cool slightly.

Preheat the oven to 400 degrees F (200 degrees C).

If using puff pastry:

Unfold puff pastry sheets, and repair any cracks by pressing them back together. Trim each sheet into a square. Then cut each larger square into 4 smaller squares. Spoon apples onto the center of each squares. Fold over from corner to corner into a triangle shape, and press edges together to seal. Place turnovers on a baking sheet, leaving about 1 inch between them.

Bake for 25 minutes in the preheated oven, until turnovers are puffed and lightly browned. Cool completely before glazing.

If using phyllo dough:

Unroll puff pastry onto a dry surface. Cover with saran wrap, then a damp towel.

Take 1 sheet, brush half of the length of the sheet with melted butter or margarine. Fold the other half over the sheet. Brush with more butter. Lay another sheet over that, repeat with butter and fold. You should now have 2 fold sheets (or 4 half sheets) alternating with butter.

Place about 2 TBSP apples on one end of the sheet.

apple filling

Fold over one corner, and continue to fold until the end of the sheet.

Place on a parchment or silicone lined baking sheet. Brush top with butter. Bake in oven for 15-20
minutes, or until golden brown.

Cool before glazing.

To make the glaze, mix together the confectioners' sugar, milk and vanilla in a small bowl. Adjust the thickness by adding more sugar or milk if necessary. Drizzle glaze over the cooled turnovers. (I did not add the glaze.)

DSC04104

Monday, June 22, 2009

Red Velvet Cupcakes with Cream Cheese Frosting

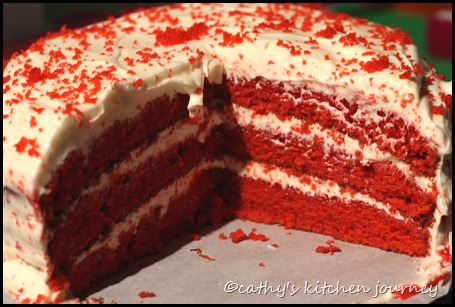
DSC04053copy

So, after I made the Red Velvet Twilight Cake, I decided to turn it into cupcakes. What a better opportunity than another holiday (father’s day) to try it! Since everybody would be gathering together, it’s a great way to share with others. I made it slightly different from the previous recipe though.

I still didn’t have cake flour or buttermilk. So for the cake flour, I substituted AP flour and cornstarch, whereas I didn’t add cornstarch before. I recommend adding the cornstarch though, because the batter ended up thicker than before, and easier to work with.


Red Velvet Cupcakes with Cream Cheese Frosting 
cake adapted from: Cake Man Raven
makes 24 cupcakes


Cake dry ingredients:
2 1/2 cups of cake flour (I used AP flour replacing 5 TBSP with cornstarch)
1 1/2 cups of granulated sugar
1 teaspoon of baking soda
1 teaspoon of fine salt
1 teaspoon of cocoa powder

Cake wet ingredients:
1 cup of buttermilk (I used buttermilk powder and 3/4 cup water)
2 eggs
1 teaspoon of vinegar (white distilled)
1 1/2 cups of vegetable oil
1 oz. of red food coloring
1 tsp. of vanilla extract

Cake Directions:
Sift together all dry ingredients. Add liquid in an electric mixing bowl and beat on medium speed until well incorporated. Slowly add dry ingredients to bowl, until all ingredients are combined.

Since I used buttermilk powder, I added the powder in with the dry ingredients and added 1 cup water with the wet ingredients.

Line a muffin tin with cupcake liners. Fill cups 3/4 full (about 1/4 cup of batter). Bake @ 350 degrees for 18-20 minutes.

Remove from pans and allow to cool thoroughly before frosting.

Cream Cheese Frosting


Ingredients:
1 package (8 ounces) cream cheese, at room temperature
8 tablespoons (1 stick) butter, at room temperature
1 teaspoon pure vanilla extract
2 cups confectioners' sugar

Directions:
Place the cream cheese and butter in a large mixing bowl. Blend with an electric mixer on low speed until combined, 30 seconds. Add extract, blend to combine.

Gradually add the confectioners' sugar and blend with the mixer on low speed until the ingredients are moistened, 30 seconds. Add enough sugar to desired sweetness. Increase the speed to medium and beat until the frosting is fluffy, 2 minutes more.

Chill for half hour to thicken. Scoop frosting into a piping bag or a heavy duty zip top bag and snip the end. Frost by swirling from the outside in.

Monday, June 15, 2009

Red Velvet Twilight Cake

Have you heard of Cake Man Raven(CMR)? If you watch Throwdown with Bobby Flay, you might have heard of him. CMR has this bakery in Brooklyn where he makes and sells his infamous red velvet cake. This is the only place where my coworker gets red velvet cakes. I’ve tried it…it’s good!

So, Bobby Flay challenges CMR in his red velvet cake throwdown. Unfortunately, CMR didn’t win, but I don’t know why! I haven’t tried Bobby’s recipe, but just looking at CMR’s cake is just impressive.

I’ve seen imitation CMR recipes out there, and of course, I tried to find one. To my surprise, he actually has his recipe on his website, so I didn’t have to look any further! That’s a shock to me, I would think he would want to keep it a secret…but that’s just me.

After I got invited to a “Twilight” party (I use the term loosely because it was all an inside joke). I wanted to take the opportunity to make this red velvet cake. Of course, I made some adaptations to it to suit it for my needs. I searched for inspiration ideas and saw what Ashlee did for her twilight party. I didn’t want to be too hands on for the cake, so I used ganache instead of fondant.

I wanted a dark base for the design, so I made a chocolate cream cheese frosting and layered chocolate ganache over that. I used chocolate chips and candy melts for the design. I think it turned out pretty good for an amateur cake decorator!

red velvet twilight cake

Red Velvet Cake with Chocolate Cream Cheese Frosting and Chocolate Ganache
cake adapted from: Cake Man Raven
frosting adapted from: recipelink.com
ganache from: allrecipes.com

Cake dry ingredients:
2-1/2 cups of cake flour (I used AP flour minus 2 TBSP per cup) I recommend replacing the 5 TBSPs with cornstarch, otherwise the batter will be thin
1 1/2 cups of granulated sugar
1 teaspoon of baking soda
1 teaspoon of fine salt
1 teaspoon of cocoa powder

Cake wet ingredients:
1 cup of buttermilk (I used buttermilk powder and 1 cup water)
2 eggs
1 teaspoon of vinegar (white distilled)
1-1/2 cups of vegetable oil
1 oz. of red food coloring
1 tsp. of vanilla extract

Cake Directions:
Sift together all dry ingredients. Add liquid in an electric mixing bowl and beat on medium speed until well incorporated. Slowly add dry ingredients to bowl, until all ingredients are combined.

Since I used buttermilk powder, I added the powder in with the dry ingredients and added 1 cup water with the wet ingredients.

batter

Pour evenly into three 9” cake pans (about 1.75c batter per pan). I only had two, so I poured the batter into a measuring cup, and it measured about 5 cups of batter. Bake @ 350 degrees for 20-30 minutes. Rotate 180 degrees halfway though. I did that because my oven is tilted forward and bakes unevenly.

Remove from pans and allow to cool thoroughly before frosting.

cake

Chocolate Cream Cheese Frosting

Ingredients:
1 package (8 ounces) cream cheese, at room temperature
8 tablespoons (1 stick) butter, at room temperature
1/2 cup unsweetened cocoa powder
1 teaspoon pure almond extract or pure vanilla extract
4 cups confectioners' sugar, sifted (I used 2.5 cups)

Directions:
Place the cream cheese and butter in a large mixing bowl. Blend with an electric mixer on low speed until combined, 30 seconds. Add the cocoa powder, extract, blend to combine.

Gradually add the confectioners' sugar and blend with the mixer on low speed until the ingredients are moistened, 30 seconds. Add enough sugar to desired sweetness. Increase the speed to medium and beat until the frosting is fluffy, 2 minutes more.

Frost the cake layers, more in the middle, but a thin layer outside. Refrigerate to allow the frosting to set.

Chocolate Ganache

Ingredients:
2 cups semisweet chocolate chips
2 cups heavy cream
2 teaspoons vanilla extract

Directions:

Place chocolate chips in a large bowl, or in the bowl of a stand mixer. Pour the cream into a saucepan, and bring to a boil. As soon as the cream boils up to the top of the pan, quickly remove it from the heat, and pour it over the chips.

Let stand for a minute or two, then stir with a whisk, or use the paddle attachment for the mixer, to mix until smooth. Be sure to scrape the bottom of the bowl occasionally. Stir in the vanilla until well blended. Place a piece of plastic wrap directly on the surface, and allow to cool at room temperature, or in the refrigerator.

Place the cake on a cooling rack over a baking sheet and pour the warm ganache slowly over the top middle of the cake. Allow the ganache to flow down the cake naturally. Allow to cool and harden. I did this in the fridge.

Chocolate Design:

Ingredients:
semi sweet chocolate chips
white candy melts
red candy melts

I first traced the image from the book cover with tracing paper.
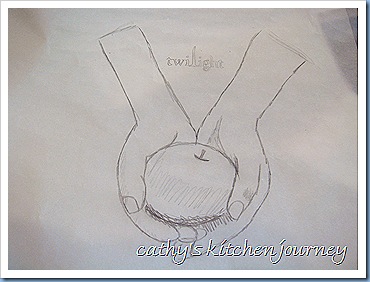
twilight sketch

Then place the image over a white sheet of paper, tape as necessary to avoid movement. Place wax paper over the image (this will be your drawing surface). Tape as necessary. Place everything in a baking sheet.

Melt chocolate chips in a microwave. Place in a decorating bag. Using a writing tip (I used #5), trace the outline of the image. Melt white candy melts in the chocolate and fill the hands with chocolate. Tap the pan on the table to allow the chocolate to spread. Repeat with red candy melts and the apple.

twilight hands

They coloring bled a little into the outline, so re-outline as necessary. Place in fridge to harden.

Before the ganache fully sets, place the image on top, and allow it to melt a little at room temperature for the image to stick.

red velvet twilight cake

This turned out very well. I wasn’t able to get a clear picture of the cut cake, since the restaurant had dim lighting, so this was the best I could do.

red velvet cake

Friday, January 16, 2009

Devil’s Food Cake Balls

Adapted from: Bakerella
Made by: Cathy

I made these over the holiday and contemplated whether or not I should post this. It came out alright, however I still needed to get my chocolate melting technique down. They’re not very appealing to the eyes, but they tasted very good. I initially made this because I had a box of devil’s food cake box mix in the pantry that I needed to use up.

Gary brought these to work and they were a big hit. They didn’t care what it looked like. I guess he’s one of the only ones (if not the only one) that brings goodies to work. They were raving about these balls for several days after.

cake balls

Ingredients:
Cake:
1 box devil's food cake mix, prepare as directed (I made the lower fat version with applesauce)
1 can frosting (I used homemade frosting, ingredients/recipe to follow)
1 package chocolate bark (I used 2 packages Baker’s Semisweet baking chocolate)

Frosting:
2 cups powdered sugar
1/2 cup butter
1 tsp vanilla
1 1/2 Tbsp milk

Directions:
1. Prepare cake as instructed on the package. After cake is cooked and cooled completely, crumble into large bowl.
2. For frosting, beat together all ingredients. Combine the frosting and cake. Fully incorporate the frosting so it blends in with the cake.
3. Shape uniform balls by using a medium cookie scoop. Roll and lay on cookie sheet lined with wax paper.
4. Chill for several hours, or freeze.
5. Melt chocolate in microwave per directions on package. (I used the double boiler method)
6. Roll balls in chocolate and lay on wax paper, refrigerate until firm. (Use a spoon to dip and roll in chocolate and then tap off extra.)

Tuesday, December 9, 2008

Banana Cake with Spiced Rum Glaze

Adapted from: The Life and Loves of Grumpy's Honeybunch
Made by: Cathy

This is the dessert I made for our anniversary dinner. We never saved our wedding cake to eat on our anniversary. The thought of eating freezer burned year old cake just doesn't seem appetizing to me.

This is a really good cake. It's moist and flavorful.


Ingredients:
2-1/2 cups all-purpose flour
2 teaspoons baking powder
1 teaspoon baking soda
1 teaspoon ground cinnamon
1/2 teaspoon salt
Cooking spray
1-3/4 cups packed brown sugar
10 tablespoons butter, softened
3 eggs
3 medium very ripe bananas, mashed
1/2 cup fat free greek yogurt (I used plain fat free yogurt)
1 tablespoon vanilla extract (I inadvertently used only 1 teaspoon)

Glaze:
3/4 cup sifted powdered sugar
2 tablespoons dark rum or 1/4 teaspoon imitation rum extract (I used Captain Morgan Spiced Rum)
1 tablespoon butter, melted

Directions:
1. Preheat oven to 375°F.
2. In a bowl, combine flour, baking powder, baking soda, and cinnamon. In a separate bowl, combine banana, yogurt, and vanilla. Set aside.
3. Beat brown sugar and butter at medium speed of a mixer until light and fluffy. Add eggs, beating until well-blended.
4. With mixer running at low speed, add flour mixture to sugar mixture alternately with banana mixture, beginning and ending with flour mixture.
5. Pour batter into a 10-inch tube pan coated with cooking spray. Bake at 375°F for 1 hour or until a wooden pick inserted in center comes out clean. Let cool in pan 10 minutes; remove from pan. Let cool completely on a wire rack.


For the Glaze:
Combine powdered sugar, rum, and melted butter; stir until smooth. Drizzle over cake.

Note: When using rum extract add 2 tablespoons skim milk to glaze.


I brought some leftovers to work and got rave reviews. I'll try adding the correct amount of vanilla next time to see how the flavor varies.

Sunday, November 23, 2008

Carrot Cake

Adapted from: All Recipes
Made by: Cathy

I'm not much of a cake person, but carrot cake is one of my favorites. I made this for my sister's Lunar birthday. I adapted the recipe from Allrecipes.com based on one of the reviews. One of the users consolidated all the reviews and came up with her own recipe.

I had rave reviews for this cake. Gary liked it and he told me he didn't like carrot cake. The ones he's had before were dry and didn't taste good. My BIL thought it was something store bought (yes!). My family thought it was great, and they usually hate sweets. They did say the frosting was sweet, but again, the DO hate sweets.


Ingredients:
4 eggs
1 1/4 cups vegetable oil
1 cup white sugar
1 cup brown sugar
3 teaspoons vanilla extract
1 cup crushed pineapple, drained (I forgot to add this)
2 cups all-purpose flour
2 teaspoons baking soda
2 teaspoons baking powder
1/2 teaspoon salt
3 teaspoons ground cinnamon
1/4 teaspoon nutmeg
3 cups grated carrots
1 cup chopped pecans (I omitted)

For the Frosting:
1/2 cup butter, softened
8 ounces cream cheese, softened
3 cups confectioners' sugar
1 teaspoon vanilla extract
1 cup chopped pecans (I omitted)

Directions:
1. Preheat oven to 350 degrees F (175 degrees C). Grease and flour 2 round 9" cake pans.
2. Grate 6-7 medium carrots to make 3 cups. Set aside.
3. In a small bowl combine flour, baking soda, baking powder, salt, cinnamon, and nutmeg. Set aside.
4. In a large bowl, beat together eggs, oil, sugars, vanilla, and pineapple. Mix in dry ingredients. Stir in carrots. Fold in pecans if desired. Pour equal amounts into prepared pans.
5. Bake in the preheated oven for 35 to 40 minutes, or until a toothpick inserted into the center of the cake comes out clean. Let cool in pan for 10 minutes, then turn out onto a wire rack and cool completely.


To Make Frosting:
1. In a medium bowl, combine butter, cream cheese, confectioners' sugar and 1 teaspoon vanilla. Beat until the mixture is smooth and creamy. Stir in chopped pecans. Frost the cooled cake.

I added 2 cups of confectioner's sugar initially to taste. I then added more sugar by the half cup to my desired sweetness.


In my excitement to eat my first ever carrot cake, I forgot to take a picture of the cut piece. It was so good.

Next time, I'm going to try it with the crushed pineapple to see how it tastes. I'm also going to try cupcakes.

Friday, October 31, 2008

Pumpkin Cake with Cream Cheese Frosting

Adapted from: Little Corner of Mine
Inspired from: Kraft
Made by: Cathy
Edited: 11/20/08 to add baking soda

Happy Halloween. I wanted to make a themed cake for Halloween this year. I had the day off so I made a pumpkin shaped pumpkin cake. I've never used canned pumpkin in anything, so I used fresh pumpkin for this recipe.

Cake Ingredients:
3 eggs
1 cup vegetable oil
2 cups fresh pumpkin puree (or 1 15oz can)
1 teaspoon vanilla extract
1 cup white sugar
1 cup brown sugar
2 1/2 cups all-purpose flour
1/2 teaspoon ground cinnamon
1/4 teaspoon ground nutmeg
1/4 teaspoon ground cloves
1 teaspoon baking soda
1/4 teaspoon salt
green ice cream cone

Frosting Ingredients:
8 oz cream cheese
1 stick butter (1/2 cup)
3 1/2 cups confectioners sugar
2 teaspoons vanilla
red & yellow food coloring (I used gel food coloring)

Directions:
1. Preheat oven to 350ºF (180ºC).
2. In a medium bowl combine flour, cinnamon, nutmeg, cloves, baking soda, and salt. Set aside.
3. Mix together eggs, oil, vanilla, and sugars.
4. Mix in dry ingredients to the wet ingredients.
5. Pour batter into a greased bundt pan or fluted pan.


6. Bake for 1 hour or until toothpick inserted in the center comes out clean. Cool in pan for 10 minutes before inverting into a wire pan.

Frosting/Decorating Instructions:
1. Allow cake to fully cool before frosting.
2. Combine cream cheese, butter, and sugar. Mix well.
3. Add 2 parts red food coloring and 6 parts yellow food coloring (or as directed on package instructions for orange).
4. Frost in an upward motion.
5. Pour extra frosting into the center of the cake. Place the ice cream cone on top for the stem.
I had fun decorating this cake. I don't have a cake stand, so I frosted this on my wire cooling rack, with a pan underneath to catch drips. Then I use to knives to transfer the cake onto a foil lined pan.

If you can't find the green ice cream cone (I just happened to have one on hand), you can always reserve some frosting for the stem and frost it green. There was extra frosting that I reserved and will probably use for something else.