Showing posts with label ethnic - italian. Show all posts

Wednesday, April 11, 2012

No Knead Pizza Dough


This past weekend, my girlfriends got together to throw one of my high school girlfriend a baby shower. She is the first one of our group to have a baby and we wanted to do something special for her.


Since the mom-to-be has a dairy allergy, we set out to make everything dairy free. I made these vegan chocolate cupcakes that were a huge hit! I started out using the 2D tip, but the frosting ended up stringy since I used half shortening. It looked fine for the pink vanilla frosting since it looked like flowers but I just used a piping bag without a tip for the chocolate. I topped them with cupcake toppers from here.

We really had a mish-mosh of a menu that included Chinese and Italian cuisines. Since my friend loves pizza, I decided to make pizza for her using vegan cheese.


I've made pizza before, but I really hate kneading dough, even if it's with the Kitchenaid mixer. I've tried it in the bread maker with the dough cycle as well, but it wasn't quite right. This dough was perfect for me, since it required no kneading! All I had to do was dump all the ingredients in a bowl, mix, then leave it alone! Since I had so many other things to for the party, I decided to give this a go.

I halved the recipe and it made 3 good sized pies (about 12" each). I was going to try making garlic bread with this as well, but I ended up using it all for pizza.


No Knead Pizza Dough
made by cathy's kitchen journey
as seen on King Arthur Flour, originally from Artisan Pizza and Flatbread in Five Minutes a Day


ingredients:
  • 3 cups + 3 tablespoons (25 1/2 ounces) lukewarm water
  • 1/3 cup olive oil
  • 1 TBSP instant yeast
  • 1 1/2 TBSP kosher salt
  • 9 cups (38 ounces) all purpose flour

directions:
  1. Combine all ingredients in a large bowl. Mix until thoroughly moistened (use a spatula if necessary).
  2. Loosely cover and set aside in a warm area. Let rise for 2 hours.
  3. After 2 hours, transfer the covered bowl to the fridge for at least 3 hours, or up to 7 days.

to make pizza:
  1. Preheat oven and stone (if using) to 450° F.
  2. To make pizza, portion out a softball sized piece of dough (about 8 oz).
  3. Dust a piece of parchment with cornmeal and place the dough on top. Add another piece of parchment over the dough and roll the dough out between the 2 pieces of parchment. Leave the dough to sit for 30 minutes to reduce shrinkage.
  4. Remove the top piece of parchment, top with pizza sauce, cheese and choice of toppings. Transfer to baking stone or pan with the parchment. Bake in preheated oven for 20-25 minutes, depending on the thickness of your pizza.
Yield: I halved the dough recipe, which yielded 3 pies


Pin It

Wednesday, March 7, 2012

Vegan Zucchini Lasagna


When I first saw this recipe for the tofu ricotta, I knew it would be a winner. I've used tofu as a ricotta replacement before, and it worked very well. However, at that time, I didn't have as much knowledge I have now about tofu.

I've always been a fan of tofu, but I never really knew the difference between firm or silken or whatnot. I just ate anything my mom fed me. Now that I have to find dairy alternatives, I have to be creative in what I use. This tofu ricotta worked out beautifully and you really wouldn't believe it's vegan until I tell you.

Gary had a hankering for stuffed shells earlier in the week. Lucky for him, I had this recipe in my back pocket and I was already planning on making it. He thought the filling was perfect for shells, and of course it worked well in lasagna too, as I first thought when I saw this. Try this, and I bet you won't miss the cheese either!


Vegan Zucchini Lasagna
made by cathy's kitchen journey
tofu "ricotta" adapted from PBS Food


ingredients:
  • 9 lasagna noodles
  • 1 block (16 oz) firm or extra firm tofu, drained
  • 2 TBSP olive oil
  • 1 1/2 tsp kosher salt
  • 1 tsp dried oregano
  • 2 cloves garlic
  • 1 TBSP nutritional yeast
  • 1 large zucchini, peeled and slice lengthwise
  • 1 24 oz jar marinara sauce
  • vegan cheese (optional)
  • vegan parmesan (optional)

directions:
  1. Preheat oven to 350° F. Bring a large pot of water to a boil. Salt the water, then boil lasagna noodles for 10 minutes. Once done, drain and add cold water.
  2. In a food processor, blend the tofu, oil, salt, oregano, garlic and nutritional yeast until smooth and the consistency of ricotta.
  3. Peel and slice the zucchini lengthwise with a mandolin. 
  4. In a 9x13 baking dish, add 1/2 cup of the sauce.
  5. Pat dry 3 lasagna noodles and add to the pan. Spread half the tofu mixture (you might have to use your hands), then layer with half the zucchini, overlapping slightly.
  6. Add 1/2 cup sauce then layer with 3 more noodles, the remaining tofu, and the remaining zucchini. Then top with another 1/2 cup sauce.
  7. Top with remaining 3 noodles, then pour the remaining sauce on top.
  8. Cover the pan loosely with foil, then bake in preheated oven for 40 minutes.
  9. During the last 5 minutes, top with cheese and sprinkle with parmesan if desired.
  10. Let rest for 5 minutes. Run a knife through to cut into 9 even pieces.
Yield: 9 servings


Pin It

Monday, July 11, 2011

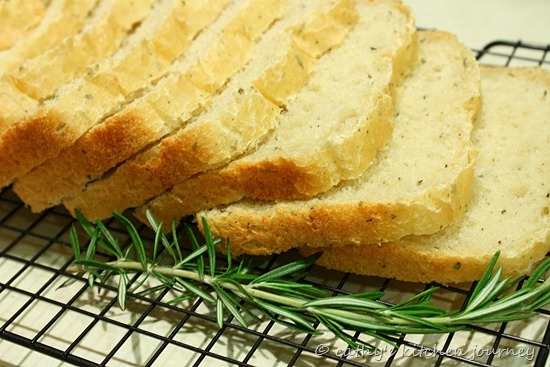
Rosemary Bread (bread machine)

A little while back, I bought a bread machine on clearance. It was $20 and too good of a deal to pass up. Now, I know some people think it's just a uni-tasker and not worth it since it takes up too much space. I think it is worth it because we want homemade bread, but I'm not one of those who likes to knead bread or wait for hours for dough to rise then punching it and then doing some other stuff to it...you get my point right? This is so much easier since I just measure out all the ingredients and I let it do the work for me.

I've made a few loaves now, and Gary really likes the basic white bread that I've made with coconut oil. He actually ate half the loaf in almost one sitting, and the whole loaf was done within a day.

While I've been testing it out, I stumbled upon a few hiccups (like forgetting to put the dough hook in before starting it!). I hope to use this some more in the next few months and get a few recipes on the blog.

rosemary bread

One of the recipes I tried out was this rosemary bread. When I saw this post, I knew I wanted to try it out, but I wasn't sure if Gary would go for it. To my surprise, he thought it looked good too! All I was missing was the rosemary, so once I got that, I was good to go. I'm glad I decided to make this. This would go great with some olive oil or paired with an Italian dinner. It will probably work well as rolls as well.


Rosemary Bread (bread machine)
adapted from: So Tasty, So Yummy, originally from allrecipes.com

ingredients:
1 cup warm water
3 TBSP olive oil
1 ½ tsp white sugar
1 ½ tsp salt
¼ tsp ground black pepper
1 TBSP fresh rosemary, minced (about 2-3 sprigs)
pinch of each: basil, oregano and marjoram
2 ½ cups bread flour
1 ½ teaspoons instant yeast

directions:
Place ingredients in the pan of the bread machine in the order recommended by the manufacturer.

Select white bread (basic) cycle and one pound loaf. Press start.

Allow to cool for 1 hour before slicing.


Monday, April 4, 2011

Tofu Parmigiana

tofu parmigiana

Lately, I’ve noticed that we’ve been eating a lot less meat for several reasons. One being that good meat is really expensive. We’ve been a bit picky lately. Another is that, for us, eating less meat is better overall. Since we usually have chicken, it gets kind of boring.

I’ve wanted to try to work more with tofu. Gary has tried, but some recipes didn’t turn out that well. I first showed this recipe to Gary, thinking he would turn this down, but I was so surprised that he was willing to try it (he’s said no to lots of recipes I’ve thrown out there). I couldn’t wait to try this out since I’m sure he’s missed his Italian food since going dairy free.

This recipe turned out fantastic, and you definitely won’t miss the meat! I adapted it slightly since I didn’t use dairy, my substitutions are noted below. I’ve been using Daiya for a little while now, and I think it worked very well in this recipe.

Tofu Parmigiana
adapted from: Prevention RD

 printable recipe


ingredients:
1 (14 ounce) package extra firm tofu
1/2 cup seasoned bread crumbs (I used panko seasoned with 1 tsp each of basil and oregano)
3 tablespoons grated Parmesan cheese, divided (I used nutritional yeast)
2 teaspoons dried oregano, divided
salt and pepper, to taste
1 egg, beaten
2 TBSP olive oil
16 oz marinara sauce
1/2 teaspoon dried basil
3 cloves garlic, minced
4 ounces  shredded mozzarella cheese (I used Daiya mozzarella shreds)

directions:
Preheat oven to 400° F.

Slice tofu into 1/4 inch thick slices (I was able to get 10 slices), and place on paper towels in a single layer on a cookie sheet. Place another paper towel over the tofu, and place another cookie sheet on top and add weights on top to press the  water out of the tofu for 20 minutes (I used full juice bottles).

In a small bowl, combine bread or seasoned panko crumbs, 2 tablespoons parmesan or nutritional yeast, 1 teaspoon oregano, salt, and black pepper.

Coat tofu in beaten egg and one at a time, press tofu slices into crumb mixture, turning to coat all sides.

Heat oil in a medium skillet over medium heat. Cook tofu slices until crisp on one side, turn, and brown on the other side.

Combine tomato sauce, basil, minced garlic, and remaining oregano. Place a thin layer of sauce in an 8 inch square baking pan. Arrange tofu slices in the pan, slightly overlapping 5 in each row. Spoon remaining sauce over tofu. Top with shredded mozzarella and remaining TBSP of parmesan or nutritional yeast.

Bake at 400° F for 20 minutes. Serve over your favorite pasta.

Serves 4-5 (Based on our appetites. I ate a quarter of it and I was full. I’m also a light eater. Gary ate about 1/3 of it)

Thursday, February 10, 2011

Weeknight Pizza

weeknight pizza

Let’s say one day, you’re craving pizza. It’s late, so do you suck it up and order pizza, or do you have time to make your own? If you happened to have the cheese on hand, the sauce on hand, the toppings ready, but no crust! No worries! If you have refrigerated crescent rolls left over in the fridge, you can make this pizza! Hypothetical situation of course!

As I mentioned in my previous post, we were trying out the Daiya cheese. I also bought the mozzarella style to make pizza. Once we brought the package home, Gary was eager to open it up and taste it. He did just that, and everyday afterward, he took a little pinch to eat. I told him I was going to use it to make pizza, and I wasn’t sure if it was enough, and since he opened it already, I had to use it up within a certain time frame.

Since I didn’t have time to make pizza dough, and I didn’t have any premade ones, I used up what I had in the pantry and fridge. This came out great, not as good as real pizza dough of course, but a great alternative if you don’t have any. I used the garlic butter flavor, and believe it or not, it’s dairy free (and possible vegan, I don’t remember)! Since there are seams on the rolls, it made it easy to tear the pizza into pieces so you don’t have to pick up the whole thing at once.

weeknight pizza 2

The Daiya website said that the cheese melts and stretches. I saw that it melted beautifully, but I didn’t notice too much stretch. It tasted like a real cheese pizza, and I will definitely buy this  again and use it on pizza dough. Of course, with any pizza, add as much or little of whatever topping you like! I used some shredded rotisserie chicken and sliced baby bella mushrooms. Gary said it reminded him of the Elio’s pizza he used to eat as a kid.

Weeknight Pizza
a Cathy original!

 printable recipe


ingredients:
1 tube garlic butter or regular crescent rolls
1/3 cup tomato sauce, divided (jarred or homemade)
1 (8 oz) package of Daiya mozzarella shreds

toppings optional:
baby bella mushrooms, thinly sliced
shredded cooked chicken

directions:
Preheat oven to 375° F. Open crescent package and unroll onto a parchment lined baking sheet. Separate down the middle of the middle of the crescents to make 2 rectangles. Press the other seams to close them up.

Spread sauce evenly onto both pieces of crust. Top with cheese, then toppings.

Bake in preheated oven for 12-13 minutes or until crust is golden brown.

Makes 2 pizzas.

Monday, February 1, 2010

Chicken Marsala

Whenever I have chicken (which is always) and baby bella mushrooms, I immediately think to make chicken marsala. It’s one of my favorite dishes to order from a restaurant, and it seems so fancy, yet so easy to make at home!

This tasted really good, and it will be in a regular rotation on our dinner menu. It’s a nice changed from the regular chicken dishes we usually make. Gary enjoyed this as well. We ate this over bowtie pasta, but any pasta or grain will do.

To keep this recipe dairy free, I used Earth Balance buttery spread. I also used chicken thighs instead of chicken breasts because it’s what we prefer to eat. However, I think it’s normally made with white meat. I didn’t have sherry, so I subbed with dry white wine.

chicken marsala

Chicken Marsala
adapted from: elly says opa!
printable recipe

ingredients:
4 boneless skinless chicken thighs
1/4 cup flour
1/2 tsp basil
1/4 tsp oregano
1.5 TBSP Earth Balance butter, divided
1 tbsp olive oil
8 oz fresh sliced baby bella mushrooms
2 cloves garlic, minced
2 tbsp dry white wine
1/2 cup marsala
salt and pepper to taste

directions:
Heat pan and melt .5 tbsp butter with olive oil over medium or medium-low heat.

Meanwhile, mix together flour, oregano and basil in a freezer bag. Sprinkle chicken with salt and pepper. Shake chicken in flour mixture to coat evenly, remove, shaking off excess flour. Cook in the oil/butter mix until fully cooked, flipping once. Remove and keep warm.

Add the remaining butter to the skillet. Add mushrooms and garlic and sauté about 2 minutes.

Add wine and marsala. Turn heat up to medium-high and cook until liquid is reduced by about half.

Season to taste. Add chicken back in to warm through if necessary.

Serves 3-4

Monday, December 7, 2009

Tiramisu Cheesecake

I’m a bit late, but hope everybody had a great Thanksgiving holiday! I’ve been crazed lately and my time in the kitchen has been limited. You can tell with the lack of posts in my blog, but I’m back (sort of). I’m off on staycation this week, so I will have some time to update. My sister is also coming over sometime next weekend or the following to bake cookies. I’m already looking up recipes.

There hasn’t been many blog worthy recipes made in my kitchen lately, so the next few posts will be all about Thanksgiving.

My sister and I were thinking up desserts to make for Thanksgiving. I knew pumpkin pie would be one of them, but I was still pondering the other. The thought of cheesecake always comes up, but I didn’t want to make a pumpkin cheesecake when there was another pumpkin dessert already. Last year, my sister made tiramisu and I made a New York Cheesecake. Then I thought of combining them together. Hey, why not. I wasn’t sure if it had been done before, but I ended up finding a good one.

My company was also looking for volunteers to bring dishes for our company potluck, so it was a great way to try this out first. Of course also to use up ingredients as well, since my tub of mascarpone cheese was double the amount I needed for 1 cheesecake.

tiramisubites2

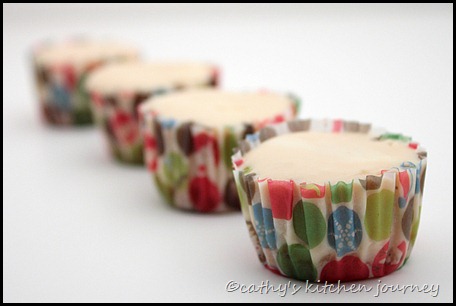
I made this bite sized version for work and it was a big hit. The whole recipe made 72 little bite sized servings.

Right before serving these, I added some unsweetened cocoa powder on top.

For Thanksgiving day, I made it in my 10” springform pan. The recipe called for an 8 or 9” springform, but I only have a 10”. The baking time called for 40-45 minutes, and I checked at 35 minutes, but it still seemed runny. I left it in for the 45 minutes and a giant crack formed on the top of my cake.

IMG_0710

I think 40 minutes would have been sufficient. To cover it up, I whipped up a cup of heavy whipping cream for a few seconds in my KA mixer, spread it on top and shaved some chocolate on top.

Tiramisu cheesecake

As for the ingredient alterations, I couldn’t find a 12 oz package of ladyfingers, but the 7 oz package I had was more than enough for the crust. I also used brewed espresso instead of coffee liqueur. I adjusted the amount of coffee needed based on the alterations as well.

Tiramisu Cheesecake
adapted from: allrecipes.com
printable recipe

ingredients:
1 (7 ounce) package ladyfingers 
3 tablespoons butter, melted 
7 tablespoons brewed espresso, divided (more or less according to your taste)
3 (8 ounce) packages cream cheese
1 (8 ounce) container mascarpone cheese
1 cup white sugar
2 eggs
4 tablespoons all-purpose flour
1 (1 ounce) square semisweet chocolate or unsweetened cocoa powder for dusting

directions:
Preheat oven to 350 degrees F (175 degrees C). Place a pan of water on the bottom of oven.

Crush the package of ladyfingers to fine crumbs (I used my food processor for this). Mix the melted butter into the crumbs. Moisten with 3 tablespoons of the coffee. Press into an 8 or 9 inch springform pan.

In a large bowl, mix cream cheese, mascarpone, and sugar until very smooth. Add 4 tablespoons coffee, and mix. Add the eggs and the flour; mix SLOWLY until just smooth. The consistency of the mascarpone can vary. If the cheesecake batter is too thick, add a little cream. Do not overmix at this point. Pour batter into crust.

Place pan on middle rack of oven. Bake for 40 to 45 minutes, or until just set. Open oven door, and turn off the heat. Leave cake to cool in oven for 20 minutes. Remove from oven, and let it finish cooling. Refrigerate for at least 3 hours, or overnight. Right before serving, grate the semi-sweet chocolate overtop.

tiramisu_bites

To make bite sized versions:

Preheat oven to 325° F. No water bath is needed for this. Line a mini muffin tin with paper liners.

Prepare crust as directed. Measure 1 tsp of the crust into each cup.

Prepare batter as directed. Using a cookie scoop, measure about 1 TBSP batter into each cup. Lightly tap  the pan on the counter to even out the batter in each cup. I will be filled to the top, but it’s ok.

Bake in preheated oven for 13-15 minutes. Remove from oven, and allow to cool on wire racks for 10 minutes before removing. Use the back of a spoon to pop them out of the cups.

Makes 72 mini bite sized cheesecakes.

Monday, August 17, 2009

Vegan Cheese Pizza with Fresh Tomato Sauce

After work one day, I decided to stroll over to the nearby Whole Foods to pick up some things I wasn’t able to find in my local supermarket (instant yeast being one of them). After I picked that up along with a few pantry staples, I strolled to the dairy section to see if they had changed their selection of vegan cheeses. The last time I looked, they only had lactose free cheeses, but not totally vegan cheeses. The lactose free ones still contained casein and whey proteins from the milk that Gary was sensitive to. This time around, I actually found something that was was totally vegan!

The package on the Vegan Gourmet Cheese from Follow Your Heart boasts that it melts just like real cheese! I was a little skeptical. I didn’t think it would be the same. It was on sale, so I picked up a block of mozzarella flavor and a block of monterey jack.

So, now I had the yeast, I had the cheese, and I had fresh tomatoes that was given to us by Gary’s sister from her garden. What a perfect way to test out the the cheese with a cheese pizza! I also had some basil leaves from the plant I’ve been growing in my Aerogarden. It was due for a pruning, so I clipped off a few leaves. It was the perfect amount to make the tomato sauce.

vegan cheese pizza

I started with the pizza dough. I used the pizza crust recipe from King Arthur Flour. The only difference I made was subbing half the flour for whole wheat flour. I messed up on my part during the 2nd rising time. I didn’t realize I had to roll it out and then let it rise. I let it rise before rolling it out. I let it pre-bake at 475° for 8 minutes as instructed plus another 15 minutes for the sauce and cheese, and the result was a very crispy crust that still tasted great. I still have half the dough in the freezer, so I know better for next time.

After the initial pre-bake, I topped it off with a fresh tomato basil sauce (recipe below) and then 1 cup of the shredded mozzarella vegan cheese. I shredded the whole thing and realized it was a lot. I was only able to use half of the 10 oz block. I froze the rest for later. I might end up using it for a casserole or something next.

Gary though this pizza tasted great. We both thought it could never replace real cheese pizza, but if you can’t have it, this is a great alternative. I won’t be buying it all the time, because it can get expensive for a small block of cheese. What it had in common with real cheese pizza? I burned the roof of my mouth just the same!

Tomato Basil Pizza Sauce
adapted from: recipezaar.com
printable recipe

ingredients:
1 tablespoon olive oil
2 cloves garlic, minced
2 cups diced peeled fresh tomatoes (or one 14.5 oz can diced tomatoes)
1/4 teaspoon salt
1/8 teaspoon pepper, freshly ground
2 tablespoons fresh basil, coarsely chopped or 2 teaspoon dried basil

directions:
Heat oil in medium saucepan over a medium heat until hot.

Add garlic; cook 30 seconds or until fragrant.

Stir in diced tomatoes, salt and pepper and cook for 8-10 minutes or until slightly thickened, stirring and mashing tomatoes with potato masher until crushed. I used an immersion blender after about 10 minutes and whizzed on low a few times, leaving the sauce slightly chunky.

Stir in basil.

Place in small bowl; cool to room temperature This sauce may be made up to 3 days ahead and refrigerated or up to 2 months ahead and frozen.

Thursday, April 23, 2009

Ground Turkey and Zucchini Pasta

This is one of the staples and quick dishes that we like to make when we’re pressed for time. Before I started exploring different recipes, we had a pasta night at least once a week. It was something simple and easy that even Gary could make. It was great for when I had to work late or when we just didn’t feel like cooking.

I had some zucchini left over, so I added that into the pasta. I don’t think I’ve ever made anything with zucchini before. I don’t think it tastes like much though. I guess that’s why it’s used in brownies and bread.

ground turkey pasta

Ground Turkey and Zucchini Pasta

Ingredients:
olive oil
1/2 medium onion, chopped
2 garlic cloves, minced
1/2 lb ground turkey
1 zucchini, peeled, cut in half lengthwise and thinly sliced
1 lb whole wheat pasta
salt & pepper to taste
1 jar spaghetti sauce (or homemade)

Directions:
1. In a big pot of water, boil the pasta in salted water as directed on the package. Drain the pasta.

2. Meanwhile, heat up a pan on medium high heat. Add olive oil, onion, garlic and zucchini. Sauté until onion is clear, about 5 minutes.

3. Add ground turkey and brown until cooked thoroughly. Add s&p to taste. Add the sauce, and bring to a boil. Simmer for 10 minutes. Remove from heat and mix in the pasta. Plate and serve.

Makes enough for 2 plus leftovers (based on what Gary eats!)

Tuesday, April 21, 2009

Vegan Eggplant and Spinach Lasagna

One of the dishes I used to make all the time with dairy was lasagna. Gary would be able to eat probably half the pan in one sitting. His portions have gotten better now. He can still almost eat half the pan, but he can’t have the dairy anymore. When I saw this eggplant spinach lasagna, I knew I had to try it, especially since I had all the ingredients on hand.

This turned out great. Using tofu instead of ricotta makes this dish lighter and much healthier than a lasagna with meat and cheese. It almost makes it ok that Gary eats half the pan…*almost*.

vegan lasagna

Vegan Eggplant and Spinach Lasagna
Adapted from: Go Dairy Free

Ingredients:
12 ounces lasagna noodles (9 noodles. I used the leftovers from previous boxes of noodles.)
2 tablespoons olive oil
1 medium-size eggplant, peeled and chopped (I used 2 Chinese eggplant)
3 cups tomato sauce, homemade or store-bought (I used the whole can of 26oz Hunts tomato sauce)
2 16-oz packages firm tofu, drained and crumbled (I used 2 packages of Mori Nu firm tofu – 12.3 oz each)
1 10-oz package frozen chopped spinach, cooked according to package directions and well drained (I used frozen leaf spinach)
Salt and freshly ground black pepper
1/2 cup shredded vegan mozzarella cheese (optional)

Directions: 
1. Preheat the oven to 350° F. Cook the lasagna noodles in a large pot of salted boiling water, stirring occasionally, until al dente, about 10 minutes. Drain the noodles and spread out on a work surface to keep them from sticking together. (I found it helpful to rinse with cold water, so it’s easier to handle. Place 3 noodles on a paper towel, layer with another paper towel, repeat to separate the noodles. You can also use a clean kitchen towel.)

2. Heat the olive oil in a large skillet over medium heat. Add the eggplant and cook, stirring occasionally, until tender, about 10 minutes. Stir in the tomato sauce and set aside.

3. In a large bowl, combine the tofu and the spinach, blending well. Season with salt and pepper to taste. Set aside.

4. Spread a thin layer of the sauce over the bottom of a 9 x 13-inch baking dish. Add a layer of noodles and top with half of the tofu mixture, spreading it out evenly. Top with another layer of noodles, a layer of sauce, and the remaining tofu mixture. Finish with a layer of noodles and the remaining sauce.

5. Bake for 30 minutes. Remove from the oven and sprinkle with the vegan cheese, if using. Continue to bake until hot and bubbly, about 15 minutes more. Let rest for 10 to 15 minutes before serving.

eggplant lasagna

I didn’t use the cheese. I covered and baked uninterrupted for about 42 minutes. This was a great alternative to meat and cheese lasagnas.

Wednesday, April 15, 2009

Shrimp Scampi

When our diet consists of chicken, chicken, and more chicken (ugh!), there’s a limit to my creativity. Once in a while we’ll have beef, we don’t eat pork, so this limits our diet somewhat. We were in a rut, so we decide to have some shrimp instead. I’ve had shrimp scampi in the back of my mind for a while, and this recipe was pretty easy and quick.

I (meaning Gary) messed up while making this. I don’t think it altered the flavor too much though. I asked Gary how much butter I needed, and he told me 4 Tbsp. So, instead of dividing up the 4 Tbsp into 2 sections, I ended up sautéing the shrimp in the butter, then adding only the 4 Tbsp olive oil only when it called for butter and olive oil again.

This was a pretty quick and tasty meal. I think the hardest part of the whole thing was peeling the shrimp.

shrimp scampi

 Shrimp Scampi
Adapted from: Tyler Florence/Food Network

Ingredients:
1 pound linguini (I used thin spaghetti)
4 tablespoons butter, divided (I used margarine)
4 tablespoons extra virgin olive oil, divided, plus more for drizzling
1 large shallot, finely diced (I used 1 tsp dried)
5 cloves garlic, sliced
Pinch red pepper flakes, optional
20 large shrimp, about 1 pound, peeled and deveined, tail on
Kosher salt and freshly ground black pepper
1/2 cup dry white wine
1 lemon, juiced
1/4 cup finely chopped parsley leaves (I used about a Tbsp dried)

Directions:

For the pasta, put a large pot of water on the stove to boil. When it has come to the boil, add a couple of tablespoons of salt and the linguini. Stir to make sure the pasta separates; cover. When the water returns to a boil, cook for about 6 to 8 minutes or until the pasta is not quite done. Drain the pasta reserving 1 cup of water.

Meanwhile, in a large skillet, melt 2 tablespoons butter in 2 tablespoons olive oil over medium-high heat.

Sauté the shallots, garlic, and red pepper flakes (if using) until the shallots are translucent, about 3 to 4 minutes.

Season the shrimp with salt and pepper; add them to the pan and cook until they have turned pink, about 2 to 3 minutes. Remove the shrimp from the pan; set aside and keep warm.

Add wine and lemon juice and bring to a boil.

Add 2 tablespoons butter and 2 tablespoons oil. When the butter has melted, return the shrimp to the pan along with the parsley and cooked pasta and reserved pasta water.

Stir well and season with salt and pepper. Drizzle over a bit more olive oil and serve immediately.

Sunday, March 15, 2009

Highlights of a Dinner Party

Our friend Jason will be leaving for culinary school in Italy next week. He came over to join me in the kitchen to cook for our friends. Here’s some highlights of what we made:

mango guacMango Guacamole
(made by Jason)

4 avocados
1 mango, cubed
cilantro
1 red onion, finely diced
lime juice
salt to taste

I think those were all the ingredients. I liked this even though I’m not a huge fan of mangos.


spinach artichoke dip Spinach Artichoke Dip
click here for link to post


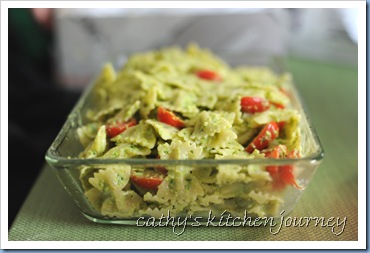
bowtie pasta Bowtie Pasta with Asparagus Pesto
(made by Jason)

Sorry, I don’t know what the ingredients are. It was very tasty though.

The leftover pesto also made a great dip.


mac and cheeseMac and Cheese
(made by Jason)

Again, I don’t know what’s in it. All I know is that he added lots of cheese!


beef stew

Beef Stew
click here for link to post


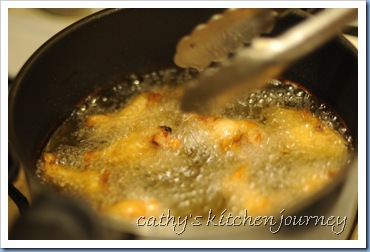
fried chicken wingsFried Chicken Wings
(made by Jason)

Season wings with salt and pepper. Fry in about 2 inches of oil.

Hot sauce (optional):
Add melted butter and hot sauce in a zip top bag. Add chicken and toss to coat.

I have a deep fryer, however when I opened the box, the cord was missing. It was left at my parent’s place. We had to make do with the pot on the oven.


linguine and clam sauce

Linguine in Clam Sauce
(made by Jason)

1 lb of linguine
2 15 oz cans of clams with juice
olive oil
red pepper flakes
salt and pepper to taste

Prepare pasta as directed. Transfer to a pan. Add 2 cans clams with juice. Toss to coat. Add seasonings and olive oil to taste.
Jason, let me know if I forgot anything!


carrot cake cupcakes Carrot Cake Cupcakes
(made by me)

I made these the night before using an existing recipe. I let it cool overnight and let my guests have fun frosting their own designs. Some of them got a little carried away, so I can’t show those ;).

To make this, pour a scant 1/4 cup of batter into cupcake liners (about 3/4 full). Bake for 20-25 minutes or until a toothpick inserted in the center comes out clean.


brownies

Espresso Chip Walnut Brownies
click here for link to post


Other dishes that were made but were camera shy:
Ragu – Homemade meat sauce (made by Jason)

Thanks to Allen for the photos!

Thanks to everyone who came over to eat!

Thanks to Jason for coming over and showing me new techniques. I’ll definitely work on my knife skills!

Can’t wait until next time!

Sunday, February 22, 2009

Baked Turkey Meatballs

turkey meatballs

For a long time, I’ve only used one recipe for meatballs. It was from Kraft. It wasn’t until I saw Alton Brown’s recipe that I decided I need to step away from the extremely easy recipe to something with more flavor. Don’t get me wrong, it’s a great basic recipe. However, I didn’t want to compromise the flavor of the meatballs since I was not using cheese, so I used AB’s recipe.

I saw Alton Brown’s recipe and thought I should try it. However, he used ingredients that I didn’t have on hand at the moment, so I improvised. I also tried to keep this dairy free by omitting the parmesan cheese that was added. Although I started off with the Kraft recipe in mind, I think the result was more of a mish mosh of both recipes. End result was a great tasting meatball.


Baked Turkey Meatballs
made by cathy's kitchen journey
inspired by Alton Brown/Food Network and Kraft


ingredients:
  • 1 lb ground turkey
  • 1 egg, lightly beaten
  • 1/4 cup panko or plain bread crumbs
  • 1/2 tsp salt
  • 1 tsp dried oregano
  • 1 tsp dried basil
  • 1 1/2 tsp dried parsley
  • 1 tsp garlic powder
  • cooking spray

directions:
  1. Preheat oven to 400° F.
  2. In a bowl, combine all ingredients, except for the cooking spray.
  3. Line a baking sheet with foil, spray with cooking spray.
  4. Shape and roll the meatballs into balls about 1.5" in diameter. Place on baking sheet and bake in preheated oven for 20-25 minutes, or until fully cooked through.
Yield: 15 meatballs


Pin It

Sunday, January 4, 2009

Chicken and Spinach Pizza

Adapted from: Allrecipes.com
Made by: Cathy

I've been meaning to make pizza for a while now. I was a little intimidated at first because I haven’t had much experience making yeast bread. This was one of the easier recipes I've tried though. There was minimal hands on time, more waiting time than anything. The crust was nice and crispy with a chewy center. The original recipe probably made a really large pizza, or 2 smaller ones. It was just the 2 of us, so I halved the recipe.

This was a great way to use up my leftover chicken from the night before.

What’s funny is that first thing that Gary said after he took a bite was “Mmm, this taste like real pizza!” Um…I think that was the point!

chicken spinach pizza

Ingredients:
For the crust:
1 1/8 teaspoons active dry yeast
1/4 teaspoon brown sugar
3/4 cups warm water (110 degrees F/45 degrees C)
1/2 teaspoon salt
1 tablespoons olive oil
2 cups all-purpose flour

1 tablespoon olive oil
1 teaspoon garlic powder
1 teaspoon onion powder
cornmeal for dusting

For the topping:
1 cup pizza sauce (I used jarred pasta sauce)
1 cup low moisture shredded mozzarella cheese (or more if desired)
1 cup cooked chopped chicken
1 10 oz package frozen spinach, thawed and drained

Directions:
1. In a large bowl, dissolve the yeast and brown sugar in the water, and let sit for 10 minutes.

2. Stir the salt and 1 tablespoon of oil into the yeast solution. Mix in 1 cup of the flour.

3. Turn dough out onto a clean, well floured surface, and knead in more flour until the dough is no longer sticky. If using the dough hook of a mixer, gradually pour in the rest of the flour as the mixer is running on low speed. Place the dough into a well oiled bowl, and cover with a cloth. (I used saran wrap and a paper towel. Let the dough rise until double; this should take about 1 hour. Punch down the dough, and form a tight ball. Allow the dough to relax for a minute before rolling out.

4. While the dough is rising, preheat oven with the pizza stone inside to 425° F (220° C). If you are baking the dough on a pizza stone, you may place your toppings on the dough, and bake immediately. If you are baking your pizza in a pan, lightly oil the pan, and let the dough rise for 15 or 20 minutes before topping and baking it.

5. Dust parchment paper with cornmeal. Roll out your dough to about 12" in diameter. Mix together the remaining oil, garlic powder, and onion powder. Brush the oil onto the crust. Pour the pizza sauce in the middle and spread in a circle with the ladle. Layer half the spinach on the crust. Layer half the chicken, then remaining spinach and chicken.

6. Transfer the pizza to the baking stone along with the parchment paper. Bake pizza in preheated oven, until the cheese and crust are golden brown, about 15 to 20 minutes.

slice

The pizza was great for my first time making pizza. Next time, I will probably add some Italian seasoning to the crust. I meant to do that too, but I forgot. I can’t wait to try different toppings.

Tuesday, November 25, 2008

Ladyfingers

Adapted from: All Recipes
Made by: Cathy

My sister was making tiramisu for Thanksgiving, so I told her I had a recipe for ladyfingers and I could make it for her. They're pretty hard to find in the stores, so might as well make something from scratch that tastes better than store bought.

The original recipe was for 48 servings, but it has all weird measurements for the ingredients. I changed it to 36 servings and it worked perfectly. I didn't get 36 cookies though, I only got 24. I guess I made them a little bigger and there was some batter left in the piping bag.

Ingredients:
3 eggs, separated
1/2 cup white sugar
2/3 cup all-purpose flour
1/2 teaspoon baking powder


Directions:
1. Preheat oven to 400 degrees F (205 degrees C). Line two 17 x 12 inch baking sheets with baking parchment. Fit large pastry bag with a plain 1/2 inch round tube.
2. Place egg whites in bowl and beat on high until soft peaks start to form. Slowly add 2 tablespoons of the sugar and continue beating until stiff and glossy. In another bowl beat egg yolks and remaining sugar. Whip until thick and very pale in color.
3. Sift flour and baking powder together on a sheet of wax paper. Fold half the egg whites into the egg yolk mixture. Fold in flour, and then add the remaining egg whites.


Transfer mixture to pastry bag and pipe out onto prepared baking sheet. Bake 8 minutes.


I made 2 batches. The first batch I made was only 24 cookies. They were also a little flat:


So, I added more baking powder for the second batch. I also whipped the egg whites a little longer, and didn't pipe the batter. I spooned the mixture onto silicone sheets.


Make sure they're totally cooled before peeling off the sheets. The cookies are fairly sticky. Although the cookies didn't look like fingers at all, the flavor was very good.