Showing posts with label seasonal - summer. Show all posts

Friday, July 8, 2011

Key Lime Bars

For the July 4 holiday, I was stumped when I was deciding on a dessert. I saw these and wanted to make it, but it wasn't dairy free, thus me making the brownies. However, I really wanted to make these since they looked so good, so I ended up making both.

key lime bars

I'm glad I made these, because they turned out beautifully. I'm not really a heavy dessert person, so these were still light from the citrus even though there was so much butter and eggs. These were a hit at the bbq as well, and I heard it was great with vanilla ice cream!

Also, I love key lime pie, so I thought key lime juice would be great instead of lemon. Since I'm in NY, key limes are hard to get by. I used some bottled juice I picked up from Fairway, and it worked wonderfully.


Key Lime Bars
adapted from: allrecipes.com via I was Born to Cook

ingredients:
crust:
1 cup butter, softened
1/2 cup white sugar
2 cups all-purpose flour

batter:
4 large eggs
1 1/2 cups white sugar
1/4 cup all-purpose flour
1/4 cup key lime juice

directions:
Preheat oven to 350° F (175° C).

In a medium bowl, cream the butter and sugar. Mix in 2 cups of flour. Press into the bottom of an ungreased 9x13 inch pan.

Bake for 15 to 20 minutes in the preheated oven, or until firm and golden. In another bowl, whisk together the remaining 1 1/2 cups sugar and 1/4 cup flour. Whisk in the eggs and lime juice. Reserve 1 cup of batter for dyeing (eyeball it). This is totally optional. You can pour all the batter over the crust without the marbling effect.

Pour batter over the baked crust.

Dip a fork or small whisk into green gel food coloring or add a few drops of liquid food coloring. Whisk into the reserved batter. Pour over the pan to create lines in the middle (it's ok if it's messy). Using a toothpick, drag through the batter to create a marbled look.

Bake for an additional 20 minutes in the preheated oven.

Remove from oven and let cool completely before cutting. The bars will firm up as they cool.

Makes 24 squares.

Monday, December 14, 2009

Oreo Cheesecake Ice Cream

I had cream cheese…a lot of cream cheese! My sister bought a whole 48 oz package of cream cheese from Costco. She opened it, then used a tiny bit. The problem with that is the way this cream cheese was packaged. It was a whole giant brick…a 48 oz brick that had to be used up once it was opened. GREAT! So I had to come up with ideas to use it up.

I was reminded that the Oreo truffles (that everybody and their mom has made) used up some. However, I didn’t have a whole package of Oreos. You see, whenever we get a bag, some of them never make it home. I knew we were going to use some for our cookie baking adventure, but I didn’t think it would be enough. I ended up starting a batch of cheesecake ice cream since I liked it so much last time. Then, while looking at The Ultimate Ice Cream Book, there was a recipe for Oreo cheesecake ice cream. Of course! Why didn’t I think of that earlier?

Basically, the Oreo version was an adaptation of the regular cheesecake ice cream. The only difference was the omission of the lemon zest and replacing the graham crackers with Oreos. Geez, if it was just that easy, I could do that with the other recipe!

So that’s exactly what I did! For this version, I omitted the lemon zest and lemon juice from the original and replace the graham crackers with 8  crumbled Oreo cookies.

oreocheesecakeicecream

Oreo Cheesecake Ice Cream
adapted from: America’s Most Wanted Recipes
printable recipe

ingredients:
2 cups heavy cream, divided
1 1/4 cups sugar
2 eggs, beaten
12 oz cream cheese (1 1/2 packages), softened
1 tsp vanilla extract
8 Oreo cookies, coarsely crumbled

directions:
In a large bowl, beat softened cream cheese until smooth.

In a saucepan, combine 1 1/2 cups of cream, sugar and eggs. Cook and stir on medium heat until it comes to a boil.

Slowly beat in the hot cream mixture into the cream cheese until combined. Use a whisk to fully mix everything together if needed.

Cover the bowl and refrigerate until mixture is cool. I left it in the fridge for about 24 hours.

After chilling, add in remaining cream and vanilla extract. Freeze in ice cream maker per the manufacturer’s instructions.

Fold in Oreo cookie crumbs. Pour into a freezer safe container and let set for 4 hours before serving.

Monday, September 14, 2009

Cheesecake Ice Cream

Have you ever ordered something from a restaurant and thought to yourself, hmm…I would like to make this at home. I know I have. Especially if I liked it, but don’t want to pay the hefty price, as well as saving a few calories.

I recently saw an offer for a new copycat cookbook and I jumped at the chance to get it. Ron Douglas has tons of recipes in this book and on his website for many copycat recipes from many chain restaurants.

America's Most Wanted Recipes

As I glanced through the book, I realized that most of the recipes in the book were things I wouldn’t normally order from those restaurants. Nor were the restaurants anywhere near me.

You see, where I live, there are plenty of restaurants, but not most of the chain restaurants that were mentioned in the book.

I did see a recipe for a cheesecake ice cream originally from Baskin Robbins. Just my luck! There are 2 close by! There used to be one right around the corner from me, but not anymore…the whole thing became a Dunkin Donuts.

I started making the batter, and realized I didn’t have enough heavy cream as the recipe originally stated. It called for 2.5 cups cream, but I only had 2 cups. I found that as an odd amount to add into the recipe, because that would either leave you with lots of cream left, or not have enough if you bought a smaller container. Since I didn’t want any leftovers, I just used the 2 cups of cream. I also used medium eggs since I reduced the amount of cream, but it might not make a difference using large eggs.

When the ice cream maker finished churning, I ended up licking up the excess and I was in love! It tasted so good! I couldn’t wait to try the final results after it froze some more in the freezer. Yes, I know it isn’t exactly as the recipe stated, but why not make it better than the real thing instead of just like it?

Meanwhile, I tried the scoop I bought from Baskin Robbins. I wasn’t too impressed. I thought the ratio was a little off. It tasted more like milk than cream cheese. I was starting to think that my little adaptation was even better than the original. It looked like it was the same color and consistency as my little homemade batch, but the tasted was different.

baskin robbins cheesecake icecream

Once my own batch was ready, I couldn’t wait to try it! It was awesome! Not exactly the same recipe as instructed, but tasted even better than store bought. It was a little tarter because different ratio ingredients, and a whole lot better.

I brought some over for my sister to try, and she thought the store bought ones had little bits of cheesecake in it. I thought it was just bigger chunks of graham cracker. She liked the consistency of the store bought one better, but the tastes of the homemade version. Next time I will make courser crumbles of the graham crackers, and add more as well.

cheesecake ice cream 

Cheesecake Ice Cream
adapted from: America’s Most Wanted Recipes
printable recipe

ingredients:
2 cups heavy cream, divided
1 1/4 cups sugar
2 eggs, beaten (I used medium eggs, but using large shouldn’t affect this)
12 oz cream cheese (1 1/2 packages), softened
1/2 tsp finely grated lemon zest
1 scant TBSP lemon juice (about half a lemon)
1 tsp vanilla extract
3 graham crackers, crumbled into chunky bits (I would add more next time)

directions:
In a large bowl, beat softened cream cheese until smooth.

In a saucepan, combine 1 1/2 cups of cream, sugar and eggs. Cook and stir on medium heat until it comes to a boil.

Slowly beat in the hot cream mixture into the cream cheese until combined. Use a whisk to fully mix everything together if needed.

Cover the bowl and refrigerate until mixture is cool. I left it in the fridge for about 24 hours.

After chilling, add in remaining cream, lemon juice, zest, and vanilla extract. Freeze in ice cream maker per the manufacturer’s instructions.

Fold in graham cracker crumbs. Pour into a freezer safe container and let set for 4 hours before serving.

Tuesday, September 8, 2009

Blueberry Buckle

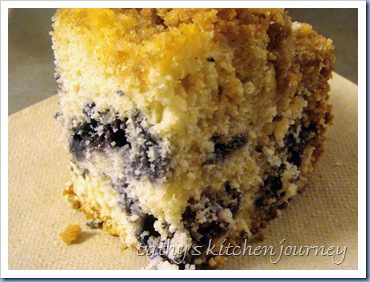
Over labor day weekend, Gary, my sister, and I all visited some friends in Quincy, MA. They invited us to a lobster bake/bbq. I asked around about what desserts to bring to a lobster bake, and most people said that they always have blueberry cake or blueberry pie after eating lobster. Well, why break tradition if that’s the case.

I found this recipe using ingredients that I could adapt to dairy free cooking. I thought it was a great dessert. The cake itself was not too sweet and it was moist as well. I thought the crumb top was a bit too sweet for my tastes, but Gary loved it.

The changes I made was doubling the recipe, using soy milk, using margarine instead of butter and subbing half the sugar in topping for brown sugar. I thought it was suitable as a coffee cake as well. It doesn’t have to be just for dessert.

blueberry buckle cake

Blueberry Buckle
adapted from: allrecipes.com (this recipe below has already been doubled for a 9x13 pan)

ingredients:
cake:
1-1/2 cups white sugar
1/2 cup shortening
2 eggs
1 cup milk (I used soy)
4 cups all-purpose flour
1 tablespoon and 1 teaspoon baking powder
1 teaspoon salt
4 cups fresh blueberries

topping:
1/2 cup white sugar
1/2 cup brown sugar
2/3 cup all-purpose flour
1 teaspoon ground cinnamon
1/2 cup butter, softened (I used margarine)

directions:
Preheat oven to 375° F (190° C). Grease one 9x13 inch pan.

For the cake:
In a separate bowl mix together flour, baking powder, and salt.

In your stand mixer, cream together sugar, shortening, and egg.

Add dry ingredients to wet ingredients, alternating with milk. Stir in blueberries. Pour into prepared pan.

To make topping:

In a small bowl, combine sugar, flour, cinnamon, and butter or margarine. Beat together until it resembles coarse crumbs. Sprinkle evenly over cake batter.

Bake at 375° F (190° C) for 50-60 minutes or when a toothpick inserted in the center comes out clean.

Wednesday, September 2, 2009

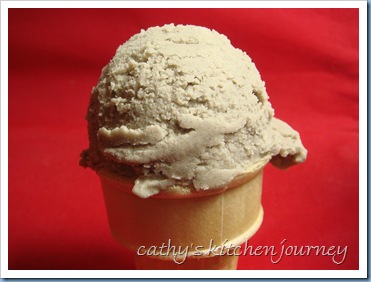
Avocado Ice Cream

I don’t know if you’re weirded out by my choices of ice cream flavors yet, but there are more odd ones to come!

I was lucky enough to get a copy of The Vegan Scoop once it was available at my library. There were plenty of good flavors to try out, but one that I’ve noticed before was the avocado flavor. When I saw it in the William-Sonoma book, I was interested. Then I saw it on Good Eats, when Alton Brown made all sorts of stuff with avocados (including buttercream frosting).

I was talking to my bro and sis about  my latest ice cream post, and  how I can make make weird flavors like that, and others that include basil, wasabi, and avocado. They told they can get wasabi and black sesame ice cream easily. Sure, you’re in NY, in the middle of Chinatown, within walking distance of the Chinatown Ice Cream Factory…of course you would be able get all that. Not everybody can though. Especially if I want to make it dairy free! And to be honest, I wouldn’t want to pay a couple of dollars for a scoop, when I can get a whole pint for that price.

So, here’s my latest venture in ice cream. I’ll soon get to the “normal” flavors, but for now, I’m having fun with the fun summer fruits. I’m not sure how I feel about this ice cream yet. It tastes like…well…it tastes like avocado! I usually don’t eat it plain. It’s always either in guacamole, sushi, or a salad. So eating it plain on a spoon is still new to me. Gary’s dad would love it though. He eats avocados plain as is.

I didn’t have soy creamer as the recipe states, so I pureed some silken tofu for this. Hey, soy milk and tofu come from the same source, so of course it would work!

avocado ice cream

Avocado Ice Cream
adapted from: The Vegan Scoop
printable recipe

ingredients:
1 package Mori-nu silken soft tofu, blended
3 ripe hass avocados
1/2 cup sugar
1 TBSP fresh lime juice
1 1/2 cup soy milk

directions:
In a blender, blend the tofu until smooth. Add in avocado meat, sugar, and lime juice. Blend until smooth and combined. Mixture will be thick.

Transfer avocado mixture to a large bowl. Add a bit of soy milk into the blender and mix again to get the remaining puree out if needed. Add soy milk to the bowl. Whisk the mixture until fully combined.

Transfer the mixture to your ice cream maker and freeze per your ice cream maker’s instructions.

Friday, August 21, 2009

Black Sesame Ice Cream

Gary and I usually don’t agree on the same flavors of ice cream. When I ask him for his suggestion on the next ice cream flavor to make, he usually asks me to make a sorbet instead. Whoa, it’s like the Twilight Zone! Years ago, he was all into the ice cream, eating a whole quart in one sitting. Me, on the other hand, would have a fruit bar or popsicle in my hand. I was always lazy to scoop ice cream. I loved how convenient popsicles were because I could just grab it out of the freezer and have instant gratification. Ice cream on the other hand had to be scooped, and sometimes it would be hard to scoop, and I had little patience for that. How times have changed since then.

When I asked Gary if he would like black sesame ice cream, his eyes lit up! Black sesame desserts were something we both grew up with. They sell little pouches of instant dessert mixes in the Chinese supermarkets in flavors like black sesame or peanut (both of which we have in the pantry). It brings back memories of my childhood because my mom used to make it for us…however I vaguely remember her grinding up sesame seeds and making it from scratch.

If Gary had said no, he wasn’t interested in that flavor, I would have made it as written. I knew he would have been interested so I had already looked up dairy free alternatives for the ingredients. The recipe came together very nicely. The dairy free sweetened condensed milk actually tasted like the real thing! Gary loves coconut flavor, me not so much. The “half and half” had a hint of coconut flavor without being too overpowering. Gary also said it looked like cement when it was done…LOL!

This recipe is vegan if using the dairy free alternatives.

DSC04294

Black Sesame Ice Cream
inspired by: The Cooking of Joy
printable recipe

ingredients:
1 14 oz can sweetened condensed milk (dairy free version below)
3 1/2 cups half and half (dairy free version below)
2 pouches black sesame instant powder mix

for dairy free sweetened condensed milk, adapted from Go Dairy Free:
combine 3/4 cup white sugar, 1/2 cup water, 1 cup plus 2 TBSP soy milk powder in a nonstick saucepan (otherwise you’ll have a tough time cleaning your pan afterwards) and bring to a boil. Reduce heat and cook until thick, about 15-20 minutes. Pour into a bowl and allow to cool. Milk will thicken more as it cools. Store in refrigerator if not being used immediately.

for dairy free half and half, adapted from Go Dairy Free:
Combine 1 3/4 cup coconut cream to 1 3/4 cup soy milk (1:1 ratio). I used a coconut cream powder mixed with water for the coconut cream.

directions:
Whisk together all ingredients.

Store in fridge to chill.

Freeze in ice cream maker per the manufacturer's instructions.

Monday, August 3, 2009

Healthy Blueberry Orange Muffins

I really need to learn to check my ingredients before I even think about baking anything! I originally found a recipe for zucchini blueberry bread that I was going to turn into muffins. However, I failed to realize my zucchini was no longer any good.

That recipe called for 3 eggs…which of course, I already cracked into my bowl. I had to find a recipe that used up the eggs, stat! Allrecipes.com to the rescue! I ended up finding this recipe for orange blueberry bread that used ingredients I had on hand. However, it called for 2 eggs. I used their handy serving calculator to change it to 18 servings rather than 12.

That however, wasn’t the only change I made. I used half whole wheat flour, subbed applesauce for the margarine, used soy milk, and added flax seed to the mix. I also didn’t use nearly as much orange zest (I gave up after one orange) as the recipe called for, so the orange taste wasn’t as prominent. The result? A low cal healthy(ish) muffin that’s not too sweet, and perfect for breakfast!

blueberry orange muffins

Healthy Blueberry Orange Muffins
loosely adapted from: allrecipes.com
makes 18-24 muffins

Ingredients:
1½ cups all-purpose flour
1½ cups whole wheat flour
¼ cup ground flaxseed
1 cup packed brown sugar
1½ tablespoon baking powder
1½ teaspoon salt
¼ cup plus 2 TBSP apple sauce
3 eggs
2 tablespoons orange zest
¾ cup milk (I used soy)
¾ cup orange juice
1 pint fresh blueberries

Directions:
Preheat oven to 350 degrees F (175 degrees C). Lightly spray the muffin tin (or line with muffin liners).

In a large bowl combine all the ingredients. Beat at low speed just until moistened. Then beat at medium speed for 2 minutes. Fold in the blueberries. Pour batter into muffin tins about ¾ full. I used a cookie scoop for this. It’s about a ¼ cup full.

Bake at 350 degrees F (175 degrees C) for 15-18 minutes or until a toothpick poked into the center comes out clean. Cool in pan for 10 minutes then invert onto a wire rack to cool completely before serving.

I think this tastes best warm. Heat in a microwave for a few seconds before eating. (Or eat it all after it comes out of the oven!) :)

Wednesday, July 29, 2009

Mango Sorbet

I’m not a huge fan of mangoes, however Gary loves it. We first saw mango sorbet at Trader Joes. We bought it, and it was done in a few days. I didn’t have any of course. The flavor doesn’t appeal to me.

A few months ago, I bought a bag of frozen mangoes on sale at the supermarket. I intended to replicate the TJ’s sorbet when I found the right recipe. I saw this recipe and decided to try it. After Gary’s first taste from the spatula, he loved it! He said it’s even better than the TJ’s one. Of course! It’s homemade!

Now, since I didn’t have any of it, I’m just going to have to take his word on it. I only had a small taste, but since I don’t like mangoes, my opinion doesn’t count.

My changes with the recipe are indicated below.

mango sorbet

Mango Sorbet
adapted from: The Ultimate Ice Cream Book

Ingredients:
1 cup sugar
3/4 cup water
2 ripe mangoes, about 1/2 lb each (I used a 1 lb bag of frozen mangoes)
juice of 1 lime (I omitted)
splash of vodka (my addition, optional)

Directions:
Combine the sugar and water in a small saucepan . Stir the mixture until the sugar dissolves completely and the syrup is clear. Remove from the heat and allow to cool to room temperature.

Peel the mangoes and cut as much of the fruit as you can away from the pits. If using the frozen mangoes, allow to thaw while the syrup is coming to room temperature, about 30-45 minutes.

Combine all the ingredients in a blender or food processor. Blend until completely smooth, about 30 seconds. Cover and refrigerate until cold or overnight. (Because I used frozen mangoes and it was slightly frozen, the mixture was cold enough to go directly into the ice cream maker.)

Stir the chilled mixture, then freeze in your ice cream machine according to the manufacturer’s instructions. When finished, the sorbet will be soft but ready to eat. For firmer sorbet, transfer to a freezer save container and freeze at least 2 hours.

Monday, July 20, 2009

Kiwi Sorbet

This past weekend was the the first hot and humid day so far this summer. We haven't had any scorchers lately, but this was the type of weather where you want to lay down, have plenty of cold drinks or just have something cold and refreshing. It was the perfect time to whip out the ice cream maker and use up the kiwis I bought.

I first saw this recipe in The Ultimate Ice Cream Book, and thought it was something I had to make. The original recipe called for lime juice as well to the recipe, but I didn't have any, so I omitted it. Also, as I look at the recipe again, I totally read the recipe wrong! For some odd reason, I thought it said 1/3 cup plus 2 TBSP sugar…so that’s all I added. However. It tasted fine to me! So, it all depends on the ripeness of your kiwi! Mine was super ripe, so it was a lot sweeter. Remember to taste the kiwi to gauge the amount of sugar you use.

Let me tell you, this was so light, tart and refreshing! I love tart fruits and this sorbet is something you can't buy at the supermarket...or at least, I've never seen this flavor in my supermarket.

kiwi sorbet

Kiwi Sorbet
adapted from: The Ultimate Ice Cream Book

Ingredients:
3/4 cup water
3/4 cup plus 2 TBSP sugar (use as little or as much as you need…I used way less than this)
1 1/2 lb kiwi (about 6-8 medium)
1/2 tsp vanilla extract
juice of 1 lime (I omitted)

Directions:
Combine the sugar and water in a small saucepan and over low heat. Stir until the sugar dissolves. Turn up the heat and boil the syrup for 1 minute. Remove from heat and let the syrup cool to room temperature.

Peel the kiwis and cut into quarters. Place the fruit in a blender with the cool syrup, lime juice, and vanilla. Blend on low until the mixture is smooth, about 1 minute. Refrigerate until cold or overnight.

Stir the chilled mixture, then freeze in 1 or 2 batches in your ice cream machine according to the manufacturer’s instructions. When finished, the sorbet will be soft but ready to eat. For firmer sorbet, transfer to a freezer-safe container and freeze at least 2 hours.

Monday, April 6, 2009

Dairy Free Strawberry Ice Cream

This recipe was so easy to make, and it was tasty too! I’ve always liked fruit sorbets and ice creams over chocolate or thick and creamy ice creams. This one is definitely the winner of the homemade non dairy frozen desserts so far! It has a great creamy, easy to scoop texture. It freezes very well and does not crystallize too much.

strawberry ice cream

Dairy Free Strawberry Ice Cream
Adapted from: dairyfreecooking.about.com

Ingredients:
2 cups plain unsweetened soymilk, divided (I used Silk soy creamer)
1 teaspoon xanthan gum
2/3 cup honey
2 cups strawberries, either fresh or frozen (thawed, if frozen)

Directions:
In a blender, combine 1 cup of the soymilk and the xanthan gum, pulsing for about one minute until the mixture is thick. Add the remaining 1 cup soymilk and the honey, blending until combined. Add the strawberries, blend until smooth.

At this point, if you’re using an ice cream maker, freeze per your ice cream maker’s instructions.

If you do not have an ice cream maker, pour the mixture into a flat nonstick metal pan and place it in the freezer for one hour.

After an hour, return the mixture to the blender and process until creamy. Return to the pan and place in the freezer for another hour. Repeat this once more, then return the pan to the freezer for at least 2 hours to overnight before enjoying.

Friday, March 13, 2009

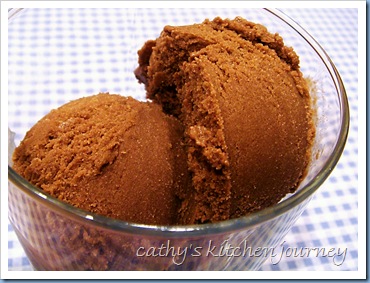
Non-Dairy Chocolate Ice Cream

Gary first tried Turtle Mountain non dairy ice cream made with coconut milk. I wasn’t such a huge fan, but he liked it. What really turned me off was the price at over $5 a pint! I told him that I would research recipes for ice cream and I would make it for him myself. It was tough finding plain chocolate non dairy ice creams. I found a few using tofu, but very few using non dairy milks. I will try the tofu one someday, but I wanted to use up the soy creamer. I finally found this recipe for double chocolate ice cream, but I omitted the chips so it’s plain chocolate. I also used 2 cups non dairy creamer instead of all 4 cups milk.

chocolate ice cream

Dairy Free Chocolate Ice Cream
Adapted from: Washington Post

Ingredients:
2 cups non dairy creamer (or use all milk)
2 cups non dairy milk (I used almond milk)
2 tablespoons arrowroot
½ cup unsweetened cocoa powder
¾ cup sugar
1 tablespoon vanilla extract
½ cup vegan dairy-free chocolate or carob chips (I omitted)

Directions:
1. Combine ¼ cup of the milk and the arrowroot. Blend well and set aside.

2. Place remaining milk and creamer in a saucepan over medium heat. Add cocoa powder and sugar, and bring up to a simmer, stirring to dissolve the sugar. Add arrowroot mixture, stirring constantly until mixture thickens and starts to bubble, about 5 minutes. Do not allow to boil.

3. Remove from heat and add vanilla. Pour into a bowl and chill in an ice bath. Refrigerate until chilled, then freeze in ice cream maker according to manufacturer's directions, add chips during last 5 minutes of freezing.

Makes 1 quart.

This turned out very good. The liquid tasted a bit bitter before it was frozen, but once it was frozen in the freezer, it tasted just like chocolate ice cream. I think the consistency was more like Italian ice than dairy ice cream, but it is pretty close.

Of all the non dairy milks Gary has tried so far, he seems to like the almond milk the best.

Sunday, February 15, 2009

Peanut Butter Banana Ice Cream

Since Gary is now trying to be dairy free, one of the things he misses most of course is ice cream! He found a decadent non-dairy ice cream from Whole Foods that he loved. The downside? Over $5 for a pint! That’s just crazy. I’ve seen many recipes for ice cream out there, so I thought it was time for me to invest in something that would help us save money in the long run…

My new Cuisinart ice cream maker!! SO, for my first recipe I made Peanut Butter Banana ice cream, and it was pretty good. I chose this because I had all the ingredients on hand and didn’t require the thickener other non dairy ice creams needed.

While it was spinning, both Gary and I were watching it spin and work its magic. I walked away and did other stuff and expected Gary to still be there when I got back. He wasn’t there watching anymore, but he did admit he was watching it spin for a little while.

Dairy drinkers can definitely use whole milk and it would be great!

pb banana ice cream

Peanut Butter Banana Ice Cream
Source: A Vegan Ice Cream Paradise

Ingredients:
3 ripe bananas
2 cups non-dairy milk or creamer (for a real treat, use coconut milk!) (I used unsweetened rice milk)
½ cups brown sugar
½ - ¾ cups peanut butter (depending on how much you love peanut butter)
1 tsp vanilla

Directions:
1. Peel bananas and place in a blender. (I used my food processor because that’s what was on my counter). Add non-dairy milk/creamer and puree.

2. Transfer the liquid to a medium-sized sauce pan. Over medium heat, dissolve the brown sugar and peanut butter into the liquid. It will be really thick and creamy at the end!

3. Remove from heat. Add vanilla.

4. Set the ice cream mixture aside to cool. It will get really thick when it’s refrigerated. Freeze according to your ice cream maker’s instructions.