Showing posts with label ethnic - asian. Show all posts

Tuesday, March 13, 2012

Caramelized Baked Chicken Wings


A couple of friends were coming over for lunch and I wanted something easy to make that would also taste phenomenal. I saw this recipe on allrecipes.com and it looked pretty simple. I had all the ingredients, so I decided to make this. This was great for me because it took minimal prep time, and all I had to do was cook the sauce then pop it in the oven. Great for someone like me who wants to sleep late and still want lunch! ;)

As usual I went through some of the comments to see how some people have adapted the recipe. Most of the time, people don't rate honestly on all recipes. They've adapted the recipe significantly then still in turn give the recipe 5 stars. It's kind of unreliable, and I have to take the comments with a grain of salt. Especially when I know my own tastes.

One of the comments mentioned to cook the sauce to thicken it first before adding to the chicken. I decided to do that first, but in the end, my sauce wasn't too thick. Now, looking back at the comments, she also mentioned to add cornstarch. I've adjusted the recipe below to include the cornstarch. Even without the full caramelization of the wings, the flavor turned out great!


Caramelized Baked Chicken Wings
made by cathy's kitchen journey
adapted from allrecipes.com


ingredients:
  • 3 lb (about 20 pieces) chicken wings
  • 2 TBSP olive oil
  • 1/2 cup soy sauce
  • 2 TBSP ketchup
  • 1 cup honey
  • 1 clove garlic, minced
  • 2 TBSP cornstarch
  • salt and pepper to taste
  • minced scallion for garnish (optional)

directions:
  1. Preheat oven to 375° F (190° C).
  2. Mix together the oil, soy sauce, ketchup, honey, garlic, and cornstarch in a small saucepan. Bring the mixture to a boil, then reduce heat and let simmer for 15 minutes.  
  3. Place chicken in a single layer in a 9x13 inch glass baking dish. Season lightly with salt and pepper. Pour the sauce over the chicken to complete cover.
  4. Bake uncovered in the preheated oven for 45 minutes, or until sauce is caramelized.
  5. Transfer to a bowl and drizzle any remaining sauce over the chicken.
Yield: 4 servings


Pin It

Sunday, March 4, 2012

Filipino Grilled Chicken


When I first started documenting my kitchen journey, I never thought I would meet such a great community of food bloggers. I often visit forums and chat with a few online. We follow each other on twitter. We've become friends over the years and we've gotten to know each other, even when most of them are many miles away.

While I've met some in person, I've yet to meet Krystal. She's one of the ladies I've met chatting online. Her and her husband, Eric are having a baby soon, and I delighted when I was asked to make something for her virtual baby shower, hosted by our wonderful Joelen.

Since Krystal is Filipino and her husband is Cuban, we were asked to make something inspired by their heritage. I decided to make this Filipino grilled chicken. I originally wanted to bake this since it wasn't quite bbq weather, which would defeat the purpose of this being grilled chicken. Then I remembered that I had bought a stove top griddle way back when I was still living with my parents! I decided it was time to take it out and take it for a test drive.

This came out very well. Since I used the boneless chicken thighs, they cooked up fast. I only had 3/4 cup vinegar left, so I only used that much. There was still plenty of liquid to marinade the chicken. The sweetness of the sugar and soda cut the vinegar very nicely, and the flavors worked well together. I can't wait til grilling season to try this again!


Filipino Grilled Chicken (Inihaw na manok)
made by cathy's kitchen journey
adapted from The Ivory Hut


ingredients:
  • 1 cup apple cider vinegar
  • 1/2 cup granulated sugar
  • 1/4 cup soy sauce
  • 12 oz lemon-lime soda (such as 7-up, Sprite, or Sierra Mist)
  • 3 bay leaves, torn or crushed
  • 3 garlic cloves, grated
  • 1 TBSP ground black pepper
  • 2 lbs chicken (I used boneless skinless thighs)


directions:
  1. In a bowl, combine all the ingredients except chicken. Whisk until the sugar has dissolved.. Reserve half for basting in a separate container with a lid.
  2. Place the chicken in a plastic zip top bag. Pour the the marinade into the bag. Seal tightly and mix the liquid around to coat the chicken. Place in fridge to marinate for at least 3 hours or overnight.
  3. When ready to grill, take the chicken out of the fridge and let come to room temperature. Remove the chicken from the marinade and place on a plate. Discard marinade.
  4. In a sauce pan, bring the reserved marinade to a boil over medium-high heat until it has reduced to a sticky syrup.
  5. Bring the grill to 350° F or heat on medium heat. Grill the chicken for 10 minutes each side, basting each side with the sticky syrup. [Depending on the size of your chicken, cook time may be longer. My chicken pieces were flat, so they cooked fairly quick on the grill.]
  6. Cook until juices run clear. Take the chicken off the grill and let rest for 5 minutes before serving.
Yield: 6-8 servings


Pin It

Monday, January 2, 2012

Tofu and Broccoli with Peanut Sauce


Happy New Year!

Here's to a new year, and a new you! I don't really make resolutions, but if I had to make one, it would be to eat healthier, less meat, and more whole foods. I've already started doing that, but I will continue to do so this year.

One of the things I've started reading up on and cooking is vegan meals. We've had a few good recipes for breakfast that are vegan, but we don't really have many vegan dinners. This meal was great because not only was it vegan, it was tasty and filling as well!

I made the mistake of using a stainless steel pan for this. I guess I missed the part about using nonstick! The tofu stuck a little and the sauce burned off a little. Next time I make this, I will definitely use a nonstick pan.


Tofu and Broccoli with Peanut Sauce
recipe by cathy's kitchen journey
adapted from Vegan Yum Yum, as seen on Made Just Right


ingredients:
  • 1 block extra firm tofu, pressed, cut into small squares
  • 1 TBSP canola or peanut oil
  • 2 tsp soy sauce
  • 2 tsp mirin
peanut dressing:
  • 1/4 cup peanut butter
  • 1/4 cup water
  • 1 TBSP sugar
  • 1 TBSP soy sauce
  • 1 TBSP seasoned rice vinegar
  • 1 tsp hot chili oil (I omitted)
  • pinch of salt
for serving:
  • steamed broccoli
  • 1 grated carrot
  • cooked rice
  • crushed peanuts (optional)

directions:
  1. Whisk sauce ingredients in a small bowl until smooth (be patient, it’ll look curdle at first then smooth out) and set aside.
  2. Fry tofu in the oil over high heat in a non-stick skillet until browned on both sides. Drain and return to hot pan (turn off the heat). Mix soy sauce and mirin together and pour over tofu, mixing well. It will bubble up and form a light glaze.
  3. Plate rice, add broccoli, tofu, carrot, and crushed peanuts. Drizzle with sauce and serve.
Yield: 2 servings


Pin It

Thursday, January 20, 2011

Vietnamese Coffee Ice Cream

 vietnamese coffee ice cream

Remember when I went to the Vietnamese restaurant when we went to Quincy? That was my first time trying Vietnamese coffee. Since then, I’ve been addicted…well not really, but I came to love it. My usual coffee addition is half and half, sometimes 1 packet of sugar in the raw. When I have extra sweetened condensed milk leftover from recipes like this one, I use it in my coffee, so it’s a win win for me!

As I tasted this ice cream for the first time, it reminded me of the coffee candy I used to eat at my grandmas. When we were kids, my grandma always had a bowl of candy which included the coffee candy, one of my faves!

Like authentic Vietnamese coffee, I brewed the coffee with my french press. If you don’t have one, I highly recommend one. It makes coffee just that much better, and less bitter. I’ve also used it for cold press coffee, which came out wonderfully without any bitterness at all.

This recipe called for just a little over a can of sweetened condensed milk. Although I would use the remaining sweetened condensed milk in future coffee cups, I think I will try this recipe using only one can of sweetened condensed milk. I wasn’t a fan of opening a second can to use about 1/4th of it. I didn’t measure the ingredients by weight. What I did first was pour the coffee into a large measuring cup, then added enough sweetened condensed milk to that to make 3 cups. Then added the half and half and pinch of coffee. Everything was done in the cup until it was time to pour it into the machine to churn.

Vietnamese Coffee Ice Cream
source: The Perfect Scoop

 printable recipe


ingredients:
1 1/2 cups (600 g) sweetened condensed milk
1 1/2 cups (375 ml) brewed espresso (or very strongly brewed coffee)
1/2 cup (125 ml) half and half
big pinch of finely ground dark roast coffee

directions:
Whisk together all the ingredients in a large measuring cup. Cover and chill the mixture in the fridge for a few hours. Pour contents into ice cream maker and freeze per your manufacturer’s instructions.

Makes about 1 quart.

Thursday, November 18, 2010

Korean Style Fried Chicken Wings

fried chicken wings 2

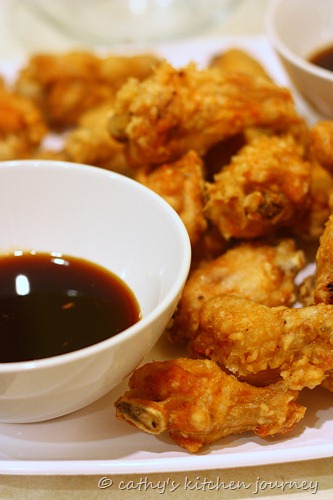
I love fried chicken. That and french fries (or any fried food for that matter) are my weaknesses. I’ve never really fried foods at home because I thought it was  bit tedious to use so much oil to only fry a few things. I saw this recipe and decided to make this for Gary’s family during his parents’ birthday. This was a good opportunity to use the fryer I received as a gift, but never used (although used by others before).

I saw this recipe pop up in Joelen’s blog and knew it was something I had to try. Instead of mixing the sauce with the wings, I had it on the side as a dipping sauce. I wasn’t sure how spicy the sauce would be and little kids were eating it. Surprisingly, it wasn’t spicy at all, and had a pleasant sweet flavor.

I forgot to add scallions in the sauce, but I’m sure it would have added a nice touch. I also added a little bit more garlic and onion powder, since I didn’t think a tsp was quite enough. I did eyeball it so it’s approximate.

Fried Chicken Wings with Korean Dipping Sauce
adapted from: Joelen’s Culinary Adventures originally from Cook’s Illustrated

  printable recipe


ingredients:
2-3 quarts vegetable oil for frying
1 1/2 cups cornstarch, divided
3 1/2 pounds bone in chicken wings
2 tsp garlic powder
2 tsp onion powder
salt & pepper to taste
1 cup water
2 scallions sliced thin on a bias

sauce:
1/2 cup sugar
1/4 cup soy sauce
1/4 cup water
3 garlic cloves, minced
1 tablespoon rice vinegar
1 teaspoon sriracha sauce

directions:
Line 2 rimmed baking sheets with wire racks; set aside.

Measure 2 inches of oil into a large Dutch oven or deep fryer and heat over medium high heat to 350 degrees.

Pat the chicken wings dry with paper towels and place the chicken in a large bowl. Season with garlic powder, onion powder, salt and pepper. Sift 1/2 cup of the cornstarch into bowl. Toss the chicken with tongs to coat thoroughly. Transfer the chicken to the one baking sheet.

Whisk the remaining cup of cornstarch, water, and 1 teaspoon salt together in a large bowl to form a smooth batter. When the oil is hot, finish coating the chicken by adding half of the chicken to the batter and turning to coat. Using tongs, remove the chicken from the batter, 1 piece at a time, allowing any excess batter to drip back back into the bowl. Add to the hot oil.

Fry the chicken, stirring to prevent the pieces from sticking together and adjusting the heat as necessary to maintain an oil temperature of 350 degrees, until the chicken begins to crisp, turns slightly golden. Continue cooking until the chicken turns a darker shade of golden brown to fully cook. Repeat with the remaining half of chicken by battering and frying.

Once fully cooked, transfer all the chicken to a large bowl, drizzle with the sauce and gently toss until evenly coated or serve with the sauce on the side. Transfer the chicken to a serving platter, sprinkle with scallions and serve.

to make the sauce:
Combine all the above ingredients together in a small sauce pan over medium heat until syrupy, about 5 minutes. Let cool to room temperature before service. Alternately you can prepare this in a microwaveable bowl and microwave for about 5 minutes. Remove from the microwave and set aside to thicken.

fried chicken wings

Monday, October 12, 2009

Crockpot Vietnamese Chicken

Sometimes, when I don’t make something for a while, Gary requests it. Like a crockpot meal for one. He actually said, and I quote, “We haven’t had a crockpot meal for a while. Why don’t you make something”. Well, if it were only that easy. He remember an orange peanut chicken recipe that I made probably 2 or 3 years ago. It was super simple crockpot dish that I found on Yahoo one day, tried it, and it was delish. It was super simple because it required about 5 minutes time, and only 5 ingredients…but I couldn’t remember that last ingredient. Of course, I couldn’t find that recipe again anywhere, but while typing this post, I decided to search Yahoo again, and of course I found it! I don’t know why I didn’t think of searching Yahoo first…duh!

Well, since I didn’t find it in time to make that recipe, I decided to look for something else that would involve chicken. This recipe for Vietnamese chicken was so easy and flavorful. I’ve been meaning to make it for a while now, but I forgot about it because I never had fish sauce on hand. I also hadn’t defrosted any chicken, so this was the perfect recipe to use up the chicken in my freezer.

The original recipe called for adding foil balls on the bottom of the crock to make it similar to roasting the chicken in an oven. I didn’t add the foil, so I let the chicken cook in the marinade.

DSC04514copy

Crockpot Vietnamese Chicken
adapted from: A Year of CrockPotting
printable recipe

ingredients:
4-6 chicken thighs (I used 2 frozen boneless skinless chicken breasts)
1 1/2 TBSP soy sauce
1 1/2 TBSP fish sauce
1 1/2 tsp white sugar
1/2 tsp ground black pepper
4 cloves chopped garlic
1 TBSP canola oil

directions:
Place chicken on the bottom of the crockpot. In a small bowl, combine the remaining ingredients and mix to combine. Pour sauce over the chicken.

Cook on low for 6 hours or 3-4 hours on high. I checked mine at 5 1/2 hours on low, and it was fully cooked already.

Serve over rice.

Edited 12/7/09: I made this again with 2 leg quarters and it was a lot better. The meat was juicy and just fell off the bone.