Thursday, November 18, 2010

Korean Style Fried Chicken Wings

fried chicken wings 2

I love fried chicken. That and french fries (or any fried food for that matter) are my weaknesses. I’ve never really fried foods at home because I thought it was  bit tedious to use so much oil to only fry a few things. I saw this recipe and decided to make this for Gary’s family during his parents’ birthday. This was a good opportunity to use the fryer I received as a gift, but never used (although used by others before).

I saw this recipe pop up in Joelen’s blog and knew it was something I had to try. Instead of mixing the sauce with the wings, I had it on the side as a dipping sauce. I wasn’t sure how spicy the sauce would be and little kids were eating it. Surprisingly, it wasn’t spicy at all, and had a pleasant sweet flavor.

I forgot to add scallions in the sauce, but I’m sure it would have added a nice touch. I also added a little bit more garlic and onion powder, since I didn’t think a tsp was quite enough. I did eyeball it so it’s approximate.

Fried Chicken Wings with Korean Dipping Sauce
adapted from: Joelen’s Culinary Adventures originally from Cook’s Illustrated

  printable recipe


ingredients:
2-3 quarts vegetable oil for frying
1 1/2 cups cornstarch, divided
3 1/2 pounds bone in chicken wings
2 tsp garlic powder
2 tsp onion powder
salt & pepper to taste
1 cup water
2 scallions sliced thin on a bias

sauce:
1/2 cup sugar
1/4 cup soy sauce
1/4 cup water
3 garlic cloves, minced
1 tablespoon rice vinegar
1 teaspoon sriracha sauce

directions:
Line 2 rimmed baking sheets with wire racks; set aside.

Measure 2 inches of oil into a large Dutch oven or deep fryer and heat over medium high heat to 350 degrees.

Pat the chicken wings dry with paper towels and place the chicken in a large bowl. Season with garlic powder, onion powder, salt and pepper. Sift 1/2 cup of the cornstarch into bowl. Toss the chicken with tongs to coat thoroughly. Transfer the chicken to the one baking sheet.

Whisk the remaining cup of cornstarch, water, and 1 teaspoon salt together in a large bowl to form a smooth batter. When the oil is hot, finish coating the chicken by adding half of the chicken to the batter and turning to coat. Using tongs, remove the chicken from the batter, 1 piece at a time, allowing any excess batter to drip back back into the bowl. Add to the hot oil.

Fry the chicken, stirring to prevent the pieces from sticking together and adjusting the heat as necessary to maintain an oil temperature of 350 degrees, until the chicken begins to crisp, turns slightly golden. Continue cooking until the chicken turns a darker shade of golden brown to fully cook. Repeat with the remaining half of chicken by battering and frying.

Once fully cooked, transfer all the chicken to a large bowl, drizzle with the sauce and gently toss until evenly coated or serve with the sauce on the side. Transfer the chicken to a serving platter, sprinkle with scallions and serve.

to make the sauce:
Combine all the above ingredients together in a small sauce pan over medium heat until syrupy, about 5 minutes. Let cool to room temperature before service. Alternately you can prepare this in a microwaveable bowl and microwave for about 5 minutes. Remove from the microwave and set aside to thicken.
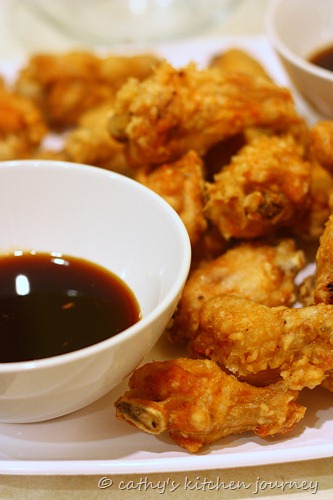
fried chicken wings

Thursday, October 7, 2010

Nutella Ice Cream

nutella ice cream

This ice cream came about because I had a few ingredients I needed to use up.  I initially searched for nutella recipes, and this one came up. It was also about the end of the summer season, so I wanted another reason to make ice cream…even though I’ll probably be making ice cream well through the winter.

Most of the ice creams I’ve made have not required the use of just egg yolks, or even eggs for that matter. This was so simple and easy, and I had ice cream to eat within the hour. Of course, if you want firmer ice cream, refrigerate for a few hours before serving. Make this, you won’t regret it!

Nutella Ice Cream
adapted from: food.com

printable recipe


ingredients
2 cups half-and-half (chilled)
1 cup heavy whipping cream (chilled)
1/4 cup granulated sugar
8 ounces nutella (about 1 cup)

directions
In a large bowl, combine ingredients and mix using a wire whisk until well combined. There will still be small flecks of nutella that does not dissolve.

Pour mixture into ice cream freezer and freeze according to manufacturer's directions. For a firmer consistency, place in freezer for a few hours before serving.

Makes about 1 1/2 quart

Wednesday, September 22, 2010

Chocolate Covered Cornflakes

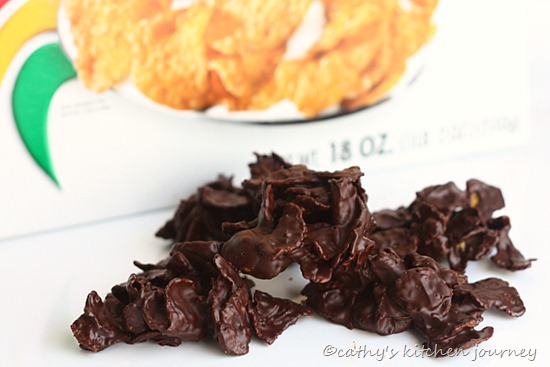
chocolate covered cornflakes
Cornflakes, they’re not just for breakfast anymore!

Steps from where I work, there’s a store called Jacques Torres. They sell all kinds of confectionaries and chocolates. Their kitchen faces the street, and you can stand there and marvel at what they’re making. When you walk in, all things chocolate exists…(although I went in once with Erin, and they didn’t know what dutch process cocoa was. They tried to sell me hot cocoa mix instead).

One of the delectable treats they make and sell are these chocolate covered cornflakes. These little crunchy flakes are amongst one of the favorite picks from the folks in the office.

I don’t recall how the conversation started, but my coworker or I said something about it. I told her I could make that…whenever I get around to it…! I then searched for the recipe, although I could have easily winged it. Surprisingly, Jacques actually had how to videos and recipes online in various locations. The video made it seem so simple, so I told everybody I was making it that weekend.

Before I looked at the recipe, I had the idea to use the dark chocolate I had on hand, our favorite baking and eating dark chocolate from Trader Joes: the pound plus. Although the recipe used bittersweet, I went with my gut and used the dark chocolate. When I poured out the corn flakes, they seemed really large. I almost went ahead with crushing the flakes slightly, but stopped myself. I’m glad I went with my gut in both instances, because people thought I could give Jacques a run for his money! The dark chocolate went well with the larger crunchy flakes.

chocolate covered cornflakes 2

Chocolate Covered Cornflakes
inspired by: Jacques Torres

 printable recipe

ingredients:
1 lb  dark chocolate
4 cups corn flakes

directions:
Chop up chocolate into small even pieces. Place in a large dry glass or metal bowl.

In a medium pot, bring about an inch of water to a boil. Reduce heat to low to simmer. Place bowl over the simmering water. Make sure the bottom of the bowl does not touch the water.

Continue to stir the chocolate until melted. Remove from heat. Set aside to allow to cool slightly.

Line 2 cookies sheets with parchment paper, or silicone mats.

Pour corn flakes into the bowl of melted chocolate. Using a spatula, fold in the cornflakes and mix well to evenly coat. It’s ok if the flakes break slightly.

Using a tablespoon, scoop about half a spoon (or more if you want them bigger). Using another tablespoon, transfer the mound from the spoon to the parchment.

Transfer baking sheet to refrigerator and let set for 10-15 minutes.

Store at room temperature ok, but if your house is on the warm side, I suggest storing in a covered container in the fridge.

Makes a few dozen, depending on how big you make them.

Tuesday, September 7, 2010

Japanese Strawberry Shortcake

Happy birthday mom!

japanese strawberry shortcake

Over the weekend, we went over to my parents’ place for my mom’s birthday. I provided the cake. My family isn’t too fond of sweets. They love the cakes from the Chinese bakeries. Basically they’re sponge cakes with a mixed fruit filling. I haven’t tried making those types of cakes before, but when I saw this recipe, it looked like it would be something similar.

This recipe doesn’t call for too much sugar in the cake or frosting, which my family prefers. My mom requested a fruit filling cake, so I decided on this Japanese strawberry shortcake.

I love the way this turned out. The technique is a little different from what I’m used to (i.e. super easy). The cake was light and airy, and had a distinct egg taste. I followed the original directions almost exactly, but omitted brushing the simple syrup on the cake, since I though it would be a bit much for my family. I think it tasted great without it. I also made 2 layers of filling, but that was only because I had extra strawberries. I didn’t have quite enough frosting for the top and sides after doing that, so next time I will make a double batch of frosting if making 2 layers of filling. I baked it for less time than the recipe called for, 22 minutes, so I’ve adjusted the cook time accordingly.

IMG_1727

Japanese Strawberry Shortcake
adapted from: La Fuji Mama

 printable recipe


ingredients:
cake:
4 large eggs, white and yolks separated
4.2 ounces (120 grams, 9.5 tablespoons) granulated sugar, sifted once
3 tablespoons milk, at room temperature
1/2 teaspoon vanilla extract
4.2 ounces (120 grams, 14 tablespoons) cake flour, sifted 3 times
1.2 ounces (22 grams, 2.3 tablespoons) butter, melted

frosting:
1 teaspoon unflavored gelatin
4 teaspoons cold water
1 cup cold heavy whipping cream
1/4 cup confectioners’ sugar
1/2 teaspoon vanilla extract

1 container strawberries (1 lb)

directions:
Allow eggs and milk to come to room temperature. Melt butter and set aside to cool to room temperature.

Preheat the oven to 350° F (170° to 180° C).  Grease and flour an 8-inch circular cake pan, set aside.

Using the wire whisk attachment to your mixer, gradually add the sugar to the egg whites, and beat the egg whites until they are stiff and glossy.

Add the egg yolks to the egg white mixture, and gently whisk until the yolks are incorporated.

Add the milk, vanilla extract, and gradually add flour (in that order) to the batter and gently fold them into the batter with a spatula.  Fold in the melted butter until it is well combined.

Pour the cake batter into the prepared cake pan, and get rid of any air bubbles in the batter by dropping the pan on a counter once or twice.  Bake the cake for 20-25 minutes (originally 25-30 mins, mine was done at 22).  The cake is done when it is golden brown and springs back when pressed lightly.  Let the cake cool completely on a wire rack. Run a blade around the inside of the pan to loosen the cake, and remove.

To make the Stabilized Whipped Cream Frosting:

Place mixing bowl in the fridge to cool down.

Put the cold water in a small saucepan.  Sprinkle the gelatin over the surface of the water and let stand for 5 minutes (do not stir).  Place the saucepan over low heat and stir constantly with a wooden spoon just until the gelatin dissolves.  Remove the saucepan from the heat and cool to room temperature.

In a cold mixing bowl and using a the wire whisk attachment, combine the whipping cream, sugar, and vanilla and beat until slightly thickened.  Reduce speed of mixer and gradually pour the gelatin into the whipped cream mixture.  Then whip the mixture at high speed until stiff.

To assemble the cake:

Reserve 7 to 1o  similar sized strawberries for decorating the cake.  Slice the remaining strawberries into thin slices.

Slice the sponge cake horizontally into 2 layers.

Place one sponge layer cut-side up on a cake board or serving plate.

Spread a thin layer of whipped cream over the cake layer and arrange the strawberry slices over the surface. Spread an additional layer of whipped cream over the strawberries.

Place the other cake layer over the frosting.  Frost the sides and top of the cake with the remaining whipped cream.  Decorate as desired and garnish with the reserved strawberries. I cut 7 strawberries in half and arranged them on the edge of the cake. Sliced the remaining 3 and fanned them out in the center of the cake.

IMG_1735

Wednesday, August 25, 2010

Salted Butter Chocolate Chip Cookies

I’ve had a go to chocolate chip cookie recipe for a little while now, and I usually stick with it. I’ve tried other recipes before, but always go back to this one.

I was all set to use that recipe for a work function, but on the day I was supposed to make the batter, I saw this recipe pop up. I instantly printed it out, and made my plans to make this. My mind was set.

I brought these to work and they were a big hit. The little extra hint of salt made a huge difference. I think this will be my new go to recipe from now on.

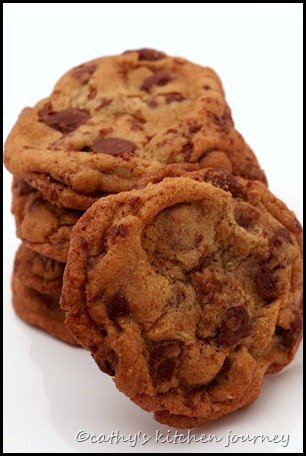
salted butter cookies

Now, I usually don’t go crazy over a recipe before I even try it out. I’ve had recipes I’ve been meaning to make, forever. I knew this recipe was going to be a hit before I even tried it out. The sweet and salty combo never fails, and I think David Lebovitz knows what he’s doing. I trust his judgment.

I did adapt the recipe slightly based on what I needed. All I needed was a batch of chocolate chip cookies, so I omitted the nuts. I used an even 2 cups of chocolate chips instead of the mix of chopped chocolate and toasted nuts the original recipe called for. I also was able to make more cookies using my cookie scoop to evenly measure out my batter vs. the 24 the original recipe mentioned.

Salted Butter Chocolate Chip Cookies
adapted from: David Lebovitz

print printable recipe

ingredients:
4 ounces (115g) salted butter, at room temperature
2/3 cup packed (110g) dark or light brown sugar
1/2 cup (100g) granulated sugar
1 large egg, at room temperature
1/2 teaspoon vanilla extract
1 1/3 cup (180g) flour
1/2 teaspoon baking soda
1/2 teaspoon flaky sea salt or kosher salt
2 cups chocolate chips

directions:
In the bowl of a stand mixer, or by hand, beat the butter, brown sugar, and granulated sugar just until smooth and creamy.

Beat in the egg and the vanilla.

In a small bowl, whisk together the flour, baking soda, and salt.

Stir the flour mixture into the beaten butter until combined, then mix in the chocolate chips.

Cover and chill the batter until firm. (It’s preferable to let it rest overnight.)

To bake the cookies, preheat the oven to 350ºF (180ºC). Line two baking sheets with parchment paper or silicone baking mats.

Using a medium cookie scoop (or form the dough by hand) form cookie dough into rounds about the size of a large unshelled walnut. Place the mounds evenly spaced apart on the baking sheets, and press down the tops to flatten them so they are no longer domed and the dough is even.

Bake the cookies for 9-10 minutes, rotating the baking sheet midway during baking, until the cookies look about set, but are not browned.

Remove from the oven and quickly tap the top of each with a spatula, then return to the oven for 2-5 more minutes, until the tops of the cookies are light golden brown.

Remove from oven and let cookies cool.

Storage: The cookies can be stored at room temperature for up to five days in an airtight container. The dough can be refrigerated for up to one week or frozen for one or two months.

Makes about 32 cookies using the cookie scoop.

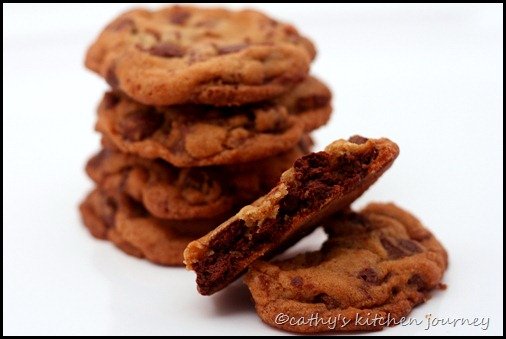
salted butter cookies 2