Showing posts with label DIY. Show all posts

Thursday, January 19, 2012

Homemade Vanilla Extract


Over the holidays I wanted to give a few of my baker coworkers something they would be able to use. I confess, this was actually not the original plan I had. I wanted to make hot chocolate and homemade marshmallows, which then I changed my mind to hot chocolate on a stick with homemade marshmallows. In the end, after a long weekend of baking, I changed my mind once again and decided on the vanilla extract.

I actually started to second guess my decisions the previous week, that's why ended up buying some bottles. I thought they were good to have, just in case I needed a last minute gift :).

Months ago, I started a batch of vanilla extract in a 8.5oz flask with used vanilla beans. Although not as dark as the ones I bought before, it has still had that wonderful vanilla-y smell of the extract. I made was enough to fill four 2-oz bottles of extract. I also added half a split vanilla bean into the bottle, so whenever they run out, they can fill with more rum and it would be the never ending supply! I tied these printable gift tags to them as a final touch.


I used rum in my extract since that's what I have on hand. Since we don't drink, most alcohol I have in the house is reserved for cooking and baking. If you have vodka or bourbon, you can used that as well!


Homemade Rum Vanilla Extract
a cathy's kitchen journey original
inspired by the web


ingredients:
  • 8 ounces rum or vodka
  • 3 whole vanilla beans, slit open (or several used beans)

equipment:
  • 8.5 ounce (or larger) glass bottle that seals tightly

directions:
  1. For every 8 oz of liquid, add 3 whole vanilla beans, split lengthwise. Store in a dark area and shake every few days. Vanilla is ready to use in 6-8 weeks.
  2. I made mine with 5-6 used vanilla beans, then transferred them to 2-oz bottles after a few months, and added half a split vanilla bean to each bottle.
Yield: 8 ounces vanilla extract


Pin It

Wednesday, January 27, 2010

Dairy Free Sweetened Condensed Milk

I thought sweetened condensed milk would be one of those ingredients that I would not be able to find a dairy free substitute for, until I found this.

I found this recipe for a dairy free sweetened condensed milk from Go Dairy Free. It is a bit stickier than regular condensed milk, but it’s a great alternative for the real thing.

I’ve used this previously to make the black sesame ice cream and it worked very well. One batch makes an equivalent to a 14 oz can of sweetened condensed milk. If you don’t have the soy milk powder, there are other variations mentioned on the site. I’m pretty sure you can use regular nonfat milk powder instead of the soy milk powder to make a regular sweetened condensed milk.

sweetenedcondensedmilk

Dairy Free Sweetened Condensed Milk
adapted from: Go Dairy Free
printable recipe

ingredients:
3/4 cup white sugar
1/2 cup water
1 cup plus 2 TBSP soy milk powder

directions:
Combine sugar, water and soy milk powder in a nonstick saucepan (otherwise you’ll have a tough time cleaning your pan afterwards) and bring to a boil.

Reduce heat and cook until thick, about 15-20 minutes. Pour into a bowl and allow to cool.

Milk will thicken more as it cools. Store in refrigerator if not being used immediately.

Thursday, June 11, 2009

Homemade Old Bay Seasoning

Let me start off by saying sorry that I’ve been MIA for almost a month. We went on vacation and ended up sick at the very end. I also didn’t cook anything because I didn’t want to spread my germs everywhere. But, now I’m back and the posts continue!

I purchased Old Bay seasoning a while ago, used it maybe a handful of times, then forgot about it. I never found a use for it really. It ended up expiring in my pantry after being hardly used. A few months ago, I stumbled upon a site that had various recipes for different spices mixes with ingredients I actually had in my pantry. I was originally looking for something else (I forget what now), and saw this recipe for bay seafood seasoning. I think it’s supposed to be similar to Old Bay Seasoning. I could be wrong. It could be something all together. I think this is a better bet for me than buying a jar of it. I can actually make small batches at a time instead of letting an entire jar go to waste again.

Now, I normally don’t have most of these spices on hand. I usually don’t have a use for celery salt and dry mustard. However, when I purchased my spice rack, there were some of those spices included. This was the perfect way to use up some of these (otherwise, it will end up going to waste in my pantry).

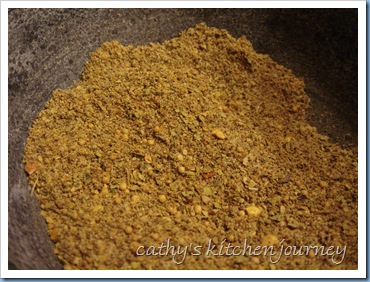
DSC03929

Bay Seafood Seasoning
adapted from: recipe-recipes.net

1 tablespoon ground bay leaves
2 1/2 teaspoons celery salt
1 1/2 teaspoons dry mustard (I ground up some mustard seed for this)
1 1/2 teaspoons black pepper
3/4 teaspoon ground nutmeg
1/2 teaspoon ground cloves
1/2 teaspoon ground ginger
1/2 teaspoon paprika
1/2 teaspoon red pepper (I didn’t have, so I used crushed red pepper flakes…I know it’s not the same)
1/4 teaspoon ground mace (optional) (I omitted)
1/4 teaspoon ground cardamom (optional) (I omitted)

Combine all ingredients; store in an airtight container. Use with seafood or chicken.

Yields 1/4 cup.

Since I didn’t have dry mustard, but I did have mustard seed, I ground it up with my mortar and pestle. I should have ground it up BEFORE adding it to the mix. At first, I thought my mini food chopper would grind everything up, but the seed were too small and slippery for the grinder to do anything to it. If you have a spice grinder or a coffee grinder, giving it a good whiz would be fine.

Tuesday, March 3, 2009

Homemade Pancake Mix aka Bisquick

Before I found this mix, I would use bisquick. When I first started out in the kitchen, I would buy pre-packaged mixes that aren’t always good for you. Bisquick was one of them. I would always buy a box, use a couple of servings, then the rest of the box would go to waste. I never ended up using the whole thing.

I hadn’t bought it in a long time since we were living gluten free at one point. We also started looking at labels and ingredients, and some of the ingredients in bisquick was not something we need in our bodies. When I found this recipe from Looking2Live, I knew it was something I could whip up in no time.

The original recipe called for a lot of flour, so I quartered the recipe. This was when I realized we don’t have a handheld calculator. I was in the kitchen with a pencil and paper and my kitchenaid booklet that came with the mixer which has measurement conversions on the back page.

pancake mix

Homemade Bisquick
Source: as seen on Looking2Live originally from cooks.com
Original recipe has been quartered

Ingredients:
2 Tbsp. baking powder
1 Tbsp. sugar
2 1/4 cup flour
1/3 cup canola oil (I used corn oil)

Directions:
1. Sift flour, baking powder, and sugar into large mixing bowl. Sift one more time.

2. Slowly add oil, cutting in with pastry blender, until mix is consistency of corn meal. (I used a stand mixture with the paddle attachment.)

3. Store in tightly covered container at room temperature or refrigerate.

My first batch messed up because I decided to use the dough blade in my food processor. I also didn’t measure the oil and decided to eyeball it…big mistake! It ended up looking like peanut butter. I tried again using my stand mixer and it turned out perfect.

Friday, January 30, 2009

Homemade Butter

Adapted from: Dutch Girl Cooking
Made by: Cathy

What’s better than butter? Homemade butter of course! I saw this on Dutch Girl Cooking and had to try it myself. I couldn’t believe it was so easy. I had some heavy cream I wanted to use up, so I made this and then used it for homemade chocolate chip cookies.

butter

Ingredients:
2 cups heavy cream
salt (optional)

Directions:
1. Pour cream into the food processor with the blade attachment.

cream2. Turn on, and watch the magic happen!

3. Butter will be done in 5-10 minutes. There will be leftover buttermilk. Pour out the buttermilk and save for something else. Strain the butter through a fine sieve, cheesecloth, or coffee filter.

Makes about 1 1/4 cups butter and 3/4 cup buttermilk.

You can use the butter immediately, or rinse with cold water before you store. Check out Dutch Girl’s site for her recipe for flavored butter spreads.

Tuesday, October 14, 2008

DIY Spice Labels

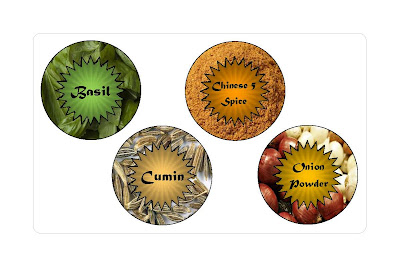
So after purchasing the spice rack, I pretty much replaced the majority of the containers with my own spices. The existing labels were plain black labels. I decided to snaz them up with my own designs. I think it came out pretty nice.

The top of the spice containers were a little larger than 1.5 inches in diameter. I created 1.5 inch round labels. They didn't have that size at Office Depot, so I bought the 3x5 labels and created the 1.5 round sizes on that. 4 on each label, 16 total.