Showing posts with label dessert - pies/tarts. Show all posts

Friday, April 6, 2012

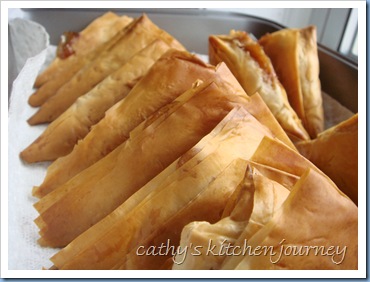
Cheese Danishes


I love turnovers or hand pies. They're just so convenient and portable to eat, no utensils required!

For our fruit recipe exchange, I received these cheese danishes. I made these for as another snack for the get together I had. We all played this board game called Quelf. It was a pretty interesting game, as none of us played it before, and I had to crawl under a table at one point! One of the things we had to do whenever anybody rolled a 1 on the die was to yell "all hail the Chinese cheese biscuit!", which was quite coincidental because I had just served these.

I originally had some difficulty using the puff pastry since I took it out of the fridge ahead of time. I was concerned that it had not fully thawed in the fridge. BIG mistake! It made the dough too tough to work with. Make sure the dough is cold, straight from the fridge, or you'll have a tough time unfolding!

A few changes I made were using Neufchâtel cheese to lighten it up, using reconstituted lemon peel from Penzeys, and using the leftover egg whites as a wash. It came out great and everybody enjoyed it, even the cheese haters! I double this to feed everybody and as I thought, I had some cheese filling left. I ended up throwing it away, but I'm sure it can be used to spread on bread or something!

Remember to check out Sarah's blog for the full round up including my submission for blueberry buckle!


Cheese and Fruit Preserve Danishes
made by cathy's kitchen journey
adapted from Simple Gourmet Cooking


ingredients:
  • 8 oz cream cheese, softened at room temperature
  • 1/3 cup granulated sugar
  • 2 large eggs, separated (reserve whites for egg wash)
  • 2 TBSP ricotta cheese
  • zest of one lemon
  • 1 tsp vanilla extract
  • 1/4 tsp kosher salt
  • 1 box frozen puff pastry, defrosted in refrigerator
  • 8 TBSP fruit preserves (I used raspberry)

directions:
  1. Preheat the oven to 400° F. Line 2 sheet pans with parchment paper.
  2. Cream the cream cheese and sugar in the bowl of an electric mixer fitted with a paddle attachment on low speed until smooth. With the mixer still on low, add the egg yolks, ricotta, lemon zest, vanilla, and salt and mix until just combined (do not whip). Turn off the mixer, and set mixture aside
  3. Unfold 1 sheet of puff pastry onto a lightly floured surface and roll it slightly with a lightly floured rolling pin until it's a 10 by 10-inch square. (Use one at a time, leaving one in the fridge until ready to use.) Using a sharp knife or pastry cutter, cut the sheet into quarters with a sharp knife.
  4. Place a heaping tablespoon of cheese filling into the middle of each of the 4 squares (I used a cookie scoop). If using, place an additional tablespoon of desired filling into each pastry.
  5. Brush the edge of each pastry with the egg wash and fold 2 opposite corners to the center, brushing and overlapping the corners of each pastry so that they stick together tightly. Crimp the edges together with a fork to seal.
  6. Lightly brush the top of the pastries with egg wash. Place the pastries on the prepared sheet pan. Repeat with the second sheet of puff pastry and refrigerate the danishes for 15 minutes.
  7. Bake the pastries for about 20 minutes, rotating the pan once during baking, until puffed and light brown. Serve warm.

Yield: 8 servings


Pin It

Friday, October 7, 2011

Caramel Apple Tart


It's that time again! The time my home gets a little chilly, but the heat doesn't turn on until November...the joys of renting! Times like these, I'm so glad that I love baking, and it's the time for fall recipes!

I participate in recipe swaps every so often, and this week's theme is fall recipes using apples or pumpkin. I got this caramel apple tart from So Tasty, So Yummy. At first, I was wondering how I would adapt the entire thing to be dairy free so Gary can have it as well. I didn't. Oh well. He doesn't have to be my guinea pig for every recipe I try.

I ended up bringing this over to my parents when we went over for dinner. My cousins loved it! I particularly liked the crust, and especially the caramel. Oh, the caramel. Let me tell you, I was eating this by the spoonful  and I didn't even wait for it to cool down. I was lucky I had any left over to drizzle over the top!

I was also happy that I was able to roll out the dough without many issues. I let it rest on the counter after taking it out of the fridge, since it was practically rock solid when I took it out. That made the dough more pliable and much easier to work with. Other than that, everything pretty much went without a hitch.

Remember to check out Sarah's blog for the full roundup of recipes from the swap!


Caramel Apple Tart
adapted from So Tasty, So Yummy, originally from Martha Stewart & Bon Apetit

ingredients:
crust:
2 ½ cups flour
1 TBSP sugar
1 tsp kosher salt
2 sticks cold unsalted butter, cut into 1//2 inch cubes
3 to 4 TBSP ice water

caramel sauce:
¾ cup dark brown sugar
¾ cup heavy whipping cream
3 TBSP unsalted butter
1 TBSP corn syrup

filling:
2 TBSP sugar
1 TBSP unbleached all purpose flour
5 firm baking apples, peeled, cored, cut into sixteenths (I used gala, original recipe used granny smith)

directions:
prepare the crust:
Pulse flour, sugar and salt in a food processor until combined. Add butter and process until mixture resembles coarse meal, about 10 seconds. With the machine running, add ice water in a slow steady stream until mixture just begins to hold together. Shape dough into a disk, wrap in plastic and refrigerate 1 hour or up to 3 days, before using.

make the caramel sauce:
Bring sugar, cream, butter and corn syrup to boil in heavy medium saucepan over medium-high heat, whisking constantly until sugar dissolves. Boil, whisking often, until caramel thickens enough to coat the back of a spoon thickly, about 8 minutes. Caramel sauce can be made up to 5 days ahead. Remove from heat, cover and chill. When ready to use, whisk over low heat until warm.

make the filling:
Preheat oven to 375° F.

Whisk flour and sugar in large bowl to blend. Add apples and toss until evenly coated.  Remove dough from fridge and let rest for 10 minutes. Roll out dough on lightly floured surface to 13-inch round. Transfer to 9-inch-diameter tart pan with removable bottom. Cut overhang even with top of pan sides. Arrange apple slices in circle around outer edge of pan, fitting snugly. Arrange remaining apples snugly in the center.

Bake tart until apples are tender, about 1 hour to 1 hour 15 minutes. Remove tart from oven and brush with some of the caramel sauce. Cool tart to room temperature. Rewarm remaining caramel sauce. Drizzle tart lightly with sauce.


Pin It

Monday, September 19, 2011

Pear Pie


To tell you that I've had this recipe bookmarked for a while is an understatement. I saw this recipe almost 3 years ago, and I just got around to making it.

I don't really have any excuse other than we usually don't have pears on hand. Since pears are one of the fruits we don't buy often I totally forgot about this recipe until now. Whole Foods had some organic pears on sale, so I remembered this recipe when I snatched some up.

Lately, I've had a bit of bad luck with pie crusts. Since I need to make a dairy free crust for Gary, I haven't found the right crust, until now! This crust rolled out wonderfully, and it didn't crack while I was rolling it out. I think I've found the one! Gary also thought the crust worked out well and that it had a buttery aspect to even though I didn't use butter.


Pear Pie
crust adapted from Being Vegan and Getting Away with It
pie filling adapted from Honey and Jam

ingredients:
pie crust:
1 cup all purpose flour (plus more as needed and for dusting)
1/2 tsp kosher salt
1/3 cup non hydrogenated shortening
4 TBSP ice water

filling:
2-3 ripe pears, peeled, cored, and sliced into 1/4 inch thickness (I used 2 pears and it was sufficient)
3/4 cup white sugar
1/4 cup butter (I used earth balance)
1/4 cup all-purpose flour
1 1/2 teaspoon vanilla extract
2 eggs, beaten

directions:
Preheat the oven to 350° F (175°s C).

prepare pie crust:
In a large mixing bowl whisk together flour and salt. Cut in shortening using a fork or pastry cutter until the mixture looks like course crumbs. Slowly pour in water while mixing with fork in a circle. Once all the water is in, knead and form the dough into a ball. If the dough is sticky, sprinkle Cover with plastic wrap and let sit in fridge for 10 minutes. (I skipped this and it was still fine.

Roll out dough for a 9" pie pan and place in pan. Cut off excess dough from the edges and flute or press edges with a fork.

prepare filling:
Peel and cut pears in half. Remove cores and slice into 1/4 inch thickness (approx). Place the pear slices down in the pie crust with the small ends toward the center to create a circular design in one layer. Chop excess pears and place in the center.

In a mixer, cream the butter and sugar together until smooth. Beat in the eggs one at a time until light and fluffy. Stir in flour and vanilla. Pour mixture over the top of the pears to completely cover.

Bake for 1 hour in the preheated oven, until pears are soft and custard is set in the center. Cool completely before slicing and serving.


Pin It

Monday, January 4, 2010

Café Mocha Tarts

A few weeks ago, phyllo shells and dough were on sale. I decided to buy them, but I didn’t have anything in mind as to what to make with them. I have been wanting to make baklava for a while, but I’ve been procrastinating.

I started looking through the Athens website for ideas. There were a few interesting dessert ideas that caught my eye. One of them was this café mocha tart recipe.

This simple recipe called for ingredients I had on hand, except for the Kahlua, which I used brewed espresso for.

The only problem I had was with the chocolate coffee mixture. Once it cooled, it gelled and did not incorporate well with the cream. The little bits also made it difficult to pipe through the star decorating tip, so I spooned the mixture into the shells. It definitely did not look like the the one pictured on the site. I’m guessing that the temperature in my house was kind of cool, therefore the mixture got too cold. Next time, I will try to time it better so the coffee mixture ends up room temperature, not cool/cold.

mocha tarts

Café Mocha Tarts
adapted from: Athens Foods
printable recipe

ingredients:
1/3 cup heavy whipping cream
1 tablespoon cold water
1 tablespoon Kahlua (I used brewed espresso)
1/2 teaspoon plain gelatin
3 tablespoons powdered sugar
1/4 teaspoon instant coffee powder
2 tablespoons semisweet chocolate chips
15 Athens® Mini Fillo Shells (1 box)
2 tablespoons shredded coconut, for garnish

directions:
In a small chilled bowl, whip heavy cream to full volume. Chill for 1 hour.

In a small pan, combine water, Kahlua and gelatin and let stand for 1 minute. Add powdered sugar, instant coffee and chocolate chips. Over low heat stir until chocolate chips are melted. Bring to room temperature. Gently fold the chocolate mixture into the whipped cream. Chill for 1 hour.

Spoon or pipe 2 teaspoons of filling into each phyllo shell. Garnish with shredded coconut. Serve immediately.

mocha tarts 2

Wednesday, December 9, 2009

Dairy Free Pumpkin Pie

While I was contemplating desserts for Thanksgiving, I was thinking of something Gary would be able to eat too. A few weeks earlier, I had seen Alisa from One Frugal Foodie make a dairy free pumpkin pie that looked awesome. I thought it would be a great addition to the menu, since I love pumpkin pie and the ingredients looked pretty good as well. The hint of ginger flavor was a nice addition to this recipe.

I did bake it about 20 minutes longer than the original recipe called for, but it got done eventually.

I did use a different crust recipe than her though. I used to use an all butter crust, but now I’ve started using an all shortening crust. Yes, it’s not that great for you, but what can I do. I’ve never really had a reason to use shortening before, but if it’s a good substitute for butter in some recipes I’m ok with it. To me, everything is ok with moderation anyway.

dfpumpkin pie

Dairy Free Pumpkin Pie
adapted from: One Frugal Foodie
printable recipe

ingredients:
1/2 cup brown sugar, firmly packed
1/4 cup white sugar
1 tsp ground cinnamon
1/2 tsp ground ginger
1/4 tsp ground nutmeg or allspice 
1/4 tsp ground cloves
1/2 tsp salt
2 large eggs
1 15-ounce can pumpkin puree
1 tsp vanilla extract
1 cup regular coconut milk
1 recipe for a single  pie crust, unbaked (recipe below)

For pie crust (from Crisco)
1 1/2 cups AP flour
1/2 teaspoon salt
1/2 cup shortening OR 1/2 stick shortening sticks (butter or all vegetable), chilled in freezer
4 to 8 tablespoons ice cold water or milk

directions:

At least 30 minutes prior (or overnight) prepare pie crust:
In your food processor using the steel blade attachment or mixer bowl using the paddle attachment, combine flour and salt. Cut in shortening until mixture resembles coarse crumbs.

Sprinkle one tablespoon ice-cold water or milk over part of mixture. Toss gently with a fork; push to side of bowl. Repeat just until mixture is moistened and can be formed into a ball. (The dough should hold together when picked up and pressed, and should not crack).

Flatten ball of dough into a disk. Wrap tightly with plastic wrap; refrigerate 30 minutes or overnight.

Remove disk from fridge. On a lightly floured surface roll out dough to 12 inches in diameter for a 9” pie crust, adding more flour if dough sticks.

Transfer dough to 9-inch, 4 cup capacity pie plate, being careful to avoid stretching pastry. Trim edge of pastry 1/2 to 3/4 inch beyond edge of the pie plate. Fold excess under to build a thick crust and flute with your thumb and forefinger. Cover and refrigerate 30 minutes to overnight before baking.

pumpkinpie

To prepare pie:
Preheat your oven to 425ºF.

Combine the sugars, cinnamon, ginger, nutmeg or allspice, cloves and salt in a small bowl. In a large bowl, beat the eggs. Beat in the sugar mixture, pumpkin, and vanilla until smooth. Fold in the coconut milk.

Pour the filling into the unbaked pie crust and bake for 15 minutes. Reduce the temperature to 350ºF and continue to bake for 50 to 60 minutes, or until a knife inserted comes out clean (I baked for almost  20 minutes more before the knife came out clean).  It may be a bit wobbly still, but it will firm-up as it cools.

Allow the pie to cool on a wire rack for 2 hours. Serve or refrigerate until ready to serve.

Wednesday, July 8, 2009

Apple Turnovers

I first made these last year or the year before for a fourth of July also. It turned out very well, although I didn’t use the glaze with it. This year, I decided to make it again, since I my dad requested it. I told him I was making a strawberry pie, but he said he didn’t like strawberries, and he wanted apple pie. Of course. That’s the same thing Gary asks for all the time too!

I tried to access allrecipes.com, but unfortunately their site was down for a few days. Luckily, I printed this recipe a long time ago before I had a laptop, when I was still printing and keeping recipes in a binder.

I didn’t have a chance to get puff pastry from the supermarket, so I used the phyllo dough I had on hand. It was the first time using phyllo dough, and it seemed pretty easy. Maybe I will finally make the baklava I’ve been meaning to make.

phyllo apple turnover

Apple Turnovers
adapted from: allrecipes.com

Ingredients:
2 tablespoons lemon juice
4 cups water
4 Granny Smith apples - peeled, cored and sliced
2 tablespoons butter (I used margarine)
1 cup brown sugar
1 teaspoon ground cinnamon
1 tablespoon cornstarch
1 tablespoon water
1 (17.25 ounce) package frozen puff pastry sheets, thawed (I used phyllo dough)

1 cup confectioners' sugar
1 tablespoon milk
1 teaspoon vanilla extract

Directions:
Combine the lemon and 4 cups water in a large bowl. Place the sliced apples in the water to keep them from browning. (I didn’t do this. I used an apple peeler/corer/slicer while the butter was melting and quickly placed the apples in the pan once I was done.)

Melt butter in a large skillet over medium heat. Drain water from apples, and place them into the hot skillet. Cook and stir for about 2 minutes. Add brown sugar, and cinnamon, and cook, stirring, for 2 more minutes. Stir together cornstarch and 1 tablespoon water. Pour into the skillet, and mix well. Cook for another minute, or until sauce has thickened. Remove from heat to cool slightly.

Preheat the oven to 400 degrees F (200 degrees C).

If using puff pastry:

Unfold puff pastry sheets, and repair any cracks by pressing them back together. Trim each sheet into a square. Then cut each larger square into 4 smaller squares. Spoon apples onto the center of each squares. Fold over from corner to corner into a triangle shape, and press edges together to seal. Place turnovers on a baking sheet, leaving about 1 inch between them.

Bake for 25 minutes in the preheated oven, until turnovers are puffed and lightly browned. Cool completely before glazing.

If using phyllo dough:

Unroll puff pastry onto a dry surface. Cover with saran wrap, then a damp towel.

Take 1 sheet, brush half of the length of the sheet with melted butter or margarine. Fold the other half over the sheet. Brush with more butter. Lay another sheet over that, repeat with butter and fold. You should now have 2 fold sheets (or 4 half sheets) alternating with butter.

Place about 2 TBSP apples on one end of the sheet.

apple filling

Fold over one corner, and continue to fold until the end of the sheet.

Place on a parchment or silicone lined baking sheet. Brush top with butter. Bake in oven for 15-20
minutes, or until golden brown.

Cool before glazing.

To make the glaze, mix together the confectioners' sugar, milk and vanilla in a small bowl. Adjust the thickness by adding more sugar or milk if necessary. Drizzle glaze over the cooled turnovers. (I did not add the glaze.)

DSC04104

Thursday, May 14, 2009

Apple Crumb Pie

I was headed to a mother’s day bbq with Gary’s family, and I wanted to make a dessert. The unanimous vote was for apple pie. I found this recipe on allrecipes.com and tried. The first ever apple pie I made was also from all recipes (I have not made it since I’ve started blogging yet).

This was a great alternative to the lattice top pie I’ve made before. The taste was pretty good, but the crumb got a little soggy, and it was slightly liquidy when I sliced into it. I baked it the night before to be eaten on Sunday. I think it was because I was heading out the door after I baked it, and covered it partially when I left the house. Otherwise, it was a great pie…nice and tart and sweet.

apple crumb pie

Apple Crumb Pie:
Source: All Recipes

Ingredients:
1 (9 inch) pie shell (I used homemade recipe here, but used margarine instead of butter)
6 cups thinly sliced apples (I used 6 granny smith apples)
1 tablespoon lemon juice (optional)
3/4 cup white sugar
2 tablespoons all-purpose flour
1/2 teaspoon ground cinnamon
1/8 teaspoon ground nutmeg
1/2 cup raisins (optional) (I did not use)
1/2 cup chopped walnuts (optional) (I did not use)
1/2 cup all-purpose flour
1/2 cup packed brown sugar
3 tablespoons butter (I used margarine)

Directions:
Preheat oven to 375 degrees F (190 degrees C).

Place sliced apples in a large bowl. Sprinkle with lemon juice if desired. In a small bowl, mix together white sugar, 2 tablespoons flour, cinnamon, and nutmeg. Sprinkle mixture over apples. Toss until apples are evenly coated. Stir in raisins and walnuts if desired. Spoon mixture into pastry shell.

In a small bowl mix together 1/2 cup flour and brown sugar. Cut in butter or margarine until mixture is crumbly. Sprinkle mixture over apple filling. I folded over the excess pie crust over the apples (This is optional. You can also trim it off). Cover top loosely with aluminum foil.

Bake in preheated oven for 25 minutes. Remove foil and bake an additional 25 to 30 minutes, until top is golden brown. Cool on a wire rack.

Thursday, November 27, 2008

Rave of the Day: Pie Crust Shield

For Thanksgiving, I made an extra pie for my sister-in-law to trade. I recently got a pie crust shield as part of my bank points redemption.

I got the Mrs. Anderson's 10-Inch Pie Crust Shield. I think it works wonders. I made 2 sweet potato pies at the same time. One was made with the pie crust shield and one with foil. In both instances, the foil and shield were removed 15 minutes before the pie was done.

This is the outcome:


The one on the left was made with foil on the crust, the right with the pie crust shield.
Here is a close up of the crusts. I got more even results with the shield. It's also much easier to work with than foil.


I usually don't make 2 pies at one time, but for the price, I think it's a good idea to have an extra.

Sunday, October 26, 2008

Sweet Potato Pie


I was procrastinating making the sweet potato pie since Monday. I had to make it now, otherwise, my crust wouldn't be good anymore. I premade my crust on Monday, thinking I was going to make it then. I finally got a chance to make it today.

It was pretty easy. I like sweet potatoes by itself already, and I already knew I liked sweet potato pie. I had a 3lb bag of sweet potatoes from BJ's. I boiled 3 good sized sweet potatoes and made an extra for me to snack on.


Recipe from: All Recipes


Ingredients:
1 (1 pound) sweet potato
1/2 cup butter, softened
1 cup white sugar
1/2 cup milk
2 eggs
1/2 teaspoon ground nutmeg
1/2 teaspoon ground cinnamon
1 teaspoon vanilla extract
1 (9 inch) unbaked pie crust (recipe here)

1. Boil sweet potato whole in skin for 40 to 50 minutes, or until done. Run cold water over the sweet potato, and remove the skin.
2. Break apart sweet potato in a bowl. Add butter, and mix well with mixer. Stir in sugar, milk, eggs, nutmeg, cinnamon and vanilla. Beat on medium speed until mixture is smooth. Pour filling into an unbaked pie crust.
3. Bake at 350 degrees F (175 degrees C) for 55 to 60 minutes, or until knife inserted in center comes out clean. Pie will puff up like a souffle, and then will sink down as it cools.


This was definitely easier than the pumpkin pie I made early this week. Cutting the pumpkin in half was hard work. I had to whip out the heavy butcher's knife. This was much simpler with just peeling the sweet potatoes.

Tuesday, October 21, 2008

Fresh Pumpkin Pie

Adapted from: All Recipes
Made by: Cathy

It's pumpkin season! In effort to use the pumpkins from my mom's garden, I decided to see what I could do with her bounty. Since I had the day off I decided to make pumpkin pie with this beauty right here.


The recipe called for a sugar pumpkin, so I used half of this one from my mom's garden.

Ingredients:

For the filling:
1 sugar pumpkin
1 recipe pastry for a 9 inch single crust pie (recipe below)
2 eggs
1 cup packed light brown sugar
1 tablespoon all-purpose flour
1/2 teaspoon salt
2 1/2 teaspoons pumpkin pie spice
1 (12 fluid ounce) can evaporated milk

For the crust, I got the recipe from here:
1 1/4 cups all-purpose flour
1/4 teaspoon salt
1/2 cup butter, chilled and diced
1/4 cup ice water

Prepare the crust:
1. In a large bowl, combine flour and salt. Cut in butter until mixture resembles coarse crumbs. Stir in water, a tablespoon at a time, until mixture forms a ball. Wrap in plastic and refrigerate for 4 hours or overnight.
2. Roll dough out to fit a 9 inch pie plate. Place crust in pie plate. Press the dough evenly into the bottom and sides of the pie plate.

Pie filling directions:
1. Cut pumpkin in half and remove seeds. Place cut side down on a cookie sheet lined with lightly oiled aluminum foil. Bake at 325 degrees F (165 degrees C) for 30 to 40 minutes, or until the flesh is tender when poked with a fork. Cool until just warm. Scrape the pumpkin flesh from the peel. Either mash, or puree in small batches in a blender. Increase oven temperature to 450 degrees F (230 degrees C.)
2. In a large bowl, slightly beat eggs. Add brown sugar, flour, salt, 2 cups of the pumpkin puree, pumpkin pie spice, and evaporated milk. Stir well after each addition.
Pour mixture into the unbaked pastry shell. Place a strip of aluminum foil around the edge of the crust to prevent over browning.
3. Bake 10 minutes at 450 degrees F (230 degrees C), then reduce the oven temperature to 350 degrees F (175 degrees C). Bake an additional 40 to 50 minutes, or until a toothpick inserted near the center comes out clean. Remove the strip of foil about 20 minutes before the pie is done so that the edge of the crust will be a light golden brown. Cool pie, and refrigerate overnight for best flavor.

I baked it for about an hour.

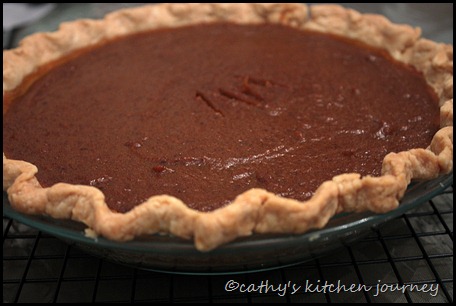
I couldn't wait. I ate it the same day. I took a picture of it before it sunk. I had just taken it out of the oven for only a couple of minutes. After a little while, the filling flattened out and it looked great. It wasn't smooth like store bought, it looked more like a creme brulee top.

There were extra crust and filling left, so I made little mini pies. Those baked for about 20-25 mins. at 350 degrees.