Showing posts with label product review. Show all posts

Friday, November 4, 2011

Mixed Berry Fruit Smoothies


Whenever we have a light dinner, we usually chase it down with a a couple of smoothies. Lame, I know, but we're both not too in to alcohol, and sorta watch what we eat. I normally don't eat a lot throughout the day, so it wouldn't hurt to have some extra fruit. I love smoothies, but the mass market ones can also be chock full of sugar and stuff I don't want to ingest. Our smoothies are frozen fruit and juice, nothing else!

These smoothies are great for a morning pick me up. This is a great base for any add-ins such flax or any other boost you may want.

I get aggravated sometimes when we use our mugs and tall glasses for smoothies. They're not really equipped to keep something cold for a long time. When I saw that the Foodbuzz Tastemaker Program was offering Tervis tumblers up for grabs, I jumped at the chance! I've heard such great things about them, but I've never actually used one before. I wish I had got one sooner because this thing is awesome! I filled the Tervis with the smoothie and it kept it cold til the last drop. Because of its double insulation, it didn't sweat on the outside and my hands stayed dried. When I get a chance, I'll probably get a few to use at home.


Mixed Berry Fruit Smoothies

ingredients:
1 cup frozen mixed berries (raspberries, blueberries, strawberries)
1 cup frozen mangoes
2 cups freshly squeezed orange juice

directions:
Add all ingredients into a blender. Blend until combined. If the mixture is too think to pour, add a little bit more juice to thin it out.

Makes 2-3 servings

disclaimer:
As part of the Foodbuzz Tastemaker Program, I received a complimentary Foodbuzz Tervis tumbler. All the reviews and opinions are my own.


Pin It

Thursday, September 29, 2011

Foodbuzz Tastemaker: Godiva Coffee review

Happy National Coffee Day!


Today, we celebrate the greatness that is coffee! You know, most days I get out of bed not so well relaxed. I am definitely in need of my coffee fix in the mornings. However, I'm not one of those who has to have one in the afternoon as well. If I ever do, it would be a decaf cup, just for the taste of it.

Now that it's fall, I've been craving pumpkin everything. As a member of Foodbuzz Tastemaker Program, was so excited when I was accepted to get a sample of Godiva's seasonal limited edition flavors: Pumpkin Spice and Caramel Pecan Bark.

I brought both bags to work along with my trusty french press and had a little coffee party. If you don't have a french press, and love strong brewed coffee I highly recommend it! All you have to do is pour the coffee grounds into the press, add hot water and let seep for 5 minutes. Then push the plunger down, and enjoy!

My coworkers and I all enjoyed the Pumpkin Spice. It had a wonderful smell and tasted equally as nice. It was brewed dark, but because it was done on the press, it didn't have that bitter taste coffee usually has. I also brewed some on my Keurig at home, but I recommend the press.

The Caramel Pecan Bark was good as well, but I thought it had bits of sweet notes that were too strong for me. I'm not a huge sweets person (you wouldn't be able to tell from my blog huh?) so it was a little off putting. It would be a great dessert coffee paired with a coffeecake or such, but not as a daily morning brew.

My net take: get a french press then get the pumpkin spice coffee :)

disclaimer:
As part of the Foodbuzz Tastemaker Program, I received two complimentary bags of Godiva Coffee. All the reviews and opinions are my own.

Thursday, February 10, 2011

Weeknight Pizza

weeknight pizza

Let’s say one day, you’re craving pizza. It’s late, so do you suck it up and order pizza, or do you have time to make your own? If you happened to have the cheese on hand, the sauce on hand, the toppings ready, but no crust! No worries! If you have refrigerated crescent rolls left over in the fridge, you can make this pizza! Hypothetical situation of course!

As I mentioned in my previous post, we were trying out the Daiya cheese. I also bought the mozzarella style to make pizza. Once we brought the package home, Gary was eager to open it up and taste it. He did just that, and everyday afterward, he took a little pinch to eat. I told him I was going to use it to make pizza, and I wasn’t sure if it was enough, and since he opened it already, I had to use it up within a certain time frame.

Since I didn’t have time to make pizza dough, and I didn’t have any premade ones, I used up what I had in the pantry and fridge. This came out great, not as good as real pizza dough of course, but a great alternative if you don’t have any. I used the garlic butter flavor, and believe it or not, it’s dairy free (and possible vegan, I don’t remember)! Since there are seams on the rolls, it made it easy to tear the pizza into pieces so you don’t have to pick up the whole thing at once.

weeknight pizza 2

The Daiya website said that the cheese melts and stretches. I saw that it melted beautifully, but I didn’t notice too much stretch. It tasted like a real cheese pizza, and I will definitely buy this  again and use it on pizza dough. Of course, with any pizza, add as much or little of whatever topping you like! I used some shredded rotisserie chicken and sliced baby bella mushrooms. Gary said it reminded him of the Elio’s pizza he used to eat as a kid.

Weeknight Pizza
a Cathy original!

 printable recipe


ingredients:
1 tube garlic butter or regular crescent rolls
1/3 cup tomato sauce, divided (jarred or homemade)
1 (8 oz) package of Daiya mozzarella shreds

toppings optional:
baby bella mushrooms, thinly sliced
shredded cooked chicken

directions:
Preheat oven to 375° F. Open crescent package and unroll onto a parchment lined baking sheet. Separate down the middle of the middle of the crescents to make 2 rectangles. Press the other seams to close them up.

Spread sauce evenly onto both pieces of crust. Top with cheese, then toppings.

Bake in preheated oven for 12-13 minutes or until crust is golden brown.

Makes 2 pizzas.

Tuesday, February 8, 2011

Basic Vegan Shells and Cheese

vegan shells mac and cheese

One of the things Gary really missed since going dairy free was his mac and cheese. Although I’ve made it once before with tofu, he still missed his blue box mac and cheese. I’ve never been a mac and cheese person, and I’ve probably had a taste of the blue box version when he made it once before.

I had heard about Daiya while ago, long before Oprah talked about it, but never tried it. Gary was a little hesitant because he didn’t like how some vegan cheeses added certain products he didn’t like (even though he thought it was great before). As usual when I first showed it to him, I was all excited, but he brushed it aside, and said he’ll take a look.

Fast forward months (or a year+) later, after I told him Oprah talked about it on her show, he decided to look at the ingredients. His normal routine is to look up every ingredient to see what it is, and how it’s made. He really read up on it, and the fact that it’s made with non-GMO products made it a winner. After reviewing, he decided it was time to go to Whole Foods and pick it up!

We picked up both the cheddar style and the mozzarella style. I told him I was going to make shells and cheese, since he missed it so much. I found a recipe from Alton Brown that I was going to adapt. I ended up working late, and when I told him I was on my way home to make it, he couldn’t wait and ended up making it himself. I came home to the obvious pungent smell of cheese. He had already eaten. As I ate mine, he grabbed another bowl. Needless to say, this was a big hit with him, and he thought it tastes almost exactly like the blue box version!

I called this a basic mac and cheese since there are definitely ways to jazz this up with veggies and meat. If you’re dairy free or vegan, definitely try this out!

vegan shells mac and cheese 2

Basic Vegan Shells and Cheese
a Gary original, inspired by Alton Brown

 printable recipe


ingredients:
1/2 lb pasta shells
1 cup original soy milk
1 (8 oz) package Daiya Cheddar Shreds
1/2 tsp salt
freshly ground black pepper

directions:
In a large pot of salted water, boil pasta per package directions. Drain.

Meanwhile, add milk and cheese into a separate pot. At low heat, bring to a boil stirring occasionally, about 15 minutes. Add salt and pepper to taste. Remove from heat.

Mix cheese mixture and pasta until well combined.

Serves 3-4

Wednesday, October 14, 2009

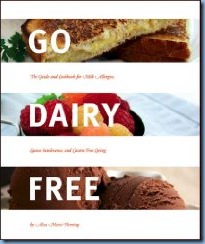
Review: Go Dairy Free

I recently entered a giveaway contest to win a free dairy free cookbook. I was surprised to hear that I actually won a one! I never win anything!

Alisa from One Frugal Foodie contacted me with the good news. She also asked if I wanted to review her book, Go Dairy Free as well. I used her website religiously as one of my dairy free resources, so I was happy to review the book.

I started reading the book once I got my hands on it. Not only does the book include tons of recipes, but lots of facts and info on living a dairy free lifestyle. She includes other blogs, websites, and books that she has used in the past.

Go Dairy Free

I love the recipes to make dairy free alternatives from scratch. Her book is a good guide for someone who is thinking about going dairy free for health or ethical reasons. My only gripe was that the font was a bit small and condensed to read, but I think if she made the font any bigger, the book would be twice as long as the 288 pages it is already.

Friday, October 2, 2009

Product Review: Better Than Milk Soymilk Powder

I don’t know if you’re like me or not, but I can never finish a carton of milk. Whether it be regular cow’s milk or soymilk, or any other alternative milks. I mostly use milk for baking, so if I don’t bake for a while, the cartons of milk I buy go to waste.

Sure, I can freeze it, but I’d rather not. My freezer is full, and I’d rather not have a carton of milk in there. I work fairly close by to a Whole Foods market, but I don’t go very often. We would buy the quart tetra packs of soy, rice, or almond milks. I found that I would use maybe a cup or so for baking, then I would leave the pack in the fridge then let it go bad.

Then I found this powdered alternative to soy milk.

soymilk powder

I always thought…there’s regular nonfat and whole milk powders, why not for soy or rice? I thought it was ingenious. Not only would I only make enough for the recipe, it also means less packaging, and it was cheaper per carton. That’s a win-win for me!

So far, I have used this in various recipes that called for soy milk (or any non-dairy milk), such as avocado ice cream, Mexican chocolate snickerdoodles, blueberry buckle, healthy blueberry muffins, and much more. We don’t use much milk for drinking, but I have used it in cereal as well.

I also mainly bought this to make my own whole wheat sandwich bread. We’ve been reading labels and many store bought breads have nonfat milk powder listed in the ingredients. This is a great product to stock in a dairy free kitchen.

Monday, August 17, 2009

Vegan Cheese Pizza with Fresh Tomato Sauce

After work one day, I decided to stroll over to the nearby Whole Foods to pick up some things I wasn’t able to find in my local supermarket (instant yeast being one of them). After I picked that up along with a few pantry staples, I strolled to the dairy section to see if they had changed their selection of vegan cheeses. The last time I looked, they only had lactose free cheeses, but not totally vegan cheeses. The lactose free ones still contained casein and whey proteins from the milk that Gary was sensitive to. This time around, I actually found something that was was totally vegan!

The package on the Vegan Gourmet Cheese from Follow Your Heart boasts that it melts just like real cheese! I was a little skeptical. I didn’t think it would be the same. It was on sale, so I picked up a block of mozzarella flavor and a block of monterey jack.

So, now I had the yeast, I had the cheese, and I had fresh tomatoes that was given to us by Gary’s sister from her garden. What a perfect way to test out the the cheese with a cheese pizza! I also had some basil leaves from the plant I’ve been growing in my Aerogarden. It was due for a pruning, so I clipped off a few leaves. It was the perfect amount to make the tomato sauce.

vegan cheese pizza

I started with the pizza dough. I used the pizza crust recipe from King Arthur Flour. The only difference I made was subbing half the flour for whole wheat flour. I messed up on my part during the 2nd rising time. I didn’t realize I had to roll it out and then let it rise. I let it rise before rolling it out. I let it pre-bake at 475° for 8 minutes as instructed plus another 15 minutes for the sauce and cheese, and the result was a very crispy crust that still tasted great. I still have half the dough in the freezer, so I know better for next time.

After the initial pre-bake, I topped it off with a fresh tomato basil sauce (recipe below) and then 1 cup of the shredded mozzarella vegan cheese. I shredded the whole thing and realized it was a lot. I was only able to use half of the 10 oz block. I froze the rest for later. I might end up using it for a casserole or something next.

Gary though this pizza tasted great. We both thought it could never replace real cheese pizza, but if you can’t have it, this is a great alternative. I won’t be buying it all the time, because it can get expensive for a small block of cheese. What it had in common with real cheese pizza? I burned the roof of my mouth just the same!

Tomato Basil Pizza Sauce
adapted from: recipezaar.com
printable recipe

ingredients:
1 tablespoon olive oil
2 cloves garlic, minced
2 cups diced peeled fresh tomatoes (or one 14.5 oz can diced tomatoes)
1/4 teaspoon salt
1/8 teaspoon pepper, freshly ground
2 tablespoons fresh basil, coarsely chopped or 2 teaspoon dried basil

directions:
Heat oil in medium saucepan over a medium heat until hot.

Add garlic; cook 30 seconds or until fragrant.

Stir in diced tomatoes, salt and pepper and cook for 8-10 minutes or until slightly thickened, stirring and mashing tomatoes with potato masher until crushed. I used an immersion blender after about 10 minutes and whizzed on low a few times, leaving the sauce slightly chunky.

Stir in basil.

Place in small bowl; cool to room temperature This sauce may be made up to 3 days ahead and refrigerated or up to 2 months ahead and frozen.

Tuesday, February 3, 2009

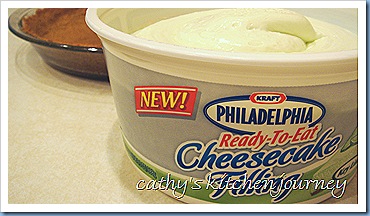
Product Review: Philadelphia Key Lime Cheesecake Filling

I’ve never been able to find key limes anywhere around my area. I’ve tasted authentic key lime pie from Florida, and it is one of my favorite pies. I’ve never made it myself since I can’t find key limes anywhere.

slice

I saw this in the cream cheese section at my supermarket and I decided to try it. It was on sale, and I had a coupon in hand, ready to purchase.

I brought this over to my parent’s place so I can share. There were mixed reviews. Too sour, too sweet, tasted like plastic.

philly key lime cheesecake

I agree, it’s not the best tasting thing in the world, however it comes close. I guess since I love tart things, it tasted fine to me.

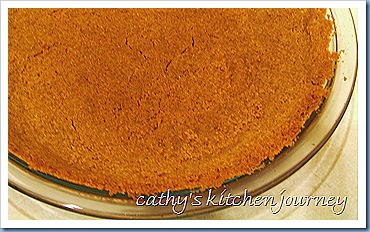
graham cracker crust

I made it semi-homemade by making my own graham cracker crust. You can find the recipe here.

I baked the crust in a 350° oven for about 10 minutes. Let it cool, then added the filling.

filling

Spread it into the pan and serve or put in fridge to keep cool.

pie